关于vue组件,平时开发过程中更多的是通过模板进行渲染,然后通过import引用,局部注册组件的方式来调用的;因为项目迁移并且要摒弃一些组件库的原因,需要自己封装一些组件,以下是相应的四个组件的实现过程,许多博客也有相关组件的封装方式,通过学习在这里记录一笔,方便日后温故。
$alert组件
实现目标:
[通过this.$alert()调用该组件,并且显示相关内容]
首先我们需要写一个alert组件的模板文件,如下
<template>
  <div :class="`${prefixCls}_wrap`">
    <div :class="`${prefixCls}_mask`" @touchmove.prevent></div>
    <div :class="`${prefixCls}_container`">
      <div :class="`${prefixCls}_header`">
        <div :class="`${prefixCls}_header_title`">{{ title }}</div>
      </div>
      <div :class="`${prefixCls}_main`">
        <div :class="`${prefixCls}_main_content`">{{ content }}</div>
      </div>
      <div :class="`${prefixCls}_footer`">
        <a href="javascript:;" :class="`${prefixCls}_footer_text`" @click.prevent="handleConfirm">{{ confirmButtonText }}</a>
      </div>
    </div>
  </div>
</template>
<script>
const prefixCls = 'app_alert'
export default {
  name: 'app-alert',
  data() {
    return {
      prefixCls,
      visible: false,
      title: '',
      content: '',
      confirmButtonText: '',
    }
  },
  methods: {
    handleConfirm() {}
  }
}
</script>
<style lang="scss" scoped>
  $app_alert: '.app_alert';
  #{$app_alert} {
    /* 遮罩层样式 */
    &_mask {
      position: fixed;
      z-index: 999;
      left: 0;
      top: 0;
      right: 0;
      bottom: 0;
      background: rgba(0, 0, 0, 0.5);
    }

    /* 内容外层样式 */
    &_container {
      position: fixed;
      z-index: 1000;
      width: 75%;
      left: 50%;
      top: 50%;
      transform: translate(-50%, -50%);
      background: #fff;
      font-family: PingFangSC-Medium;
      font-weight: 500;
      border-radius: 4px;
      overflow: hidden;
    }

    /* 头部样式 */
    &_header {
      text-align: center;
      margin: 25px 0 10px;
      &_title {
        font-size: 16px;
        color: rgba(0,0,0,.85);
        line-height: 1.4;
        font-family: PingFangSC-Medium;
        font-weight: 500;
      }
    }

    /* 主体内容样式 */
    &_main {
      text-align: center;
      margin: 0 20px 25px;
      &_content {
        line-height: 1.4;
        font-family: PingFangSC-Regular;
        font-weight: 300;
        font-size: 15px;
        color: rgba(0,0,0,.45);
      }
    }

    /* 底部样式 */
    &_footer {
      position: relative;
      padding: 12px 0 11px;
      &_text {
        display: block;
        line-height: 1.4;
        font-size: 16px;
        font-family: PingFangSC-Regular;
        font-weight: 300;
        color: #E62E34;
        text-align: center;
        &::before {
          content: '';
          position: absolute;
          left: 0;
          top: 0;
          right: 0;
          height: 1px;
          border-top: 1px solid #eee;
          transform-origin: 0 0;
          transform: scaleY(.5);
        }
      }
    }
  }
</style>
以上文件中可以做任何我们想定义的或者想要展示的内容,重要的是下面的js文件
通过上面文件不难发现,该组件中没有props,所以目前无法给该组件进行传值,我们需要在当前目录中新建一个js,如下:
import Vue from 'vue'
import Alert from './index.vue'

const AppAlertConstructor = Vue.extend(Alert)

// 关闭alert窗口vm表示当前实例
const closeAlert = function (vm) {
  vm.visible = false
  vm.$nextTick(() => {
    vm.$destroy(true)
    vm.$el.parentNode.removeChild(vm.$el)
  })
}

const AppAlert = (param) => {
  return new Promise((resolve) => {
    // 默认按钮文案为‘确定’
    const { title, content, confirmButtonText = '确定' } = param
    const AlertInstance = new AppAlertConstructor({
      data: {
        title,
        content,
        confirmButtonText
      }
    })

    AlertInstance.vm = AlertInstance.$mount()
    AlertInstance.vm.visible = true
    AlertInstance.dom = AlertInstance.vm.$el
    document.body.appendChild(AlertInstance.dom)
    AlertInstance.dom.style.zIndex = 99999

    AlertInstance.handleAlert = () => {
      resolve()
      closeAlert(AlertInstance)
    }
  })
}
export default {
  install: Vue => {
    Vue.prototype.$alert = AppAlert
  }
}
然后在main.js文件中进行全局注册
import Alert from '@/components/app-alert/index.js'
Vue.use(Alert)
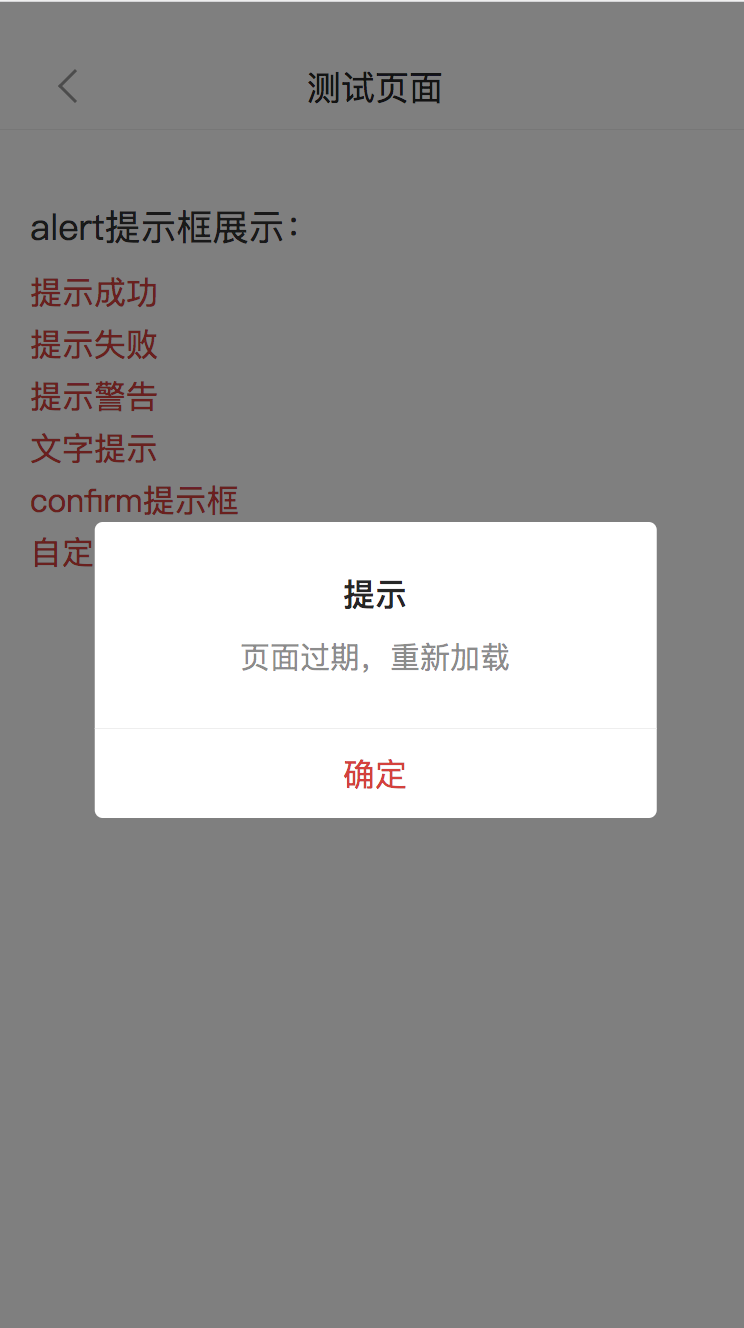
使用方式如下:
showAlert() {
    this.$alert({
      title: '提示',
      content: '页面过期,重新加载'
    })
  },
效果如下

$confirm组件
实现目标:
[通过this.$confirm()调用该组件,并进行相关操作]
组件模板如下:
<template>
  <div :class="`${prefixCls}_wrap`">
    <!-- 遮罩层 -->
    <div :class="[`${prefixCls}_mask`, !visibleMask ? `${prefixCls}_mask_transition` : '']" @touchmove.prevent></div>
    <div :class="`${prefixCls}_position`">
      <transition name="confirm">
        <div :class="`${prefixCls}_container`" v-if="visible">
          <!-- 标题部分 -->
          <div :class="`${prefixCls}_header`">
            <strong :class="`${prefixCls}_header_title`">
              {{ title }}
              <div v-html="iconHtml"></div>
            </strong>
          </div>

          <!-- 中间主内容部分 -->
          <div :class="`${prefixCls}_main`">
            {{ message }}
            <input type="text" v-model="inputValue" v-if="type === 'input'" :placeholder="placeholderText">
          </div>

          <!-- 底部按钮部分 -->
          <div :class="`${prefixCls}_footer`">
            <a href="javascript:;" :class="[`${prefixCls}_footer_cancel`, `${prefixCls}_footer_btn`]" @click.prevent="handleCancel">{{ this.cancelText }}</a>
            <a href="javascript:;" :class="[`${prefixCls}_footer_confirm`, `${prefixCls}_footer_btn`]" @click.prevent="handleConfirm">{{ this.confirmText }}</a>
          </div>
        </div>
      </transition>
    </div>
  </div>
</template>
<script>
/**
 * @description confirm组件,调用方式this.$confirm({...}).then(() => {}).catch(() => {})
 * @param title 属性title设置弹窗标题,当该属性有值时则不会出现icon图标,包裹iconHtml设置的html片段也不会渲染
 * @param message 属性message设置主体文本内容
 * @param placeholderText 属性placeholderText设置input框的占位文本
 * @param cancelText 属性cancelText设置取消按钮的文本,默认‘取消’
 * @param confirmText 属性confirmText设置确定按钮的文本,默认‘确定’
 * @param iconHtml 属性iconHtml自定义一个html片段代替默认的icon图标或标题内容样式等,设置为空时不出现icon
 * @param type 属性type为input时会出现input输入框,目前只有这一种状态
 * @param inputValue 属性inputValue,可以设置输入框默认的值,在点击确定后可以获取当前的输入框值
 */
const prefixCls = 'app_confirm'
export default {
  name: 'app-confirm',
  data() {
    return {
      prefixCls,
      visible: false,
      visibleMask: true,
      title: '',             // 标题
      message: '',           // 主内容
      placeholderText: '',   // input输入框占位符
      cancelText: '',        // 取消按钮文案
      confirmText: '',       // 确定按钮文案
      iconHtml: '',
      type: '',              // 是否带有输入框
      inputValue: ''
    }
  },
  methods: {
    handleCancel() {},
    handleConfirm() {}
  }
}
</script>
<style lang="scss" scoped>
  $app_confirm: '.app_confirm';
  #{$app_confirm} {
    &_mask {
      position: fixed;
      z-index: 999;
      left: 0;
      top: 0;
      right: 0;
      bottom: 0;
      background: rgba(0, 0, 0, 0.6);
      transition: background .2s;
    }
    &_mask_transition {
      background: rgba(0, 0, 0, 0);
    }
    &_position {
      position: fixed;
      z-index: 1000;
      width: 80%;
      max-width: 300px;
      top: 50%;
      left: 50%;
      transform: translate(-50%, -50%);
    }
    &_container {
      background-color: #fff;
      text-align: center;
      border-radius: 3px;
      overflow: hidden;
      font-size: 16px;
    }
    &_header {
      padding: 1.8em 1.6em 0.5em;
      &_title {
        font-weight: 500;
        font-size: 18px;
      }
    }
    &_main {
      min-height: 40px;
      line-height: 1.3;
      word-wrap: break-word;
      word-break: break-all;
      font-size: 16px;
      color: rgba(0, 0, 0, 0.85);
      padding: 0 1.6em 1.5em;
      input {
        width: 4.6rem;
        height: .6rem;
        margin-top: .4rem;
        background-color: #F2F2F2;
        border-radius: .04rem;
        font-size: .28rem;
        padding-left: .2rem;
        border: 0 solid;
        outline: none;
        resize: none;
        text-transform: none;
        -webkit-appearance: button;
      }
    }
    &_footer {
      position: relative;
      line-height: 48px;
      font-size: 18px;
      display: flex;
      &::after {
        content: '';
        position: absolute;
        width: 200%;
        left: 0;
        top: 0;
        right: 0;
        height: 1px;
        border-top: 1px solid #D5D5D6;
        color: #D5D5D6;
        transform-origin: 0 0;
        transform: scale(0.5);
      }
      &_btn {
        display: block;
        flex: 1;
        text-decoration: none;
        -webkit-tap-highlight-color: rgba(0, 0, 0, 0);
        position: relative;
      }
      &_cancel {
        color: #353535;
      }
      &_confirm {
        color: #E62E34;
        &::after {
          content: '';
          position: absolute;
          left: 0;
          top: 0;
          bottom: 0;
          width: 1px;
          height: 200%;
          border-left: 1px solid #D5D5D6;
          color: #D5D5D6;
          transform-origin: 0 0;
          transform: scale(0.5);
        }
      }
    }
  }
  /* ----------- transition动画样式 ----------- */
  .confirm-enter-active {
    transition: transform .2s, opacity .2s;
  }
  .confirm-leave-active {
    transition: transform .2s, opacity .2s;
  }
  .confirm-enter {
    transform: scale(1.1, 1.1);
    opacity: .75;
  }
  .confirm-leave-to {
    transform: scale(.75, .75);
    opacity: .75;
  }
</style>
组件通过vue的transition组件实现了相应的动画过渡效果,有兴趣的可以去了解一下;
其中添加了一些我自己需要的内容,如果不需要这些功能可以去除,比如input框。
下面是js文件
import Vue from 'vue'
import Confirm from './index.vue'

const AppConfirmConstructor = Vue.extend(Confirm)

// 关闭confirm窗口vm表示当前实例
const closeConfirm = function (vm) {
  vm.visible = false
  vm.visibleMask = false
  // 设置定时器为了配合css动画
  setTimeout(() => {
    vm.$destroy(true)
    vm.$el.parentNode.removeChild(vm.$el)
  }, 200);
  // vm.$nextTick(() => {

  // })
}

const AppConfirm = (param) => {
  return new Promise((resolve, reject) => {
    const defaultIconHtml = `<div style="background-image: url(${require('@/assets/img/success.png')});width:1.2rem;height:1.2rem;background-size:100%;margin:0 auto"></div>`
    const { title, message, inputValue, cancelText = '取消', confirmText = '确定', placeholderText, iconHtml = defaultIconHtml, type } = param
    const ConfirmInstance = new AppConfirmConstructor({
      data: {
        title,
        message,
        inputValue,
        cancelText,
        confirmText,
        placeholderText,
        iconHtml,
        type
      }
    })

    ConfirmInstance.vm = ConfirmInstance.$mount()
    ConfirmInstance.vm.visible = true
    ConfirmInstance.dom = ConfirmInstance.vm.$el
    document.body.appendChild(ConfirmInstance.dom)
    ConfirmInstance.dom.style.zIndex = 999999

    // 点击确定时走then
    ConfirmInstance.handleConfirm = () => {
      // 返回输入框的值
      const data = {
        inputValue: ConfirmInstance.inputValue
      }
      resolve(data)
      closeConfirm(ConfirmInstance)
    }
    // 点击取消时走catch
    ConfirmInstance.handleCancel = () => {
      reject()
      closeConfirm(ConfirmInstance)
    }
  })
}

export default {
  install: Vue => {
    Vue.prototype.$confirm = AppConfirm
  }
}
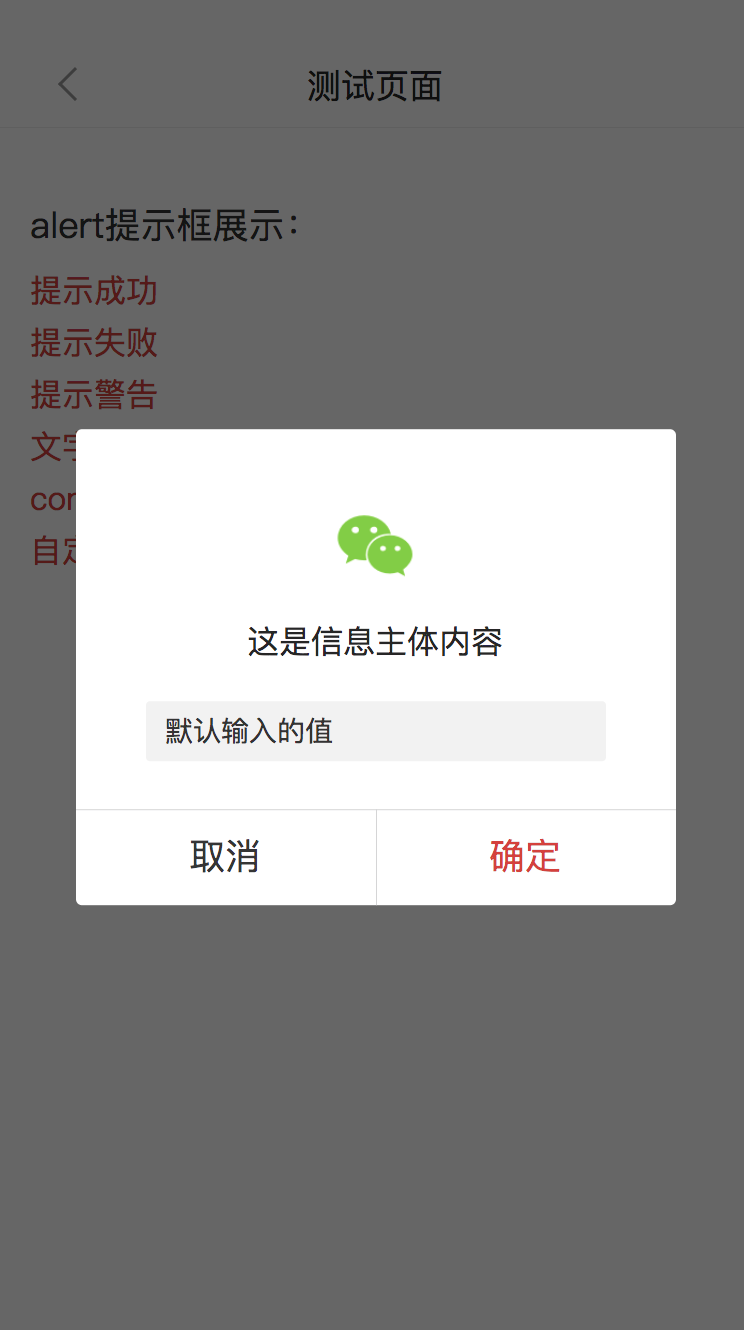
注册方式跟上面一样,使用方式如下:
showConfirm() {
    this.$confirm({
      // title: '这是标题',                 // 当title有值时不会出现icon图标
      inputValue: '默认输入的值',            // 可以设置输入框的默认值
      message: '这是信息主体内容',            // 主体文本内容
      // 当iconHtml没有设置时会出现默认的icon图标success.png
      // iconHtml: '',                     // 设置为空时不显示图标
      iconHtml: `<div style="background-image: url(${require('@/assets/img/WeChat.png')});width:1.2rem;height:1.2rem;background-size:100%;margin:0 auto"></div>`,
      // cancelText: '取消',                // 默认显示‘取消’
      // confirmText: '确定',               // 默认显示‘确定’
      placeholderText: '请输入内容',
      type: 'input',
    }).then((data) => {
      // 当type为'input'时,点击确定按钮可以接收到输入框的值
      console.log('确定', data.inputValue)
    }).catch(() => {
      console.log('取消')
    })
  },
效果如下

$toast组件
实现目标:
[通过this.$toast()调用该组件,并且提示相关信息]
模板文件
<template>
  <div :class="[`${prefixCls}_container`, !this.type ? `${prefixCls}_container_text` : '' ]">
    <div :class="[`${prefixCls}_icon`, alertType]" v-if="this.type"></div>
    <div :class="`${prefixCls}_content`">{{ content }}</div>
  </div>
</template>
<script>
const prefixCls = 'app_alert'
/**
 * @param type 'success'-成功,'fail'-失败,'warn'-警告
 * @param content 提示文本
 */
export default {
  name: 'app-alert',
  data() {
    return {
      prefixCls,
      visible: false,
      content: '',
      type: '',
      duration: 3000
    }
  },
  computed: {
    alertType() {
      return `${prefixCls}_${this.type}`
    }
  },
  methods: {
    setTimer() {
      setTimeout(() => {
        this.close()
      }, this.duration)
    },
    close() {
      this.visible = false
      setTimeout(() => {
        this.$destroy(true)
        this.$el.parentNode.removeChild(this.$el)
      }, 500)
    }
  },
  mounted() {
    this.setTimer()
  }
}
</script>
<style lang="scss" scoped>
  $alert: '.app_alert';
  #{$alert} {
    &_container {
      position: fixed;
      border-radius: 4px;
      text-align: center;
      min-width: 1.8rem;
      // max-width: 5.8rem;
      min-height: 1.8rem;
      padding: 0 8px 8px;
      top: 30%;
      left: 50%;
      transform: translateX(-50%);
      color: #fff;
      background-color: rgba(0, 0, 0, 0.7);
      &_text {
        display: flex;
        flex-direction: column;
        justify-content: center;
        padding-top: 8px;
      }
    }
    &_content {
      font-size: .3rem;
    }
    &_icon {
      display: inline-block;
      width: .85rem;
      height: .85rem;
      margin: .25rem .45rem .05rem .45rem;
      background-size: 100%;
    }
    &_success {
      background-image: url('~assets/img/success-toast.png');
    }
    &_fail {
      background-image: url('~assets/img/toast-fail.png');
    }
    &_warn {
      background-image: url('~assets/img/toast-warn.png');
    }
  }
</style>
接管组件的js文件
import Vue from 'vue'
import Toast from './index.vue'

// 直接将Vue组件作为Vue.extend的参数
const AppToastConstructor = Vue.extend(Toast)

let nId = 1
const AppToast = ({content = '成功', type, duration})=> {
  let id = `appalter${nId++}`
  const ToastInstance = new AppToastConstructor({
    data: {
      content,
      type,
      duration
    }
  })

  ToastInstance.id = id
  ToastInstance.vm = ToastInstance.$mount()
  ToastInstance.vm.visible = true
  ToastInstance.dom = ToastInstance.vm.$el
  document.body.appendChild(ToastInstance.dom)  // 将dom插入body
  ToastInstance.dom.style.zIndex = nId + 1001
  return ToastInstance.vm
}

export default {
  install: Vue => {
    Vue.prototype.$toast = AppToast
  }
}
注册方式跟上面的组件一样
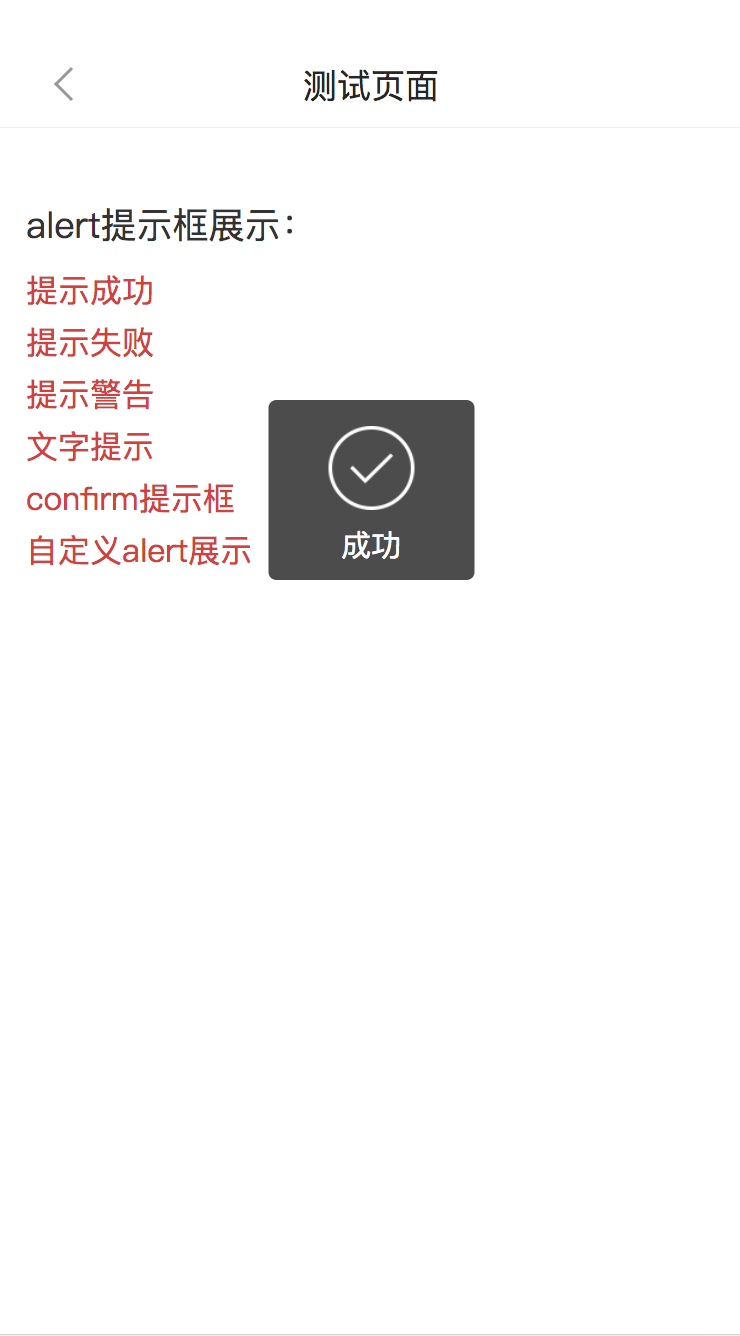
使用方法如下:
this.$toast({
  content: '成功',
  type: 'success',
  duration: 2000         // 设置消失时间
})
效果如下:

loading组件
该组件实现思路与上面几个略有不同;
实现目标:
[通过在元素上绑定相应指令调用该组件]
模板文件,写一个loading的组件,如下:
<template>
  <div :class="`${prefixCls}_wrap`" v-show="visible" @after-leave="handleAfterLeave">
    <div :class="`${prefixCls}_mask`"></div>
    <div :class="`${prefixCls}_container`">
      <div :class="`${prefixCls}_animation`">
        <span></span>
        <span></span>
        <span></span>
        <span></span>
        <span></span>
      </div>
      <div :class="`${prefixCls}_text`">
        {{ loadingText }}
      </div>
    </div>
  </div>
</template>
<script>
const prefixCls = 'app_loading'
export default {
  name: 'app-loading',
  data() {
    return {
      prefixCls,
      visible: false,
      loadingText: ''
    }
  },
  methods: {
    handleAfterLeave() {
      this.$emit('after-leave');
    }
  }
}
</script>
<style lang="scss" scoped>
  $app_loading: '.app_loading';
  #{$app_loading} {
    position: relative;
    &_mask {
      position: absolute;
      z-index: 999;
      top: 0;
      right: 0;
      bottom: 0;
      left: 0;
      // background-color: rgba(0,0,0, .8);
    }
    &_container {
      position: fixed;
      z-index: 1000;
      top: 50%;
      left: 50%;
      transform: translate(-50%, -50%);
    }
    &_text {
      margin-top: 5px;
      text-align: center;
      font-size: 13px;
      color: rgb(255, 114, 31);
    }
    &_animation {
      width: 150px;
      height: 10px;
      margin: 0 auto;
      text-align: center;
      span {
        display: inline-block;
        vertical-align: top;
        width: 10px;
        height: 100%;
        margin-right: 5px;
        border-radius: 50%;
        background: rgb(255, 114, 31);
        -webkit-animation: load 1.04s ease infinite;
        &:last-child {
          margin-right: 0;
        }
        &:nth-child(1) {
          -webkit-animation-delay: 0.13s;
        }
        &:nth-child(2) {
          -webkit-animation-delay: 0.26s;
        }
        &:nth-child(3) {
          -webkit-animation-delay: 0.39s;
        }
        &:nth-child(4) {
          -webkit-animation-delay: 0.52s;
        }
        &:nth-child(5) {
          -webkit-animation-delay: 0.65s;
        }
      }
      @-webkit-keyframes load {
        0% {
          opacity: 1;
        }
        100% {
          opacity: 0;
        }
      }
    }
  }
</style>
接管组件的js文件所做的事略有不同,如下:
import Vue from 'vue'
import Loading from './index.vue'

const AppLoadingConstructor = Vue.extend(Loading)

export default {
  install: Vue => {
    Vue.directive('loading', {
      bind: (el, binding) => {
        const loading = new AppLoadingConstructor({
          el: document.createElement('div'),
          data: {
            loadingText: el.getAttribute('loading-text'), // 通过app_loading_text属性获取loading的文字
          }
        })
        el.instance = loading    // el.instance是一个Vue的实例
        el.loading = loading.$el
        el.loadingStyle = {}
        toggleLoading(el, binding)
      },
      update: (el, binding) => {
        // el.instance.setText(el.getAttribute('loading-text'))
        if (binding.oldValue !== binding.value) {
          toggleLoading(el, binding)
        }
      },
      unbind: (el) => {
        if (el.domInserted) {
          document.body.removeChild(el.loading);
        }
      }
    })

    // 用于控制Loading的出现与消失
    const toggleLoading = (el, binding) => {
      if (binding.value) {
        Vue.nextTick(() => {
          el.originalPosition = document.body.style.position;
          el.originalOverflow = document.body.style.overflow;
          insertDom(document.body, el, binding); // 插入dom
        })
      } else {
        if (el.domVisible) {
          el.instance.$on('after-leave', () => {
            el.domVisible = false
            document.body.style.position = el.originalPosition
          })
          el.instance.visible = false
        }
      }
    }

    const insertDom = (parent, el) => {
      if (!el.domVisible) {
        Object.keys(el.loadingStyle).forEach(property => {
          el.loading.style[property] = el.loadingStyle[property]
        })
        if (el.originalPosition && el.originalPosition !== 'absolute') {
          parent.style.position = 'relative'
        }
        // if (!binding.modifiers.fullScreen) {
        //   parent.style.overflow = 'hidden'
        // }
      }
      el.domVisible = true
      parent.appendChild(el.loading)
      Vue.nextTick(() => {
        el.instance.visible = true
      })
      el.domInserted = true
    }
  }
}
注册方式与其他组件一样;
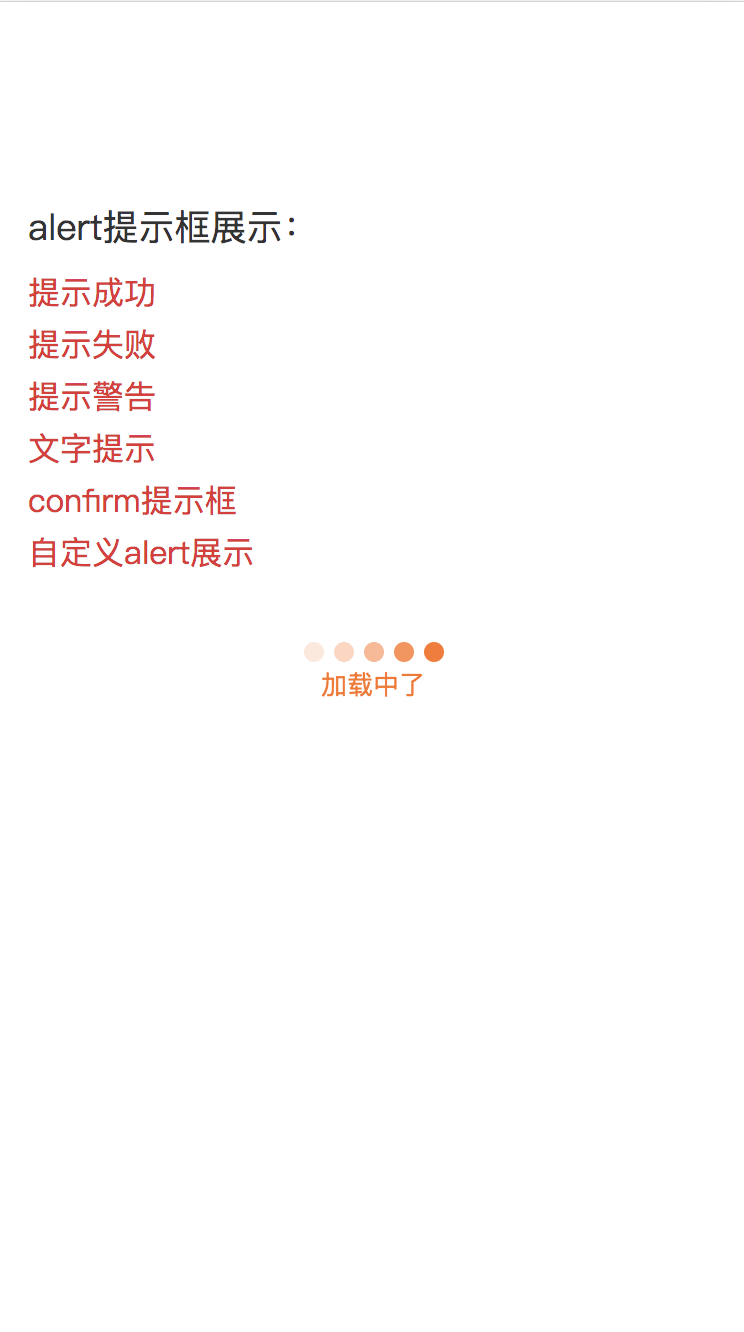
使用方式如下:
<template>
    <div v-loading="loading" loading-text="加载中了"></iv>
</template>
<script type="javascript">
    name: 'demo',
    data () {
        return {
            loading: false,    // 通过改变loading的值来展示/隐藏loading
        }
    }
</script>
实现效果如下:

点到为止~