

项目需求分析:
-
打开评论弹窗,
input框获取焦点,input框默认提示文字为留下你精彩的评论吧,输入内容点击提交,即可向服务器发送请求,并将评论内容,评论时间,用户头像,用户昵称等内容在页面进行渲染。 -
点击用户评论,
input框获取焦点,修改input框的默认提示文字为回复 @被回复用户的昵称,点击提交后,剩余操作与1相同。 -
用户提交评论前,需要做校验,
评论内容不能为空,用户需要登录后才能评论。 -
评论提交按钮默认是灰色,处于
disable状态;当评论内容不为空时,提交按钮样式发生变化,状态也变为enable状态。 -
评论是可以被回复和点赞的。因为回复也可以看做是一条评论,为了区别是评论还是回复,我们为评论对象设计了
father_comment_id。同时,为了区分这个评论是回复谁的,我们为评论对象设计了to_user_id。
实现流程
1.实现发送评论的函数
import axios from 'axios'
import {BASE_URL} from './route'

export function sendComment(params){
  return axios.post(`${BASE_URL}/saveComment`,params)
}
2.编写前端页面
目前先实现评论发送功能,对评论展示暂时先放在一边。所以,我们只要处理input框的样式和逻辑。(css样式会在文章最后完整代码给出。)
<div class="comment_input_box_hover"></div>
<div class="comment_input_box" v-show="commentPop"> //commentPop用来控制是否显示评论弹窗
<input
:placeholder="commentPlaceholder" //placeholder绑定data中的commentPlaceHolder,实现我们的需求
class="comment_input"
v-model="comment_text"
ref="content"
@click="checkComment"
/>
<div class="comment_input_right" @click="checkComment">
<i class="iconfont icon-fasong comment_i" :class="canSend?'comment_i_active':''"></i> // canSend用来标识评论是否可以发送。
</div>
3.实现相关data和methods
data(){
    commentPlaceholder:'留下你精彩的评论吧',
    comment_text:'', // 评论内容,由v-model实现双向绑定
    hasSend:false, // 标识评论是否已经发送过,防止同一条评论被重复提交
    canSend:false, //canSend用来标识评论是否可以发送
    video_id:'',// 标识是哪一个视频的评论
    to_user_id:'',// 需要回复对象的id
    father_comment_id:'',// 父评论的id
}
methods:{
     // 在发送评论之前,我们需要对输入的内容做合法性判段
     checkComment() {
      if (this.comment_text == "") {
        Toast("评论内容不能为空");
      } else {
        if (!this.isLogin) {
          this.$router.push({
            path: "/login"
          });
          return;
        }
        const to_user_id = this.to_user_id;
        const father_comment_id = this.father_comment_id;
        const comment = this.comment_text;
        const video_id = this.video_id;
        const id = Date.now();
        const newComment = {
          avatar: this.userInfo.avatar,
          comment,
          id,
          create_time: "刚刚",
          nickname: this.userInfo.nickname
        };
        sendComment({ to_user_id, father_comment_id, comment, video_id }).then(
          val => {
            this.comment_text = "";
            this.hasSend = true;
            this.commentList.unshift(newComment);
          }
        );
      }
    },
}
watch:{
    comment_text(newVal,oldVal){ // 监听comment_text的变化,动态修改提交按钮的样式和状态
        this.canSend = newVal ==='' ? true:false
    }
}
注意,video_id是在打开评论弹窗时获取并赋值的,这里并没有涉及到评论弹窗的打开与关闭操作,因此直接省略了video_id的赋值操作
 changeComments(item) {
      if (this.showShareBox) {
        // 打开评论弹窗之前,要先关闭分享弹窗
        this.commentPop = false;
      }
      this.commentPop = true;
      this.video_id = item.id  // 对video_id进行了赋值操作
      // 打开评论窗时需要从服务端获取评论列表
      getCommentList(this.video_id).then(val => {
        let data = val.data.message;
        data.forEach(item => {
        });
        this.commentList = data;
      });
    },
评论展示
1. 编写前端页面
<van-popup v-model="commentPop" :overlay="true" class="comment_container" position="bottom">
<div class="comment_box">
<div class="comment_top">
{{commentList.length}}条评论
<i
class="iconfont icon-guanbi1 guanbi3"
@click="closeCommentsBox"
></i>
</div>
<ul class="comment_ul">
<div v-if="commentList.length!=0">
<transition-group appear>
<li
class="comment_li"
v-for="(item,index) in commentList"
:key="item.id"
@click="replyUser(item,index,-1)" <!-- 在这里为每条评论绑定了点击事件-->
>
<div class="comment_author_left">
<img :src="item.avatar" />
</div>
<div class="comment_author_right">
<div class="comment_author_top">
<div class="comment_author_name">@{{item.nickname}}</div>
<div class="icon-shoucang1_box" @click.stop="commentLove(item,index,-1)">
<div class="icon_right_change" :class="item.love_comment?'love_active':''">
<i class="iconfont icon-shoucang1"></i>
</div>
<div class="shoucang1_num">{{item.love_count}}</div>
</div>
</div>
<div class="comment_author_text">
{{item.comment}}
<span>{{item.create_time}}</span>
</div>
</div>
<div class="clear"></div>
<div class="comment_reply_box">
<transition-group appear>
<div
class="comment_reply_li"
v-for="(item2,index2) in item.child_comment"
:key="item2"
@click.stop="replyUser(item2,index,index2)"
>
<div class="comment_reply_left">
<img :src="item2.avatar" />
</div>
<div class="comment_reply_right">
<div class="comment_reply_top">
<div class="comment_reply_name">@{{item2.nickname}}</div>
<div
class="icon-shoucang1_box"
@click.stop="commentLove(item2,index,index2)"
>
<div
class="icon_right_change"
:class="item2.love_comment?'love_active':''"
>
<i class="iconfont icon-shoucang1"></i>
</div>
<div class="shoucang1_num">{{item2.love_count}}</div>
</div>
</div>
<div class="comment_reply_text">
<span
v-if="item.user_id!=item2.be_commented_user_id && item.user_id!=item2.user_id"
>
回复
{{item2.be_commented_nickname}}:
</span>
{{item2.comment_content}}
<span>{{item2.create_time}}</span>
</div>
</div>
<div class="clear"></div>
</div>
</transition-group>
</div>
</li>
</transition-group>
</div>
<div class="no_message" v-if="!commentList.length">
<i class="iconfont iconfont_style icon-zanwupinglun"></i>
<div class="no_message_tips">暂无评论</div>
</div>
</ul>
</div>
</van-popup>
获取评论
打开评论弹窗时,发起获取评论的请求
methods:{
    changeComments(item) {
      if (this.showShareBox) {
        // 打开评论弹窗之前,要先关闭分享弹窗
        this.commentPop = false;
      }
      this.commentPop = true;
      this.video_id = item.id
      getCommentList(this.video_id).then(val => {
        this.commentList = val.data.message;
        this.commentList.forEach((item)=>{
          item.create_time = formatTime(new Date(item.create_time))
        })
      });
    },
}
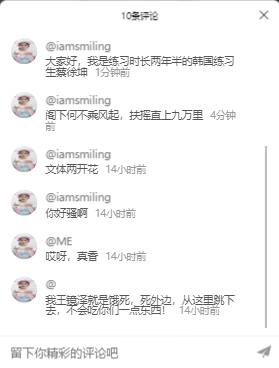
页面效果展示
实现实时插入评论
在前面,已经实现了评论功能,但新发表的评论并没有在页面中显示出来,只有在刷新页面后才会显示。为了解决这个问题,我们需要在发送评论之后,将新评论封装成一个对象,然后插入到commentList中。越新的评论放在越前面,也就是新评论应该放在第一个位置。所以新评论应该插入到commentList中的0号位置。
如何构建新的评论对象
在页面显示时,需要显示的内容有nickname,avatar,comment,create_time,另外,因为在遍历过程中是使用item.id来绑定:key的。因此我们需要一个为这个对象绑定一个id,其实这个id只是起临时作用,并不会写到数据库。为了保证id的唯一性,我们通过Date.now()来生成这个id。而其他字段的内容,我们可以通过在vuex中,或者上下文中取到。
所以构建出来的comment长成下面这个样子:
const id = Date.now()
const comment = this.comment_text;
const newComment = {
  avatar:this.userInfo.avatar,
  comment,
  id,
  create_time:'刚刚',
  nickname:this.userInfo.nickname,
}
此外,还需要修改一下我们的sendComment之后的逻辑,就是将新的评论对象插到commentList中去。
 sendComment({ to_user_id, father_comment_id, comment, video_id }).then(
          val => {
            this.comment_text = "";
            this.hasSend = true;
            this.commentList.unshift(newComment) //将新的评论对象插入到数组中去
          }
        );
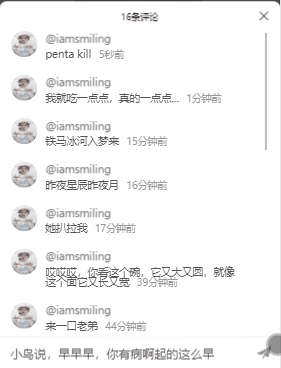
页面效果展示
vue前端部分的评论功能已经实现,接下来就是回复功能了...
