

参考资料
1、组件化启蒙文章:
2、通过Cocoapods实现组件化:
3、组件化相关资料:
相关文章
我们为什么要对项目进行组件化?
以我的切身经历来说:
1、随着业务增加,需求迭代。整个项目的文件越来越多,Build越来越慢,按下 Command + R,然后喝杯卡布奇诺再蹲个坑回来,项目还没有跑完。。。
2、干外包,啊不,在外包公司做项目。通用的基础功能代码,如:菊花、网络访问组件、下拉刷新、数据持久化、基础类的分类。如果不把它们弄成私有库,那么我们只能选择:
言归正传,我对项目进行组件化我干了两件事:
- 把基础功能做成私有库,可以通过 pod 添加到任何项目;
- 把独立功能模块做成私有库,再将该模块添加到主项目实现模块分离,这里解藕解得我欲仙欲死。
1、创建私有Spec Repo
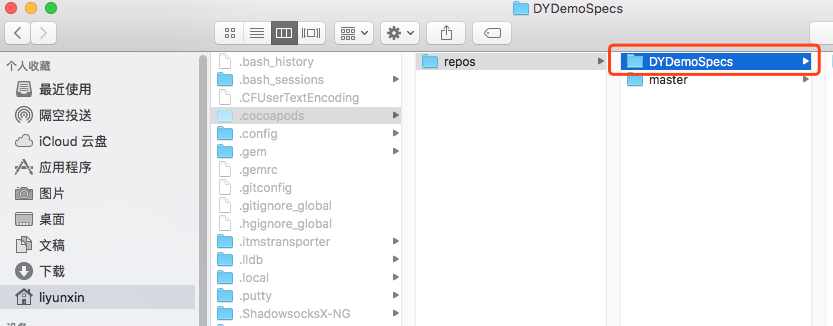
私有库当然要用私有Spec Repo,当然可以使用官方的Repo,但如果只想添加自己的Pods,那还是使用私有的Repo把。打开:~/.cocoapods/repos。你会看到一个master文件夹,这个是 Cocoapods 官方的 Spec Repo。
1.1、创建一个私有的Git仓库来作为私有的Repo
这里创建 DYDemoSpecs 仓库。
1.2、执行repo命令添加私有Repo
# pod repo add [Private Repo Name] [GitHub HTTPS clone URL]
$ pod repo add DYDemoSpecs https://github.com/liyunxin/DYDemoSpecs.git
此时如果成功的话,到:~/.cocoapods/repos 目录可以看到DYDemoSpecs。
2、创建一个组件库
2.1、Using Pod Lib Create 创建组件库
通过官方文档:Using Pod Lib Create,创建一个DYDemoTools项目。cd到想要创建项目的目录然后执行:
$ pod lib create DYDemoTools接着在命令行需要你确认一些参数:
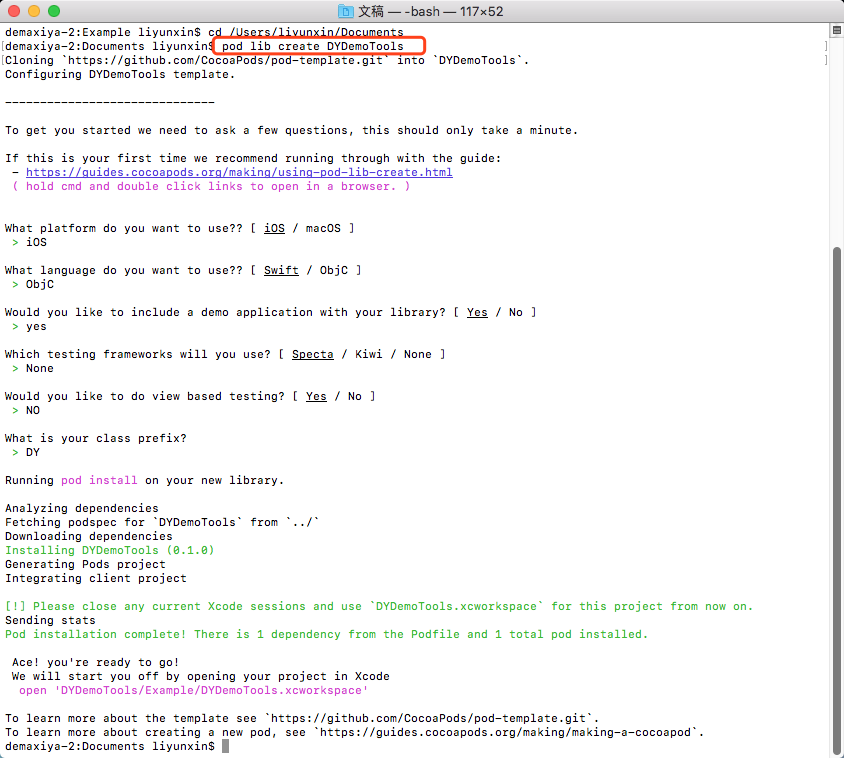
根据命令行的输入会创建不一样的工程
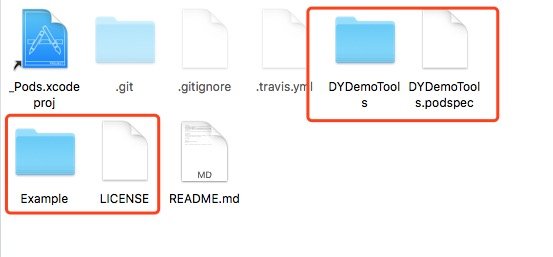
2.2、创建DYDemoTools仓库
这里创建 DYDemoTools 仓库,并clone到本地。
把2.1步骤生成的项目的相关文件复制到DYDemoTools仓库目录下
这里你也可以直接给2.1生成的项目设置远端仓库
2.3、podspec文件
podspec是Ruby文件,可以打开Example的项目工程查看。
这是我在DYDemoTools中使用的podspec文件:
相关字段可以到 官方文档 查阅
Pod::Spec.new do |s|
  s.name             = 'DYDemoTools'
  s.version          = '0.0.1'
  s.summary          = 'DYDemoTools.'

  s.description      = <<-DESC
  TODO: Add long description of the pod here.
  DESC

  s.homepage         = 'https://github.com/liyunxin/DYDemoTools'
  s.license          = { :type => 'MIT', :file => 'LICENSE' }
  s.author           = { 'liyunxin' => '447674668@qq.com' }
  s.source           = { :git => 'https://github.com/liyunxin/DYDemoTools.git', :tag => s.version.to_s }

  s.platform   = :ios, "10.0"
  s.frameworks = 'UIKit'

  s.source_files = 'DYDemoTools/Classes/**/*'

end
从 podspec 中,source_files字段的设置可以知道,该组件的源文件都要放在仓库中DYDemoTools文件夹中。
2.4、添加类到组件
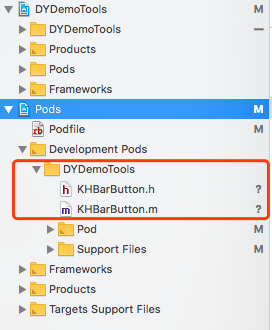
这里我添加一个自定义Button到Pod/Classes,然后进入Example文件夹执行 pod update 命令。再次打开Example项目工程可以看到:
每一次修改了pod或者以后更新了podspec版本都需要重新执行一遍 pod update 命令
使用示例:
在Example工程的ViewController中直接导入 KHBarButton,这里要先给Main.storyboard添加导航控制器
#import "ViewController.h"
#import "KHBarButton.h"

@interface ViewController ()

@end

@implementation ViewController

- (void)viewDidLoad {
    [super viewDidLoad];
    self.navigationItem.rightBarButtonItem = [[KHBarButton rightBtnWithTitle:@"德玛西亚" Color:[UIColor blackColor] ClickOption:^{
        NSLog(@"德玛西亚,永世长存");
    }] getBarItem];
}

@end
2.5、添加资源文件(如添加一张照片)
- 创建 DYDemoToolsAsset.xcassets 用来存放 DYDemoTools 组件的图片
- 在 Pod 中创建一个Base文件夹,把DYDemoToolsAsset.xcassets放入其中
- 在 podspec 添加相关代码
Pod::Spec.new do |s|
  s.name             = 'DYDemoTools'
  s.version          = '0.0.1'
  s.summary          = 'DYDemoTools.'

  s.description      = <<-DESC
  TODO: Add long description of the pod here.
  DESC

  s.homepage         = 'https://github.com/liyunxin/DYDemoTools'
  s.license          = { :type => 'MIT', :file => 'LICENSE' }
  s.author           = { 'liyunxin' => '447674668@qq.com' }
  s.source           = { :git => 'https://github.com/liyunxin/DYDemoTools.git', :tag => s.version.to_s }

  s.platform   = :ios, "10.0"
  s.frameworks = 'UIKit'

  s.source_files = 'DYDemoTools/**/*'

  s.resource_bundles = {
    'DYDemoTools' => ['DYDemoTools/Base/*.xcassets']
  }
end- 在 DYDemoToolsAsset 中添加任意一张图片
- 在 Pod 中创建一个Tools文件夹,然后创建并添加 DYDemoYools 类
- 打开Example文件夹执行 pod update
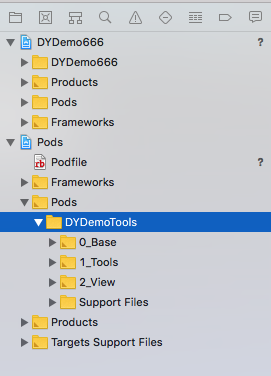
- 打开Example工程,可看到如下目录:
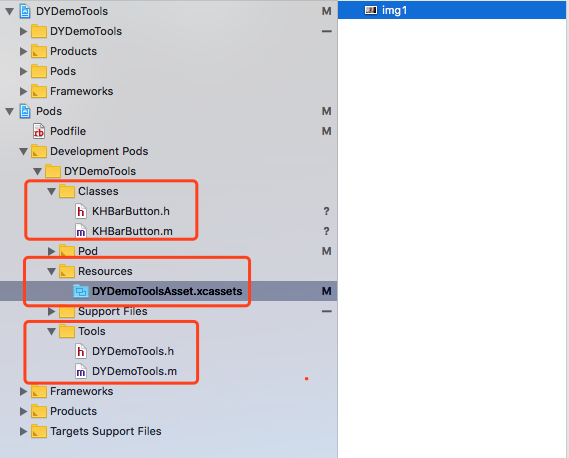
获取DYDemoToolsAsset中的图片有很多中方法,这里采取的方法:
在DYDemoYools中添加一个类方法,专门获取DYDemoToolsAsset中的图片
#import <Foundation/Foundation.h>

@interface DYDemoTools : NSObject

///获取KHealthTools这个Bundle的图片
+ (UIImage *)getToolsBundleImage:(NSString *)imageName;

@end
#import "DYDemoTools.h"

@implementation DYDemoTools

///获取DYDemoTools这个Bundle的图片
+ (UIImage *)getToolsBundleImage:(NSString *)imageName {
    static NSBundle *bundle;
    if (bundle == nil) {
        bundle = [NSBundle bundleWithPath:[[NSBundle bundleForClass:NSClassFromString(@"DYDemoTools")] pathForResource:@"DYDemoTools" ofType:@"bundle"]];
    }

    UIImage *image = [UIImage imageNamed:imageName inBundle:bundle compatibleWithTraitCollection:nil];
    if (image == nil) {
        image = [UIImage imageNamed:imageName];
    }

    return image;
}

@end
使用示例:
在Example工程的ViewController中直接导入DYDemoTools
#import "ViewController.h"
#import "KHBarButton.h"
#import "DYDemoTools.h"
@interface ViewController ()
@end
@implementation ViewController
- (void)viewDidLoad {
[super viewDidLoad];
__weak typeof(self) weakSelf = self;
self.navigationItem.rightBarButtonItem = [[KHBarButton rightBtnWithTitle:@"德玛西亚" Color:[UIColor blackColor] ClickOption:^{
[weakSelf addImageDemo];
}] getBarItem];
}
- (void)addImageDemo {
UIImage *img = [DYDemoTools getToolsBundleImage:@"img1"];
UIImageView *iV = [[UIImageView alloc] initWithFrame:CGRectMake(50, 100, img.size.width, img.size.height)];
iV.image = img;
[self.view addSubview:iV];
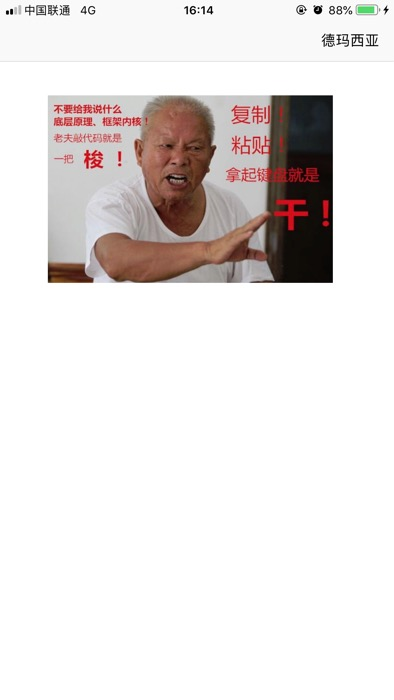
}
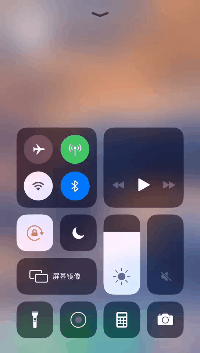
@end效果图:
2.6、设置subspec
这个将来有大用
在Base里面添加:DYDemoToolsHeader.h
Pod::Spec.new do |s|
  s.name             = 'DYDemoTools'
  s.version          = '0.0.1'
  s.summary          = 'A short description of DYDemoTools.'

  s.description      = <<-DESC
  TODO: Add long description of the pod here.
  DESC

  s.homepage         = 'https://github.com/liyunxin/DYDemoTools'
  s.license          = { :type => 'MIT', :file => 'LICENSE' }
  s.author           = { 'liyunxin' => '447674668@qq.com' }
  s.source           = { :git => 'https://github.com/liyunxin/DYDemoTools.git', :tag => s.version.to_s }

  s.platform   = :ios, "10.0"
  s.frameworks = 'UIKit'

  s.subspec '0_Base' do |sb|
    sb.source_files = "DYDemoTools/0_Base/**/*.{h,m}"
    sb.resource_bundles = {
      'DYDemoTools' => ['DYDemoTools/0_Base/*.xcassets']
    }
  end

  s.subspec '1_Tools' do |st|
    st.source_files = "DYDemoTools/1_Tools/**/*.{h,m}"
  end

  s.subspec '2_View' do |sv|
    sv.source_files = "DYDemoTools/2_View/**/*.{h,m}"
  end

end
2.7、向Spec Repo提交podspec
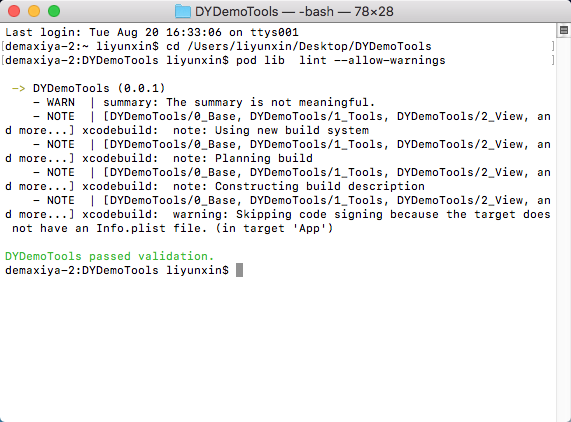
终于来到这里了,提交之前要验证 podspec 是否无误。否则没办法提交。然后还要给 git 打上一个 tag,该 tag 要与 podspec 的 version 相同。
#cd到DYDemoTools文件夹,执行下面的命令
pod lib lint --allow-warnings
如果出现:DYDemoTools passed validation. 那恭喜我,本地校验通过:
#cd到DYDemoTools文件夹,执行下面的命令
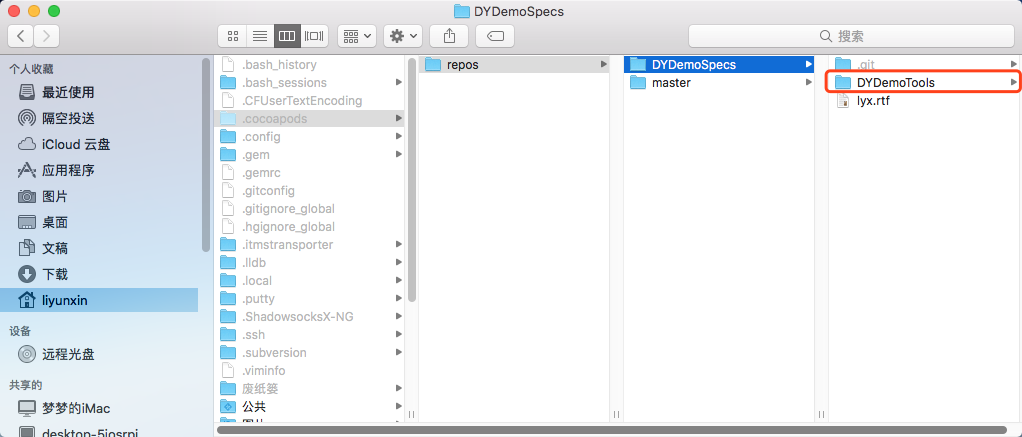
pod repo push DYDemoSpecs DYDemoTools.podspec --allow-warnings查看:~/.cocoapods/repos/DYDemoSpecs,你会看到新增了一个DYDemoSpecs
到此,第一个组件库创建完成
3、在项目中使用组件
这里创建 DYDemo666 仓库。
创建一个DYDemo666工程。添加podfile文件如下:
use_frameworks!

platform :ios, '10.0'

source 'https://github.com/CocoaPods/Specs.git'  # 官方库
source 'https://github.com/liyunxin/DYDemoSpecs.git' # 私有库

target 'DYDemo666' do
  pod 'DYDemoTools'
end
执行成功后打开项目:
在 DYDemo666 中的 ViewController 使用组件的东西:
#import "ViewController.h"
#import "DYDemoToolsHeader.h"

@interface ViewController ()

@end

@implementation ViewController

- (void)viewDidLoad {
    [super viewDidLoad];
    __weak typeof(self) weakSelf = self;
    self.navigationItem.rightBarButtonItem = [[KHBarButton rightBtnWithTitle:@"哈哈哈" Color:[UIColor blackColor] ClickOption:^{
        [weakSelf addImageDemo];
    }] getBarItem];
}

- (void)addImageDemo {
    UIImage *img = [DYDemoTools getToolsBundleImage:@"img1"];
    UIImageView *iV = [[UIImageView alloc] initWithFrame:CGRectMake(100, 100, img.size.width, img.size.height)];
    iV.image = img;
    [self.view addSubview:iV];
}

@end
使用效果:
4、对项目进行组件化
接下来的笔记在下一篇文章:iOS组件化 - 项目组件化
