

开头
在flutter中,我们可以通过 AnimationController 及各种 Animation 搭配使用的方式去实现 Widget 的动画。
实现的方式也非常方便,通过flutter内置好的模版代码,在你创建的dart文件中输入 sta 即可创建出基本的动画模版类。
那么,我们可以通过这样的Widget组合方式,实现出怎样的动画呢?
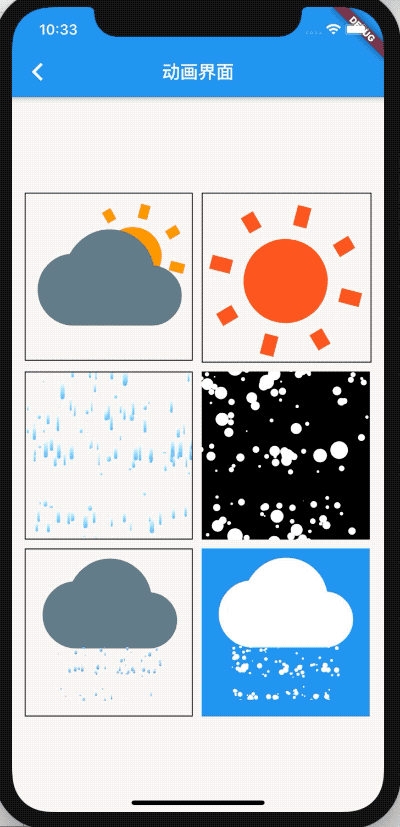
接下来,我们就以上面的动画为例子,讲一讲Widget强大的组合性!
Widget 组合
由简到难,我们依次开始组合出上面的效果。
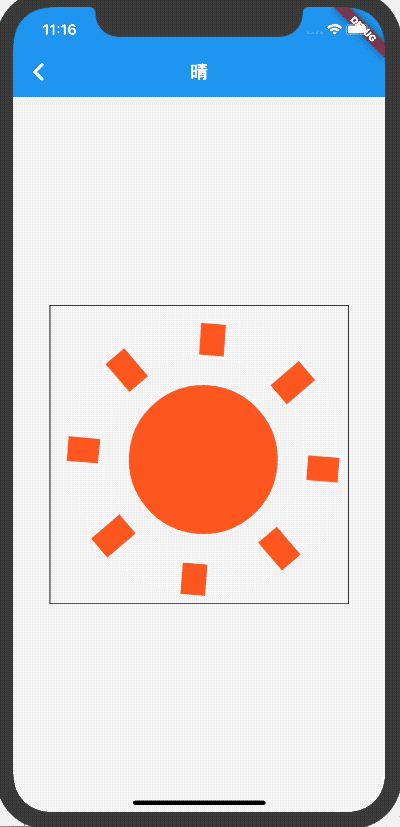
晴
晴天动画是最简单的,就是一个太阳360度不停旋转的效果
首先,通过模版代码 sta 创建出一个 WeatherSunny 类,初始化的 controller 和 animation 分别如下
  AnimationController _controller;
  Animation _animation;

  @override
  void initState() {
    _controller = AnimationController(
      vsync: this,
      duration: Duration(seconds: 60),
    );
    _animation = Tween(begin: 0.0, end: 1.0).animate(_controller);
    ...
    }
为了达到太阳不停旋转的效果,我们需要把动画设置成循环的,所以需要监听它的状态
  @override
  void initState() {
    ...
    _controller.addStatusListener((status) {
      if (status == AnimationStatus.completed) {
        _controller.reset();
        _controller.forward();
      }
    });
    _controller.forward();
    super.initState();
  }
由于动画需要进行Widget的刷新,所以我们通常需要进行下面的操作:
    _controller.addListener((){
      setState(() {});
    });
但是对于复杂度不高的动画,我们可以使用 AnimatedBuilder 去降低代码行数,所以在这里上面的监听刷新就没有必要了
然后是将 Animation 应用在 Widget 上
  @override
  Widget build(BuildContext context) {
    return AnimatedBuilder(
      animation: _animation,
      builder: (ctx, child) {
        return Container(
          decoration: BoxDecoration(border: Border.all()),
          child: Transform.rotate(
            angle: pi * 2 * _animation.value * 5,
            child: child,
          ),
        );
      },
      child: Icon(
        Icons.wb_sunny,
        size: widget.sunnySize,
        color: widget.sunColor,
      ),
    );
  }
这里的太阳其实就是flutter默认提供的Icon,我们让它每60s旋转 360 * 5 的度数,也就是每60s 转5圈。
到这里也许有同学会问,为什么不将 Duration 设置成12s,旋转度数设置成 360 ,效果不是一样吗?
效果确实一样,不过灵活度是不一样的,等你实际操作一遍就可以体会到了。
阴
晴天动画非常简单,实际上就是 旋转动画 + Icon 的组合
那么阴天动画如何实现呢,应该很多同学已经知道了,就是 晴天动画 + Stack 的组合
首先我们将之前的 WeatherSunny 封装好,让它可以从外部传入某些参数
WeatherSunny({
    this.sunnySize = 100,
    this.sunColor = Colors.orange,
    ...
  })
然后我们创建一个 WeatherCloudy 去实现阴天动画,这里的阴天动画不需要额外的动画操作,所以不用将其创建成 StatefulWidget
  @override
  Widget build(BuildContext context) {
    ...
    return Container(
      width: width,
      height: height,
      child: Stack(
        children: <Widget>[
          Positioned(
            left: sunOrigin.dx + cloudSize / 6,
            top: sunOrigin.dy - cloudSize / 6,
            child: WeatherSunny(
              sunnySize: sunSize,
              sunColor: sunColor,
            ),
          ),
          Positioned(
            left: cloudOrigin.dx,
            top: cloudOrigin.dy,
            child: Icon(
              Icons.cloud,
              size: cloudSize,
              color: cloudColor,
            ),
          ),
        ],
      ),
    );
  }
上面省去了很多细节代码,可以看到阴天的动画就是通过 Stack 组合 晴天动画 与另外一个 云朵Icon,只不过我们需要计算各个对象的相对坐标

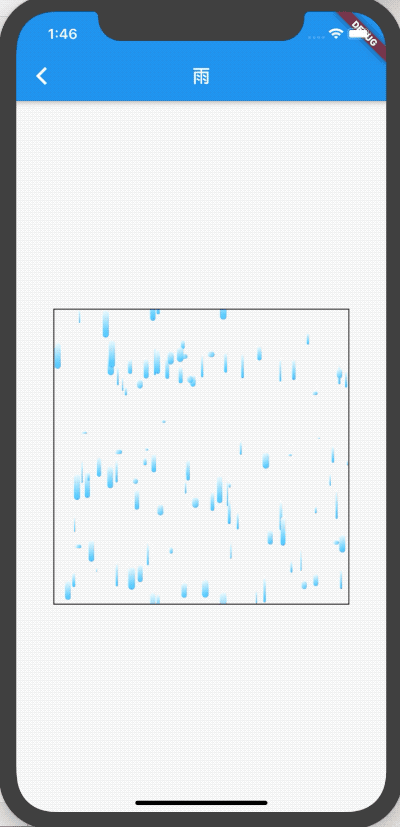
雨
落雨的动画稍微要复杂一些,因为雨点的生成都是随机的,所以需要使用到 Random()
在实现之前可以先思考一下,雨点是用什么去实现的?
也许有小伙伴早就知道了,就是通过 Container 去实现的雨点
Container(
          width: randomWidth,
          height: randomHeight,
          decoration: BoxDecoration(
              borderRadius: BorderRadius.all(Radius.circular(randomWidth / 2)),
              gradient: LinearGradient(
                  begin: Alignment.topLeft,
                  end: Alignment.bottomRight,
                  colors: [
                    Colors.white, Theme.of(context).primaryColor,
                  ])),
        )
Container可以实现的效果很丰富,冒充雨点也是不在话下
接下来,就是如何展示出这么多的雨点。
显然,是通过 Stack + N个Position 的结合方式
我们可以创建出随机数量的 Container 雨点展示,然后在 Position 中设置他们的随机坐标
      //雨滴随机大小
      final randomWidth = Random().nextDouble() * width / 50 + 1;
      final randomHeight = Random().nextDouble() * height / 10;
      //雨滴随机坐标
      double randomL = Random().nextDouble() * width - randomWidth;
      double randomT = Random().nextDouble() * height + randomHeight;
不过又有一个问题来了,如何实现雨滴动画无限向下移动呢?
首先肯定是需要让动画无限循环的
        _controller.reset();
        _controller.forward();
让雨滴移动通过 Transform.translate 即可
 Transform.translate(
              offset: Offset(
                0,
                _animation.value * widget.droppingHeight,
              ),
              child: child,
            ),
          );
实际上的动画应该上这个样子
所以还剩下一个问题,如何保证雨滴不出边界?
这里就需要用到另一个控件 ClipRect
通过 ClipRect 的 clipper 属性,我们可以对显示区域进行限制,接下来自定义一个 CustomClipper
class CustomRect extends CustomClipper<Rect> {
  @override
  Rect getClip(Size size) {
    Rect rect = Rect.fromLTRB(0.0, 0.0, size.width, size.height);
    return rect;
  }

  @override
  bool shouldReclip(CustomRect oldClipper) {
    return false;
  }
}
这样,我们就可以把显示内容限制在 rect 的范围内
大概的代码如下
  Widget build(BuildContext context) {
    final children =
        getDroppingWidget(widget.droppingHeight, widget.droppingWidth, context);

    return Container(
      width: widget.droppingWidth,
      height: widget.droppingHeight,
      decoration: BoxDecoration(border: Border.all()),
      child: AnimatedBuilder(
        animation: _animation,
        builder: (ctx, child) {
          return ClipRect(
            clipper: CustomRect(),
            child: Transform.translate(
              offset: Offset(
                0,
                _animation.value * widget.droppingHeight,
              ),
              child: child,
            ),
          );
        },
        child: Stack(
          children: [
            Transform.translate(
              offset: Offset(0, -widget.droppingHeight),
              child: Stack(
                children: children,
              ),
            ),
            Stack(
              children: children,
            ),
          ],
        ),
      ),
    );
  }
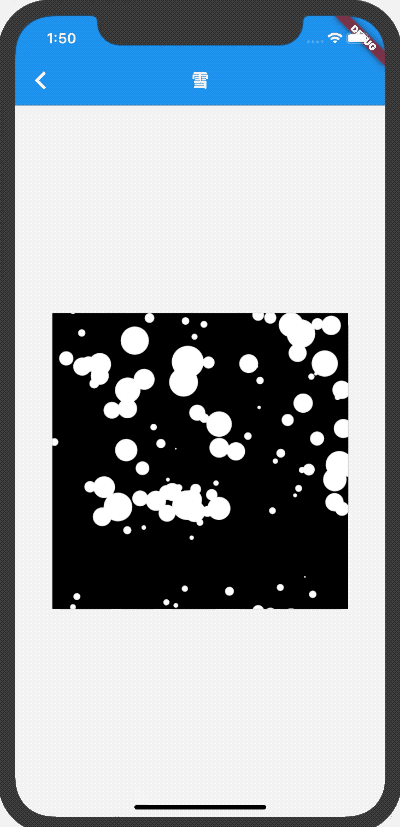
雪
下雪的动画与下雨的动画是一样的,只是将实现 雨滴 的Widget替换为 飘雪 的Widget
Container(
          width: width,
          height: width,
          decoration: BoxDecoration(
              shape: BoxShape.circle,
              gradient: LinearGradient(
                  begin: Alignment.topLeft,
                  end: Alignment.bottomRight,
                  colors: [
                    Colors.white,
                    Theme.of(context).primaryColor,
                  ])),
        );
最后还有 雨雪 + 云 的动画,具体实现方式与 晴 + 云 的效果是差不多的,只是需要进行位置的计算有所不同
那么,通过 widget 组合实现一些动画效果就到此为止,可以看到在flutter 中 万物基于widget 绝非空口无凭,
附录
demo地址如下:
(ps:demo中我将控件进行了封装,可以很方便的调用,本来是打算写成一个dart package的,后来觉得效果比较简单,还是用作学习素材最为合适!
封装后,通过 droppingType 参数来控制下降的是与还是雪,通过 droppingLevel 参数控制雨雪的数量。 也可以通过 droppingWidget 参数来自定义下落的控件。 )
