

本篇主要介绍一下retrofit的基本使用。使用时需要在build.gradle下添加:其中第一个为添加retrofit,第二及第三个为添加json解析,这里采用的是GSON
implementation 'com.squareup.retrofit2:retrofit:2.1.0'
implementation 'com.squareup.retrofit2:converter-gson:2.0.2'
implementation 'com.google.code.gson:gson:2.7'
其示例如下: retrofit在使用的过程中,需要定义一个接口对象
public interface APIService {
    /** 不传参 */
    //@GET("/microservice/weather?citypinyin=beijing")
    //Call<WeatherBean> getWeatherInfo();
    /** 传参 */
    @GET("microservice/weather")
    Call<WeatherBean> getWeatherInfo(@Query("citypinyin") String city);
}
可以看到有一个getWeatherInfo()方法,通过@GET注解标识为get请求,@GET中所填写的value和baseURL组成完整的路径,baseURL在构造retrofit对象时给出。其基本步骤如下:
- 创建Retrofit2实例:创建Retrofit2实例时需要通过Retrofit.Builder方法,并调用baseUrl方法设置根URL。Retrofit2的baseUlr必须以/结束,不然会抛出一个IllegalArgumentException。
Retrofit retrofit = new Retrofit.Builder()
.baseUrl("http://apistore.baidu.com/")
.build();
- 定义一个和HTTP的API对应的接口:
public interface APIService {
    /** 不传参 */
    @GET("microservice/weather?citypinyin=beijing")
    Call<WeatherBean> getWeatherInfo();
}
上面的接口定义就会调用服务端URL为http://apistore.baidu.com/microservice/weather?citypinyin=beijing
- 生成网络请求接口的对象:通过Retrofit2的create方法可以生成一个接口对应的实现对象,我们可以使用这个对象去调用接口。
APIService apiService = mRetrofit.create(APIService.class);
- 调用实现的方法来进行同步或异步的HTTP请求:
 Call<WeatherBean> call = apiService.getWeatherInfo("beijing");
 //异步请求
        call.enqueue(new Callback<WeatherBean>() {
            @Override
            public void onResponse(Call<WeatherBean> call, Response<WeatherBean> response) {
                WeatherBean bean = response.body();

                mGetResultTv.setText(bean.retData.weather);
            }

            @Override
            public void onFailure(Call<WeatherBean> call, Throwable t) {
                mGetResultTv.setText(t.toString());
            }
        });
如果要同步请求的话:
try {
      //同步请求
     Response<WeatherBean> response = call1.execute();
     If (response.isSuccessful()) {
          Log.d("Retrofit2Example", response.body().getDesc());
     }
} catch (IOException e) {
     e.printStackTrace();
}
可以看到通过调用接口的实现对象可以获得一个Call对象。Call对象有两个请求方法: 1.Enqueue异步请求方法; 2.Exectue同步请求方法
完整的请求如下:
final String baseUrl = "http://apistore.baidu.com/";
        Retrofit mRetrofit = new Retrofit.Builder()
                .baseUrl(baseUrl)
                .addConverterFactory(GsonConverterFactory.create())
                .build();

        APIService apiService = mRetrofit.create(APIService.class);

        //Call<WeatherBean> call = apiService.getWeatherInfo();
        Call<WeatherBean> call = apiService.getWeatherInfo("beijing");

        call.enqueue(new Callback<WeatherBean>() {
            @Override
            public void onResponse(Call<WeatherBean> call, Response<WeatherBean> response) {
                WeatherBean bean = response.body();

                mGetResultTv.setText(bean.retData.weather);
            }

            @Override
            public void onFailure(Call<WeatherBean> call, Throwable t) {
                mGetResultTv.setText(t.toString());
            }
        });
    }
这里需要指出的是:
- 1.接口中的方法必须有返回值,且比如是Call类型
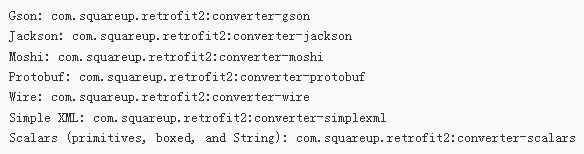
- 2..addConverterFactory(GsonConverterFactory.create())这里如果使用gson,需要额外导入gson-converter
- 3.还支持其他类型的converter
除了@GET注解还有其他几种类型:
- @Path注解
@GET("group/{id}/users")
Call<List<User>> groupList(@Path("id") int groupId);
它会替换URL中的用花括号包起来的变量。使用方法如上面代码,URL中的‘id’会被替换成groupList方法的入参groupId。
- @Query注解
@GET("group/{id}/users")
Call<List<User>> groupList(@Path("id") int groupId, @Query("sort") String sort);
上面代码生成的url会是这样的 http://10.14.180.70/group/groupId对应的值/users?sort=sort对应的值 这样的url。这样我们就可以在URL中添加参数了。
- @QueryMap注解
@GET("group/{id}/users")
Call<List<User>> groupList(@Path("id") int groupId, @QueryMap Map<String, String> options);
可以看到@QueryMap这个注解对应的是一个Map数据类型,它的的泛型是Map<String,String>所以它的key和value都是String类型的,它的key和Value在URL中的对应关系如下http://10.14.180.70/group/groupId/users?key=value 所以理解起来也比较容易。
- @POST注解&@Body注解
@POST("users/new")
Call<User> createUser(@Body User user);
上面的代码中使用了两个注解,我们先看@POST注解,它的参数和@GET注解类似都代表拼接的URL,再看@Body注解,上面的代码中使用的是一个User实体bean,这个时候就需要使用我们上面提到的转换器Converter设置对应的转换器就可以把实体bean转换成Converter对应的数据类型,比如这里我们使用一个Gson的转换器,在这里我们使用@Body注解注解的时候user对象就会被转换成json字符串被放入到post请求中,如果没有设置任务Converter这个地方只能是RequestBody类型的参数。
- @FormUrlEncoded注解
@FormUrlEncoded
@POST("user/edit")
Call<User> updateUser(@Field("first_name") String first, @Field("last_name") String last);
该注解表示POST请求携带了FORM表单。
- @Field注解
@FormUrlEncoded
@POST("user/edit")
Call<User> updateUser(@Field("first_name") String first, @Field("last_name") String last);
@Field注解对应FORM表单中的每个属性值,比如@Field("first_name") String first代表FROM表单中的first_name属性的值为first。当然我们也可以批量添加属性值,对应的注解为@FieldMap,它的用法和@QueryMap一样。
- @Url注解
@GET //当有URL注解时,这里的URL就省略了
Call<ResponseBody> query(@Url String url, @Query("showAll") boolean showAll);
这个注解是在@GET和@POST没有设置URL时必须使用的。 @Url注解支持的类型有 okhttp3.HttpUrl; String; java.net.URI; android.net.Uri;
- @HTTP注解
public interface BlogService {
     /**
       * method 表示请的方法,不区分大小写
       * path表示路径
       * hasBody表示是否有请求体
     */
      @HTTP(method = "get", path = "blog/{id}", hasBody = false)
      Call<ResponseBody> getFirstBlog(@Path("id") int id);
}
这个@HTTP注解可以包含很多注解的功能,GET,POST,PATH,HEAD等等。
- @Header注解&@Headers注解
public interface BlogService {
    @GET("/headers?showAll=true")
    @Headers({"CustomHeader1: customHeaderValue1", "CustomHeader2: customHeaderValue2"})
    Call<ResponseBody> testHeader(@Header("CustomHeader3") String customHeaderValue3);
}
如果我们要在HTTP请求的header中加入参数就需要@Header和@Headers两个注解。以上就是retrofit的基本注解的使用。下面介绍一下retrofit在实际项目中可能用到的其他功能,比如集成RxJava,是的返回结果可以通过RxJava的操作符进行下一步操作。这时候就得在构造retrofit的时候再添加一个转换器
 retrofitInstance = new Retrofit.Builder()
                            // baseUrl总是以/结束,@URL不要以/开头
                            .baseUrl(Config.getUrl())
                            // 使用OkHttp Client
                            .client(buildOKHttpClient())
                            // 集成RxJava处理
                            .addCallAdapterFactory(RxJavaCallAdapterFactory.create())
                            // 集成Gson转换器
                            .addConverterFactory(GsonConverterFactory.create())
                            .build();
这时候它的返回值就应该是被observable包裹的,比如下面这个post请求
@POST("user/getUserInfo")
    Observable<ResponseResultUserInfoBean>> getUserInfo(@Header("Cookie") String token, @Body UserInfoReqDto reqDto);
这个请求可以看到,向header中写入一个字段“Cookie"值为一个String,向post请求的body中传入参数UserInfoBean,其最终的返回结果是一个Observable对象。 在实际项目中,还能经常用到的就是上传文件了。如果要上传文件的话,那么就必须加上 @Multipart 注解,示例代码如下
 @Multipart
    @POST("user/upLoad")
    Observable<ResponseResult<UploadSuccessBean>> uploadUserData(@Header("Cookie") String token,
                                                               @Part("name") String name,
                                                               @Part("age") Integer age,
                                                               @PartMap Map<String, RequestBody> avatar);
这里就是向接口中Header中传入"Cookie",body中传入三个参数,类型为String的name,类型为Integer的age,以及一个File类型的avatar。注意这里的@Part中的name,age,以及最后的avatar则是接口中定义的请求体中json数据的key。 这里的requestBody必须根据后台的定义来写,比如上传图片,
public static RequestBody toRequestBodyOfImage(File pFile) {

        RequestBody fileBody = RequestBody.create(MediaType.parse("image/*"), pFile);
        return fileBody;
    }
这里是构建文本类型的requestBody(它是OKHTTP的requestBody,对应的是HTTP请求中的Content-type)。然后在构建请求的map时可以使用如下方式 Map<String, RequestBody> files = new HashMap<>();
    if (reqDto != null && reqDto.getFiles() != null && reqDto.getFiles().length > 0)
        for (int i = 0; i < reqDto.getFiles().length; i++) {
            RequestBody _requestBody = toRequestBodyOfImage(reqDto.getFiles()[i]);
            files.put("avatar\"; filename=\"" + reqDto.getFiles()[i].getName() + "", _requestBody);
        }
这里的files.put("avatar";...)其中的avatar必须的是这么写,它对应的也是接口中定一个的Json的key,如果在你的一个接口中需要上传一个类型为File的avatar,以及一个类型为File[]的introduces,同样可以把它们都放到这个map里。 除了上面的Requestbody之外还有
public static RequestBody toRequestBodyOfAudio(File pFile) {

        RequestBody fileBody = RequestBody.create(MediaType.parse("audio/*"), pFile);
        return fileBody;
    }
上传一段音频
public static RequestBody toRequestBodyOfText(String value) {
        RequestBody body = RequestBody.create(MediaType.parse("text/plain"), value);
        return body;
    }
上传一段文本
另外这里的另一个坑则是采用RxJava这种方式可能会引起内存泄露,原因在于当前页面关闭时,网络请求还没回来。Observable对象一直被观察着,这时候就需要手动的取消订阅。这里常用的做法则是通过 CompositeSubscription 来统一管理,它是继承自Subscription的类,它内部维持了一个set
private Set<Subscription> subscriptions;
这个set存储的就是subscription,所以在发送网络请求时需要把当前页面所有用到的网络请求添加到这个set中,然后在页面关闭的时候,调用它的clear方法,取消当前页面所有subscription的订阅,从而避免内存泄露。它的clear方法最终调用的是如下:
private static void unsubscribeFromAll(Collection<Subscription> subscriptions) {
        if (subscriptions == null) {
            return;
        }
        List<Throwable> es = null;
        for (Subscription s : subscriptions) {
            try {
                s.unsubscribe();
            } catch (Throwable e) {
                if (es == null) {
                    es = new ArrayList<Throwable>();
                }
                es.add(e);
            }
        }
        Exceptions.throwIfAny(es);
    }
具体的使用方式则是
- 在发起请求的页面创建一个CompositeSubscription
mSubscription = new CompositeSubscription();
- 让请求的方法返回一个Subscription,这里的callback则是对返回的封装可以忽略
Subscription getUserInfo(Context context, GetUerInfoCallback callback);
- 真正发起请求时将方法添加到CompositeSubscription中(页面中的每一个请求都可以加入到这里)
mSubscription.add(getUserInfo);
- 在页面关闭时比如onPause或者onDestroy中取消所有订阅
mSubscription.clear();
