版本记录
| 版本号 | 时间 |
|---|---|
| V1.0 | 2019.04.26 星期五 |
前言
iOS中有关视图控件用户能看到的都在UIKit框架里面,用户交互也是通过UIKit进行的。感兴趣的参考上面几篇文章。
1. UIKit框架(一) —— UIKit动力学和移动效果(一)
2. UIKit框架(二) —— UIKit动力学和移动效果(二)
3. UIKit框架(三) —— UICollectionViewCell的扩张效果的实现(一)
4. UIKit框架(四) —— UICollectionViewCell的扩张效果的实现(二)
5. UIKit框架(五) —— 自定义控件:可重复使用的滑块(一)
6. UIKit框架(六) —— 自定义控件:可重复使用的滑块(二)
7. UIKit框架(七) —— 动态尺寸UITableViewCell的实现(一)
8. UIKit框架(八) —— 动态尺寸UITableViewCell的实现(二)
9. UIKit框架(九) —— UICollectionView的数据异步预加载(一)
10. UIKit框架(十) —— UICollectionView的数据异步预加载(二)
11. UIKit框架(十一) —— UICollectionView的重用、选择和重排序(一)
12. UIKit框架(十二) —— UICollectionView的重用、选择和重排序(二)
13. UIKit框架(十三) —— 如何创建自己的侧滑式面板导航(一)
14. UIKit框架(十四) —— 如何创建自己的侧滑式面板导航(二)
开始
首先看下写作环境
Swift 4, iOS 11, Xcode 9
下面我们先看一下要实现的效果:
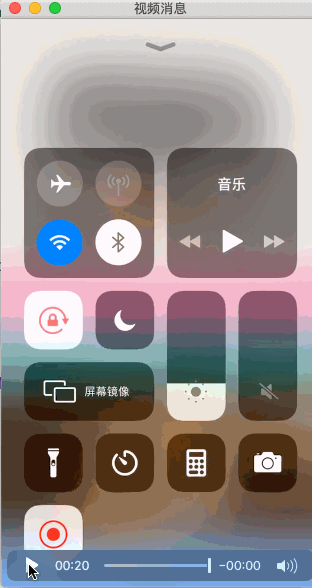
下面我们在慢一点看一下滚动时候的细节
大家可以看到滚动的时候cell的变化效果和一般的colletionViewCell效果是不一样的。
这就是这篇需要做的事情!
UICollectionView是在iOS 6中引入的,并通过iOS 10中的新功能进行了改进,是在iOS应用程序中自定义和动画数据集合表示的第一选择。
与UICollectionView关联的关键实体是UICollectionViewLayout。 UICollectionViewLayout对象负责定义集合视图的所有元素的属性,例如单元格,补充视图和装饰视图。
UIKit提供了一个名为UICollectionViewFlowLayout的UICollectionViewLayout的默认实现。此类允许您使用一些基本自定义设置网格布局。
这个UICollectionViewLayout教程将教你如何子类化和自定义UICollectionViewLayout类。它还将向您展示如何向集合视图添加自定义补充视图,弹性,粘性和视差效果。
注意:此
UICollectionViewLayout教程需要Swift 4.0的中级知识,UICollectionView的高级知识,仿射变换以及对UICollectionViewLayout类中核心布局过程如何工作的清晰理解。
如果您不熟悉这些主题,可以阅读Apple官方文档 Apple official documentation…

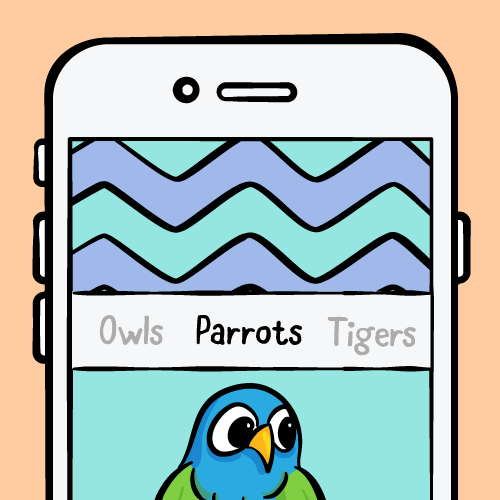
打开开始项目,你会看到一些可爱的猫头鹰在标准的UICollectionView中布局,其中的headers和footers如下所示:
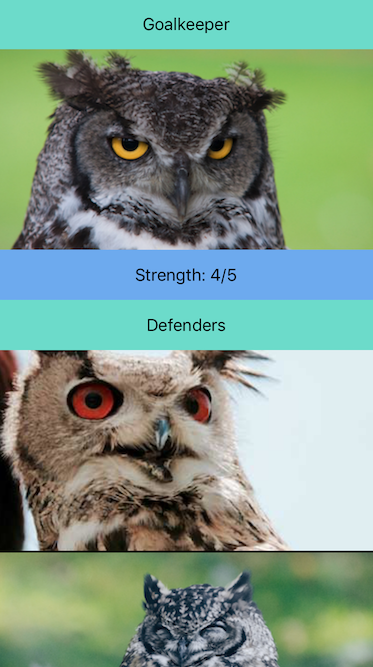
该应用程序展示了参加2017年丛林足球杯的猫头鹰队的球员。Section headers显示了他们在球队中的角色,而footer显示了他们的集体力量。
让我们仔细看看启动项目:
在JungleCupCollectionViewController.swift文件中,您将找到符合UICollectionDataSource协议的UICollectionViewController子类的实现。它实现了所有必需的方法以及添加补充视图的可选方法。
JungleCupCollectionViewController也采用了MenuViewDelegate。这是一个让集合视图切换其数据源的协议。
在Reusable Views文件夹中,单元格有UICollectionViewCell的子类, section header and section footer有UICollectionReusableView。它们链接到Main.storyboard文件中设计的各自视图。
除此之外,还有CustomLayout所需的自定义补充视图。 HeaderView和MenuView类都是UICollectionReusableView的子类。它们都链接到自己的.xib文件。
MockDataManager.swift文件包含所有团队的数据结构。为方便起见,Xcode项目嵌入了所有必要的资源。
1. Layout Settings
Custom Layout文件夹值得特别注意,因为它包含两个重要文件:
CustomLayoutSettings.swiftCustomLayoutAttributes.swift
CustomLayoutSettings.swift实现具有所有布局设置的结构体。 第一组设置处理集合视图的元素大小。 第二组定义布局行为,第三组设置布局间距。
2. Layout Attributes
CustomLayoutAttributes.swift文件实现名为CustomLayoutAttributes的UICollectionViewLayoutAttributes子类。 此类存储集合视图在显示元素之前配置元素所需的所有信息。
它从超类继承了默认属性,如frame,transform,transform3D,alpha和zIndex。
它还添加了一些新的自定义属性:
var parallax: CGAffineTransform = .identity
var initialOrigin: CGPoint = .zero
var headerOverlayAlpha = CGFloat(0)parallax,initialOrigin和headerOverlayAlpha是您稍后将在弹性和粘性效果的实现中使用的自定义属性。
注意:布局属性对象可能会被集合视图复制。 因此,在子类化
UICollectionViewLayoutAttributes时,必须通过实现将自定义属性复制到新实例的适当方法来符合NSCopying。如果实现自定义布局属性,则还必须覆盖继承的
isEqual方法以比较属性的值。 从iOS 7开始,如果这些属性未更改,则集合视图不应用布局属性。
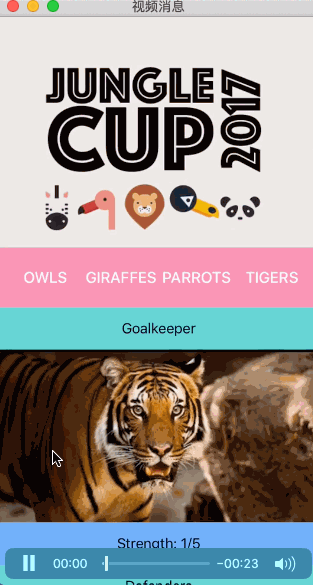
目前,集合视图无法显示所有团队。 目前,老虎队,鹦鹉队和长颈鹿队的支持者不得不等待。
别担心。 他们很快就会回来! CustomLayout将解决问题。
The Role of UICollectionViewLayout
UICollectionViewLayout对象的主要目标是提供有关UICollectionView中每个元素的位置和可视状态的信息。 请记住,UICollectionViewLayout对象不负责创建单元格或补充视图。 它的工作是为他们提供正确的属性(attributes)。
创建自定义UICollectionViewLayout分为三个步骤:
- 1) 对抽象类
UICollectionViewLayout进行子类化,并声明执行布局计算所需的所有属性。 - 2) 执行所有必需的计算,为每个集合视图的元素提供正确的属性。 这部分将是最复杂的,因为您将从头开始实现
CollectionViewLayout核心流程。 - 3) 使集合视图采用新的
CustomLayout类。
Step 1: Subclassing the UICollectionViewLayout Class
在Custom Layout组中,您可以找到名为CustomLayout.swift的Swift文件,该文件包含CustomLayout类存根。 在这个类中,您将实现UICollectionViewLayout子类和所有Core Layout进程。
首先,声明CustomLayout需要计算属性的所有属性。
import UIKit

final class CustomLayout: UICollectionViewLayout {

  // 1
  enum Element: String {
    case header
    case menu
    case sectionHeader
    case sectionFooter
    case cell

    var id: String {
      return self.rawValue
    }

    var kind: String {
      return "Kind\(self.rawValue.capitalized)"
    }
  }

  // 2
  override public class var layoutAttributesClass: AnyClass {
    return CustomLayoutAttributes.self
  }

  // 3
  override public var collectionViewContentSize: CGSize {
    return CGSize(width: collectionViewWidth, height: contentHeight)
  }

  // 4
  var settings = CustomLayoutSettings()
  private var oldBounds = CGRect.zero
  private var contentHeight = CGFloat()
  private var cache = [Element: [IndexPath: CustomLayoutAttributes]]()
  private var visibleLayoutAttributes = [CustomLayoutAttributes]()
  private var zIndex = 0

  // 5
  private var collectionViewHeight: CGFloat {
    return collectionView!.frame.height
  }

  private var collectionViewWidth: CGFloat {
    return collectionView!.frame.width
  }

  private var cellHeight: CGFloat {
    guard let itemSize = settings.itemSize else {
      return collectionViewHeight
    }

    return itemSize.height
  }

  private var cellWidth: CGFloat {
    guard let itemSize = settings.itemSize else {
      return collectionViewWidth
    }

    return itemSize.width
  }

  private var headerSize: CGSize {
    guard let headerSize = settings.headerSize else {
      return .zero
    }

    return headerSize
  }

  private var menuSize: CGSize {
    guard let menuSize = settings.menuSize else {
      return .zero
    }

    return menuSize
  }

  private var sectionsHeaderSize: CGSize {
    guard let sectionsHeaderSize = settings.sectionsHeaderSize else {
      return .zero
    }

    return sectionsHeaderSize
  }

  private var sectionsFooterSize: CGSize {
    guard let sectionsFooterSize = settings.sectionsFooterSize else {
      return .zero
    }

    return sectionsFooterSize
  }

  private var contentOffset: CGPoint {
    return collectionView!.contentOffset
  }
}
这是一个相当大的代码块,但是一旦你将其分解,它就相当简单:
- 1) 枚举是定义
CustomLayout的所有元素的不错选择。 这可以防止您使用字符串。 还记得黄金法则吗? 没有字符串=没有拼写错误。 - 2)
layoutAttributesClass计算属性提供了用于属性实例的类。 您必须返回CustomLayoutAttributes类型的类:在starter项目中找到的自定义类。 - 3)
UICollectionViewLayout的子类必须覆盖collectionViewContentSize计算属性。 - 4)
CustomLayout需要所有这些属性才能准备属性。 除了settings之外,它们都是fileprivate,因为settings可以由外部对象设置。 - 5)用作语法的计算属性,以避免以后的冗长重复。
现在您已完成声明,您可以专注于核心布局流程实现。
Step 2: Implementing the CollectionViewLayout Core Process
注意:以下代码需要清楚地了解核心布局工作流程
(Core Layout workflow)。
集合视图直接与CustomLayout对象一起使用,以管理整个布局过程。例如,集合视图在首次显示或调整大小时会询问布局信息。
在布局过程中,集合视图调用CustomLayout对象的必需方法。在动画更新等特定情况下可以调用其他可选方法。这些方法可以计算项目的位置,并为集合视图提供所需的信息。
要重写的前两个必需方法是:
prepare()shouldInvalidateLayout(forBoundsChange:)
prepare()是您执行确定布局中元素位置所需的任何计算的机会。 shouldInvalidateLayout(forBoundsChange :)用于定义CustomLayout对象再次执行核心进程(core process)的方式和时间。
让我们从实现prepare()开始。
打开CustomLayout.swift并将以下扩展名添加到文件末尾:
// MARK: - LAYOUT CORE PROCESS
extension CustomLayout {

  override public func prepare() {

    // 1
    guard let collectionView = collectionView,
      cache.isEmpty else {
      return
    }
    // 2
    prepareCache()
    contentHeight = 0
    zIndex = 0
    oldBounds = collectionView.bounds
    let itemSize = CGSize(width: cellWidth, height: cellHeight)

    // 3
    let headerAttributes = CustomLayoutAttributes(
      forSupplementaryViewOfKind: Element.header.kind,
      with: IndexPath(item: 0, section: 0)
    )
    prepareElement(size: headerSize, type: .header, attributes: headerAttributes)

    // 4
    let menuAttributes = CustomLayoutAttributes(
      forSupplementaryViewOfKind: Element.menu.kind,
      with: IndexPath(item: 0, section: 0))
    prepareElement(size: menuSize, type: .menu, attributes: menuAttributes)

    // 5
    for section in 0 ..< collectionView.numberOfSections {

      let sectionHeaderAttributes = CustomLayoutAttributes(
        forSupplementaryViewOfKind: UICollectionElementKindSectionHeader,
        with: IndexPath(item: 0, section: section))
      prepareElement(
        size: sectionsHeaderSize,
        type: .sectionHeader,
        attributes: sectionHeaderAttributes)

      for item in 0 ..< collectionView.numberOfItems(inSection: section) {
        let cellIndexPath = IndexPath(item: item, section: section)
        let attributes = CustomLayoutAttributes(forCellWith: cellIndexPath)
        let lineInterSpace = settings.minimumLineSpacing
        attributes.frame = CGRect(
          x: 0 + settings.minimumInteritemSpacing,
          y: contentHeight + lineInterSpace,
          width: itemSize.width,
          height: itemSize.height
        )
        attributes.zIndex = zIndex
        contentHeight = attributes.frame.maxY
        cache[.cell]?[cellIndexPath] = attributes
        zIndex += 1
      }

      let sectionFooterAttributes = CustomLayoutAttributes(
        forSupplementaryViewOfKind: UICollectionElementKindSectionFooter,
        with: IndexPath(item: 1, section: section))
      prepareElement(
        size: sectionsFooterSize,
        type: .sectionFooter,
        attributes: sectionFooterAttributes)
    }

    // 6
    updateZIndexes()
  }
}
依次对每个注释部分进行说明:
- 1)
Prepare工作是资源密集型的,可能会影响性能。因此,您将在创建时缓存计算的属性。在执行之前,您必须检查cache字典是否为空。这对于不弄乱旧的和新的属性attributes实例至关重要。 - 2) 如果
cache字典为空,则必须正确初始化它。通过调用prepareCache()来完成此操作。这将在此解释之后实施。 - 3)
stretchy header是集合视图的第一个元素。因此,您首先考虑其attributes。您创建CustomLayoutAttributes类的实例,然后将其传递给prepareElement(size:type:attributes)。同样,您稍后将实现此方法。暂时记住每次创建自定义元素时,必须调用此方法才能正确缓存其属性attributes。 - 4) 粘性菜单是集合视图的第二个元素。您可以像以前一样计算其属性
attributes。 - 5) 这个循环是核心布局
core layout过程中最重要的。对于集合视图的每个section中的每个item,您:- 为
section's header创建和准备属性attributes。 - 创建
items的属性attributes。 - 将它们与特定的
indexPath相关联。 - 计算并设置
item的frame和zIndex。 - 更新
UICollectionView的contentHeight。 - 使用
type(在本例中为单元格)和元素的indexPath作为键将新创建的属性存储在cache字典中。 - 最后,您可以为
section's footer创建和准备属性attributes。
- 为
- 6) 最后但并非最不重要的是,您调用方法来更新所有
zIndex值。稍后您将发现有关updateZIndexes()的详细信息,您将了解为什么这样做非常重要。
接下来,在prepare()下面添加以下方法:
override public func shouldInvalidateLayout(forBoundsChange newBounds: CGRect) -> Bool {
  if oldBounds.size != newBounds.size {
    cache.removeAll(keepingCapacity: true)
  }
  return true
}在shouldInvalidateLayout(forBoundsChange :)中,您必须定义如何以及何时使prepare()执行的计算无效。 每次其bounds属性更改时,集合视图collection view都会调用此方法。 请注意,每次用户滚动时,集合视图的bounds属性都会更改。
您始终返回true,如果bounds size更改,这意味着集合视图从纵向portrait模式转换为横向landscape模式,反之亦然,您也清除缓存字典。
缓存清除是必要的,因为更改设备的方向会触发重新绘制集合视图的frame。 因此,所有存储的属性都不适合新集合视图的frame。
接下来,您将实现prepare()中调用的所有尚未实现方法:
将以下内容添加到扩展程序的底部:
private func prepareCache() {
  cache.removeAll(keepingCapacity: true)
  cache[.header] = [IndexPath: CustomLayoutAttributes]()
  cache[.menu] = [IndexPath: CustomLayoutAttributes]()
  cache[.sectionHeader] = [IndexPath: CustomLayoutAttributes]()
  cache[.sectionFooter] = [IndexPath: CustomLayoutAttributes]()
  cache[.cell] = [IndexPath: CustomLayoutAttributes]()
}这个方法的第一件事就是清空cache字典。 接下来,对于每个元素系列,它使用元素类型type作为主键重置所有嵌套字典。 indexPath将是用于标识缓存属性(cached attributes)的辅助(第二)键。
接下来,您将实现prepareElement(size:type:attributes :)。
将以下定义添加到扩展的末尾:
private func prepareElement(size: CGSize, type: Element, attributes: CustomLayoutAttributes) {
  //1
  guard size != .zero else {
    return
  }
  //2
  attributes.initialOrigin = CGPoint(x:0, y: contentHeight)
  attributes.frame = CGRect(origin: attributes.initialOrigin, size: size)
  // 3
  attributes.zIndex = zIndex
  zIndex += 1
  // 4
  contentHeight = attributes.frame.maxY
  // 5
  cache[type]?[attributes.indexPath] = attributes
}
以下是对上述情况的逐步说明:
- 1) 检查元素是否具有有效
size。 如果元素没有size,则没有理由缓存其属性attributes - 2) 接下来,将
frame的origin值分配给属性的initialOrigin属性。 为了稍后计算视差和粘性变换,必须备份元素的初始位置。 - 3) 接下来,指定
zIndex值以防止不同元素之间的重叠。 - 4) 创建并保存所需信息后,更新集合视图的
contentHeight,因为您已向UICollectionView添加了新元素。 执行此更新的一种智能方法是将属性的frame maxY值分配给contentHeight属性。 - 5) 最后,使用元素
type和indexPath作为唯一键将属性attributes添加到cache字典中。
最后是时候实现在prepare()结束时调用的updateZIndexes()。
将以下内容添加到扩展程序的底部:
private func updateZIndexes(){
  guard let sectionHeaders = cache[.sectionHeader] else {
    return
  }
  var sectionHeadersZIndex = zIndex
  for (_, attributes) in sectionHeaders {
    attributes.zIndex = sectionHeadersZIndex
    sectionHeadersZIndex += 1
  }
  cache[.menu]?.first?.value.zIndex = sectionHeadersZIndex
}此方法将渐进的zIndex值分配给section headers。计数从分配给单元格的最后一个zIndex开始。最大的zIndex值分配给菜单的属性attributes。这种重新分配对于具有一致的粘性行为是必要的。如果未调用此方法,则给定section的单元格将具有比section headers更大的zIndex。这会在滚动时造成难看的重叠效果。
要完成CustomLayout类并使布局核心进程core process正常工作,您需要实现一些required的方法:
layoutAttributesForSupplementaryView(ofKind:at:)layoutAttributesForItem(at:)layoutAttributesForElements(in:)
这些方法的目标是在正确的时间为正确的元素提供正确的属性。更具体地,两个第一方法为集合视图提供特定supplementary视图或特定单元的属性。第三个方法返回给定时刻显示元素的布局属性。
//MARK: - PROVIDING ATTRIBUTES TO THE COLLECTIONVIEW
extension CustomLayout {

  //1
  public override func layoutAttributesForSupplementaryView(
    ofKind elementKind: String,
    at indexPath: IndexPath) -> UICollectionViewLayoutAttributes? {

  switch elementKind {
    case UICollectionElementKindSectionHeader:
      return cache[.sectionHeader]?[indexPath]

    case UICollectionElementKindSectionFooter:
      return cache[.sectionFooter]?[indexPath]

    case Element.header.kind:
      return cache[.header]?[indexPath]

    default:
      return cache[.menu]?[indexPath]
    }
  }

  //2
  override public func layoutAttributesForItem(
    at indexPath: IndexPath) -> UICollectionViewLayoutAttributes? {
      return cache[.cell]?[indexPath]
  }

  //3
  override public func layoutAttributesForElements(
    in rect: CGRect) -> [UICollectionViewLayoutAttributes]? {
      visibleLayoutAttributes.removeAll(keepingCapacity: true)
      for (_, elementInfos) in cache {
        for (_, attributes) in elementInfos where attributes.frame.intersects(rect) {
          visibleLayoutAttributes.append(attributes)
        }
      }
      return visibleLayoutAttributes
  }
}
下面进行细分:
- 1) 在
layoutAttributesForSupplementaryView(ofKind:at :)中,您可以打开元素kind属性并返回与正确kind和indexPath匹配的缓存属性attributes。 - 2) 在
layoutAttributesForItem(at :)中,您对单元格的属性执行完全相同的操作。 - 3) 在
layoutAttributesForElements(in :)中,清空visibleLayoutAttributes数组(您将存储visibile属性)。 接下来,迭代所有缓存的属性,并仅向数组添加可见元素。 要确定元素是否可见,请测试其frame是否与集合视图的frame相交。 最后返回visibleAttributes数组。
后记
本篇主要讲述了基于自定义UICollectionViewLayout布局的简单示例,感兴趣的给个赞或者关注~~~