

项目现状:每次有新版本发布时,需要用户自己去手动点击下载,然后手动一步步操作安装,每次都要去重新选择安装目录等,过程较为耗时,也需要用户去手动操作,用户体验不佳。
方案: 采用electron-builder配合electron-updater实现自动更新
electron 的打包可以采用electron-packager及electron-builder两种方式实现,经过对比之后发现electron-builder有比electron-packager有更丰富的的功能,支持更多的平台,同时也支持了自动更新。除了这几点之外,由electron-builder打出的包更为轻量,并且可以打包出不暴露源码的setup安装程序,所以将方案选为后者。
步骤:
A. 安装 electron-updater 包模块
npm install electron-updater --save
B. 配置package.json文件里的build
"build": {
    "productName": "uWorker",   //项目名 这也是生成的exe文件的前缀名
    "appId": "xxxx",   //项目的appid
    "copyright": "xxx", //版权  信息
    "directories": {
      "output": "dist"  // 输出的文件夹
    },
    "publish": [
      {
        "provider": "generic",  //服务器提供商 也可以是GitHub等等
        "url": "http://127.0.0.1/",//更新服务器地址,用本地服务做测试
      }
    ],
    "dmg": {
      "background": "../build/body-background.jpg",
      "window": {
        "x": 400,
        "y": 100,
        "width": 1100,
        "height": 709
      }
    }
    "mac": {
      "icon": "build/icons/icon.icns", // mac的图标路径
      "artifactName": "${productName}_setup_${version}.${ext}" // 打出来的包所带的版本信息名
    },
    "win": {
      "icon": "build/icons/icon.ico", // windows的图标路径,
      // 打包出来之后的结果
      "target": [
        "nsis",
        "zip"
      ],
      "artifactName": "${productName}_setup_${version}.${ext}" // 打出来的包所带的版本信息名
    },
    "nsis": {
        "oneClick": false, // 一键安装
        "perMachine": true, // 是否开启安装时权限限制(此电脑或当前用户)
        "allowElevation": true, // 允许请求提升。 如果为false,则用户必须使用提升的权限重新启动安装程序。
        "allowToChangeInstallationDirectory": true, // 允许修改安装目录
        "installerIcon": "../build/icons/icon.icns", // 安装图标
        "uninstallerIcon": "../build/icons/icon.icns", //卸载图标
        "installerHeaderIcon": "../build/icons/icon.icns", // 安装时头部图标
        "createDesktopShortcut": true, // 创建桌面图标
        "createStartMenuShortcut": true, // 创建开始菜单图标
    }
    "linux": {
      "icon": "build/icons",
      "artifactName": "${productName}_setup_${version}.${ext}"
    }
  }
  "scripts": {
    "builder": "electron-builder"
  }
- 要打包成安装程序的话我们有两种方式,a.使用NSIS工具对我们的文件夹再进行一次打包,打包成exe; b.通过electron-builder的nsis直接打包成exe.这个nsis的配置指的是安装过程的重要配置,如果不配置nsis那么应用程序就会自动的安装在C盘。没有用户选择的余地,这样是不友好的(这里的nsis是一些基础的的配置,支持引入自定义的nsis脚本,来完成一些定制化的需求)。
注意: 配置了publish会生成latest.yml文件,用于自动更新的配置信息;不要自己轻易去修改该文件。如果文件有误,需要重打包获取新的latest.yml文件。
C. 打包操作
npm run builder
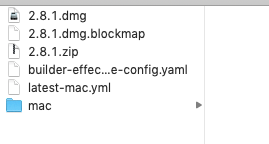
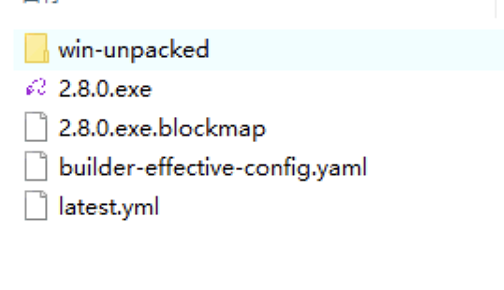
配置了publish之后在mac上会生成.dmg的包以及latest-mac.yml文件; 在windows上会生成.exe的包以及latest.yaml, 这是实现自动更新的关键。根据latest.yaml里的版本信息去判断是否有新版本,需要进行下载安装。
// windows 下的latest.yml
version: 2.8.0

files:

        - url: 2.8.0.exe

        sha512:  FmSi6nU1PJ1LRQIBjuvaw0TG32KHPM76FlGMRcWrSNOs7XGeaUALspgOKknTFYzuqmjEJk6JiHGNOm/UH+wDLw==

size: 42463133

// 当target选择nsis和zip等时候,此时的files里会有多项,所以path是指定下载时候对于服务器上的下载文件地址,如果是mac的话指的的.zip.   sha512参数是在下载时候做校验的,以确保下载的是正确的新版本
path: 2.8.0.exe

sha512: FmSi6nU1PJ1LRQIBjuvaw0TG32KHPM76FlGMRcWrSNOs7XGeaUALspgOKknTFYzuqmjEJk6JiHGNOm/UH+wDLw==

releaseDate: '2020-01-21T02:24:38.716Z'
D. 配置主进程main.js文件,引入 electron-updater 文件,添加自动更新检测和事件监听(一定要是主进程main.js文件(或主进程main中的index.js文件),否则会报错)
const {app, BrowserWindow,Menu,ipcMain} = require('electron')
const path = require('path')
const package = {
    version:"2.8.1",
    productEnv:"development",// development products
    feedUrl:"http://127.0.0.1/"
};

// Keep a global reference of the window object, if you don't, the window will
// be closed automatically when the JavaScript object is garbage collected.
let mainWindow;

// ===============================================================更新区
// ===============================================================更新区
// ===============================================================更新区
const autoUpdater = require('electron-updater').autoUpdater;
// 检测更新,在你想要检查更新的时候执行,renderer事件触发后的操作自行编写
function updateHandle() {
    let message = {
        error: 'Check update is error.',
        checking: 'checking update now.',
        updateAva: 'has new packer is downing...',
        updateNotAva: 'is the lasted packer. do not to update   !',
    };
    const os = require('os');

    autoUpdater.setFeedURL(package.feedUrl);
    autoUpdater.on('error', function (error) {
        console.log('出错了', error)
        sendUpdateMessage({cmd:'error',message:error})
    });
    autoUpdater.on('checking-for-update', function (message) {
        sendUpdateMessage({cmd:'checking-for-update',message:message})
    });
    autoUpdater.on('update-available', function (message) {
        sendUpdateMessage({cmd:'update-available',message:message})
    });
    autoUpdater.on('update-not-available', function (message) {
        sendUpdateMessage({cmd:'update-not-available',message:message})
    });

    // 更新下载进度事件
    autoUpdater.on('download-progress', function (progressObj) {
        sendUpdateMessage({cmd:'download-progress',message:progressObj})
    })
    autoUpdater.on('update-downloaded', function (event, releaseNotes, releaseName, releaseDate, updateUrl) {
        sendUpdateMessage({cmd:'update-downloaded',message:{
            releaseNotes, releaseName, releaseDate, updateUrl
        }})
    });

    ipcMain.on('isUpdateNow', (e, arg)=>{
        // sendUpdateMessage({cmd:'isUpdateNow',message:arg})
        //some code here to handle event
        autoUpdater.quitAndInstall();
    });

    ipcMain.on("checkForUpdate",(e, arg)=>{
        //执行自动更新检查
        // sendUpdateMessage({cmd:'checkForUpdate',message:arg})
        autoUpdater.checkForUpdates();
    })

}

// 通过main进程发送事件给renderer进程,提示更新信息
function sendUpdateMessage(data) {
    mainWindow.webContents.send('message', data)
}
此处是在主进程中调用自动更新的api(事件触发可以在渲染进程中自定义并且通过ipcRenderer知会主进程),主进程中可以在对应的事件钩子里拿到对应的状态参数,如是否需要更新,下载包的进度,下载是否成功等。然后将这些通讯给渲染进程,可以将其反馈在界面上显示。
const ipcRenderer = require('electron').ipcRenderer;
ipcRenderer.on("staticData",function(event,data){
    // 获取配置项数据
    console.log('获取配置项数据', data)
    if(data.version) {
        Upd_version.innerText = data.version;
        if(typeof window.updateVerson == 'function') _app.innerText = data.version
    }
})

ipcRenderer.on('message',(event,data) => {
    // 初始化参数
    data = data || {};
    var message = data.message || {};
    console.log(data)

    // 需更新
    if(data.cmd == 'update-available'){
        Upd_app.style.display = "block";
        if(message.version) {
            console.log("正在更新到最新版本:v "+message.version);
            Upd_version.innerText = message.version;
        }
    }
    // 更新异常
    if(data.cmd == 'error'){
        console.log('error', data)
        Upd_lock = false;
        Upd_btn.innerText = "立即更新";

        if(message.errno == -4058){
            Upd_app.style.display = "none";
        }
    }
    // 下载中
    if(data.cmd == 'download-progress'){
        Upd_progress.value = Number(message.percent);
        Upd_percent = Number(message.percent);
    }
    // 下载完成
    if(data.cmd == 'update-downloaded'){
        // 下载完成 开始安装
        if(Upd_percent == 100){
            Upd_btn.innerText = "安装重启中...";
            ipcRenderer.send('isUpdateNow');
        }
    }
});
setTimeout(function(){
    autoUpdate()
},500);
function autoUpdate(){
    if(Upd_lock) return false;
    Upd_lock = true;
    Upd_btn.innerText = "版本更新中.";
    ipcRenderer.send('checkForUpdate');
}
渲染进程接受这些状态然后进行反馈,当下载成功时进询问用户。
E. 现在可以去模拟测试了,以windows的为例,安装刚刚打包出来的2.8.0的应用,然后再将版本号改为2.8.1,然后进行打包,并且部署到publish里设置的url服务目录下(用了IIS开了本地服务,不过刚开始一直失败,原来是要为.yml添加MIME的扩展类型~)
效果如上视频所示,autoUpdater会检测到有新版本并且进行下载,在下载完成后可以自己选择弹框询问用户是否立即更新,用户选择确定之后,会去调用autoUpdater.quitAndInstall(),会退出当前的应用并且安装刚刚下载好的新版本
