

项目地址 github.com/wudiufo/Web…
知识点概览:
Loader,HMR ,Create React App, Caching, Plugin, SourceMap,Vue Cli 3.0 ,Shimming, WebpackDevServer,TreeShaking, CodeSplitting, Babel, React , Library, Eslint ,PWA, Vue, Mode,性能优化,多页应用,原理, PreLoading, PreFetching ,环境变量,TypeScript
收获:
彻底学会Webpack的配置 理解 Webpack的作用及原理 上手项目的打包过程配置 拥有工程化的前端思维 步入高级前端工程师行列
一:初识Webpack
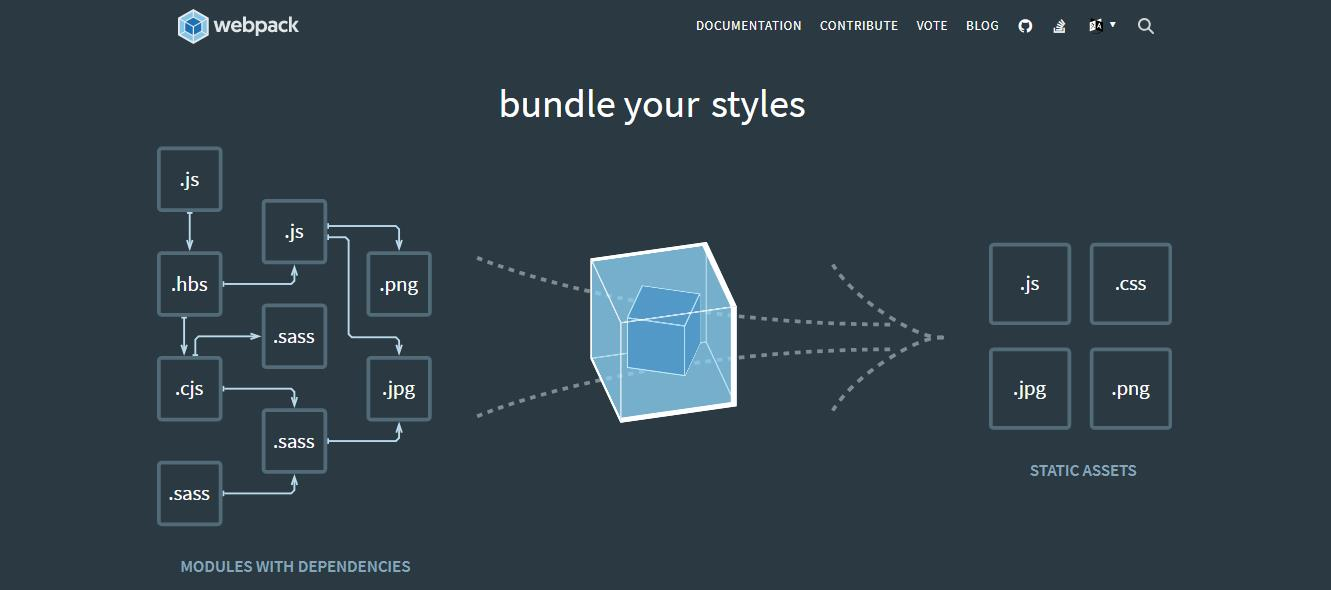
官网图镇楼:
1. 1 什么是WebPack
webpack 是一个现代 JavaScript 应用程序的静态模块打包工具:它做的事情是,分析你的项目结构,找到JavaScript模块以及其它的一些浏览器不能直接运行的拓展语言(Scss,TypeScript等),并生成一个或多个 bundle,将其打包为合适的格式以供浏览器使用。
webpack构建:
构建就是把源代码转换成发布到线上的可执行 JavaScrip、CSS、HTML 代码,包括如下内容。
1.代码转换:TypeScript 编译成 JavaScript、SCSS或Less 编译成 CSS 等。
2.文件优化:压缩 JavaScript、CSS、HTML 代码,压缩合并图片等。
3.代码分割:提取多个页面的公共代码、提取首屏不需要执行部分的代码让其异步加载。
4.模块合并:在采用模块化的项目里会有很多个模块和文件,需要构建功能把模块分类合并成一个文件。
5.自动刷新:监听本地源代码的变化,自动重新构建、刷新浏览器,nodemon。
6.代码校验:在代码被提交到仓库前需要校验代码是否符合规范,以及单元测试是否通过。
7.自动发布:更新完代码后,自动构建出线上发布代码并传输给发布系统。
构建其实是工程化、自动化思想在前端开发中的体现,把一系列流程用代码去实现,让代码自动化地执行这一系列复杂的流程。 构建给前端开发注入了更大的活力,解放了我们的生产力,更加方便了我们的开发。
1.2 什么是 webpack 模块
-
CommonJS
require()语句 -
AMD
define和require语句 -
css/sass/less 文件中的
@import语句。 -
样式(
url(...))或 HTML 文件(<img src=...>)中的图片链接
1.3 搭建Webpack环境
-
去官网下载node
// 查看node版本号
node -v
// 查看npm版本号
npm -v
1.4 初始化项目
mkdir webpack-productname
cd webpack-productname
//初始化webpack配置清单package.json
npm init -y
1.5 安装webpack
//全局安装(不推荐),因为如果有两个项目用了webpack不同版本,就会出现版本不统一运行不起来的情况。只有卸了当前版本安装对应版本非常麻烦。
npm install webpack webpack-cli -g
//查看版本
webpack -v
//全局卸载
npm uninstall webpack webpack-cli -g
//在项目里安装webpack(推荐使用)。可以在不同项目中使用不同的webpack版本。
cd webpack-productname
npm install webpack webpack-cli -D
//查看版本
npx webpack -v
//查看对应包的详细信息
npm info webpack
//安装指定版本包
npm install webpack@4.16.1 webpack-cli -D
注意:
由于npm安装走的是国外的网络,比较慢容易出现安装失败的现象。
可以用yarn安装,首先得全局安装yarn,
npm install yarn -g。或使用nrm快速切换npm源,首先得全局安装nrm,
npm install -g nrm。nrm 使用:
nrm ls 查看可选源。
nrm test npm 测试速度。看哪个快就use哪个。
nrm use cnpm 使用cnpm 。
webpack-cli:使我们们可以在命令行里正确的使用webpack
1.6 webpack的配置文件
webpack 开箱即用,可以无需使用任何配置文件。然而,webpack 会假定项目的入口起点为 src/index,然后会在 dist/main.js 输出结果,并且在生产环境开启压缩和优化。通常,你的项目还需要继续扩展此能力,为此你可以在项目根目录下创建一个 webpack.config.js 文件,webpack 会自动使用它。
在项目根目录下创建 webpack.config.js 文件,这是webpack默认配置文件
const path = require('path')

module.exports = {
    //默认是production,打包的文件默认被压缩。开发时可以设置为development,不被压缩
    mode:'production',
    //打包项目的入口文件
    entry: './index.js',
    //打包项目的输出文件
    output: {
        //自定义打包输出文件名
        filename:'bundle.js',
        //输出文件的绝对路径
        path: path.resolve(__dirname,'bundle')
    }
}
也可以自己指定配置文件来完成webpack的打包:
npx webpack --config + 自定义配置文件
1.7 webpack打包输出内容
执行 `npm run build` 后,在控制台输出

Hash:1b245e275a547956bf52 //本次打包对应唯一一个hash值
Version:webpack 4.29.6 //本次打包对应webpack版本
Time:162ms Built at:2019-4-11 23:13:43 //本次打包耗时,及打包的时间
Asset Size Chunks Chunk Names //打包后的文件名,大小,id,入口文件名
bundle.js 1.36 KiB 0 [emitted] main
Entrypoint main=bundle.js
[0]./src/index.js 159 bytes {0}[built]
[1]./src/header.js 187 bytes {e}[built]
[2]./src/sidebar.js 193 bytes {e}[built]
[3]./src/content.js 193 bytes {e} [built]
二:Webpack核心概念
LOADER
2.1 什么是Loader
webpack可以使用 loader 来预处理文件,就是通过使用不同的Loader,webpack可以把不同的静态文件都编译成js文件,比如css,sass,less,ES6/7,vue,JSX等。
使用Loader打包静态资源
支持加载图片文件:
需要安装 file-loader:解决CSS等文件中的引入图片路径问题
npm install file-loader -D
在 webpack.config.js 里添加 loader 配置
module.exports = {
    //配置模块,主要用来配置不同文件的加载器
  module: {
      //配置模块规则
    rules: [
      {
        test: /\.(png|jpg|gif)$/, //正则匹配要使用相应loader的文件
        use: [
          {
            loader: 'file-loader', //要用到的loader
              options: {
                  //palceholder占位符
                  name:'[name].[ext]', //打包后的图片名字,后缀和打包的之前的图片一样
                  outputPath: 'images/' //图片打包后的地址
              },
          },
        ],
      },
    ],
  },
};
详细请看官方文档:file-loader
将小图片转换成base64格式
需要安装 url-loader:当图片小于limit的时候会把图片BASE64编码,大于limit参数的时候还是使用file-loader 进行拷贝
npm install url-loader -D
在 webpack.config.js 里添加 loader 配置
module.exports = {
  module: {
    rules: [
      {
        test: /\.(png|jpg|gif|bmp/)$/i,
        use: [
          {
            loader: 'url-loader',
            options: {
              name:'[name].[ext]',
              outputPath: 'images/',
              limit: 8192 //小于8192b,就可以转化成base64格式。大于就会打包成文件格式
            }
          }
        ]
      }
    ]
  }
}
详细请看官方文档:url-loader
支持加载样式CSS文件:
需要安装 css-loader style-loader:
npm install css-loader style-loader -D
在 webpack.config.js 里添加 loader 配置
module.exports = {
  module: {
    rules: [
      {
        test: /\.css$/, //匹配以css为后缀的文件
        use: ['style-loader', 'css-loader'],//loader的执行顺序是从右向左,从下到上。css-loader:分析几个css文件之间的关系,最终合并为一个css。style-loader:在得到css生成的内容时,把其挂载到html的head里,成为内联样式。
      },
    ],
  },
};
支持加载样式SASS文件:
需要安装 sass-loader node-sass:
npm install sass-loader node-sass -D
在 webpack.config.js 里添加 loader 配置
module.exports = {
    ...
    module: {
        rules: [{
            test: /\.scss$/,
            use: [
                "style-loader", // 将 JS 字符串生成为 style 节点
                "css-loader", // 将 CSS 转化成 CommonJS 模块
                "sass-loader" // 将 Sass 编译成 CSS,默认使用 Node Sass
            ]
        }]
    }
};
为 css 样式属性加不同浏览器的前缀
为了浏览器的兼容性,有时候我们必须加入-webkit,-ms,-o,-moz这些前缀
- Trident内核:主要代表为IE浏览器, 前缀为-ms
- Gecko内核:主要代表为Firefox, 前缀为-moz
- Presto内核:主要代表为Opera, 前缀为-o
- Webkit内核:产要代表为Chrome和Safari, 前缀为-webkit
npm i postcss-loader autoprefixer -D
在项目跟目录下创建 postcss.config.js
module.exports = {
    plugins: [
        require('autoprefixer')
    ]
}
webpack.config.js
module.exports = {
    ...
    module: {
        rules: [{
            test: /\.scss$/,
            use: [
                "style-loader", // 将 JS 字符串生成为 style 节点
                "css-loader", // 将 CSS 转化成 CommonJS 模块
                'postcss-loader',//配置在css-loader后,在sass|less|stylus-loader 之前。
                "sass-loader" // 将 Sass 编译成 CSS,默认使用 Node Sass

            ]
        }]
    }
};
给loader加一些配置项:
webpack.config.js
module.exports = {
    ...
    module: {
        rules: [{
            test: /\.scss$/,
            use: [
                "style-loader",
                {
                 	loader: "css-loader",
                    options:{
                        importLoaders:2 ,//如果sass文件里还引入了另外一个sass文件,另一个文件还会从sass-loader向上解析。如果不加,就直接从css-loader开始解析。// 0 => no loaders (default); 1 => postcss-loader; 2 => postcss-loader, sass-loader
                        modules: true //开启css的模块打包。css样式不会和其他模块发生耦合和冲突
                    }
                },
                'postcss-loader',
                "sass-loader",

            ]
        }]
    }
};
为字体图标文件配loader
在 阿里巴巴矢量图标库中,把需要的字体图标下载到本地,解压。将iconfont.eot iconfont.svg iconfont.ttf iconfont.woff 文件放入到项目中,在src中新建一个放字体图标的文件夹font。将iconfont.css文件拷贝到项目中,自己改一下引入字体图标的路径。
需要安装 file-loader:
npm i file-loader -D
webpack.config.js
module.exports = {
    ...
    module: {
        rules: [{
            test: /\.(eot|ttf|svg|woff)$/,
            use:{
                loader:'file-loader'
            }
        },
            ]
        }]
    }
};
详细请看官方文档:asset-management
plugin : 可以在webpack运行到某个时刻的时候,帮你做一些事情
使用plugins让打包更便捷
HtmlWebpackPlugin :htmlWebpackPlugin 会在打包结束后,自动生成一个html文件,并把打包生成的js自动引入到这个html文件中
安装:npm i html-webpack-plugin -D
基本用法:在 webpack.config.js 中:
const HtmlWebpackPlugin = require('html-webpack-plugin');
const path = require('path');

module.exports = {
  entry: 'index.js',
  output: {
    path: path.resolve(__dirname, './dist'),
    filename: 'index_bundle.js'
  },
    plugins: [new HtmlWebpackPlugin({
        template: 'src/index.html' //以index.html为模板,把打包生成的js自动引入到这个html文件中
    })]
};
CleanWebpackPlugin :自动清除上一次打包的dist文件
安装:npm i clean-webpack-plugin -D
基本用法:在 webpack.config.js 中:
const HtmlWebpackPlugin = require('html-webpack-plugin');
const CleanWebpackPlugin = require('clean-webpack-plugin');
const path = require('path');

module.exports = {
  entry: 'index.js',
  output: {
    path: path.resolve(__dirname, './dist'),
    filename: 'index_bundle.js'
  },
    plugins: [
        new HtmlWebpackPlugin({
        template: 'src/index.html' //在打包之后,以.html为模板,把打包生成的js自动引入到这个html文件中
    }),
        new CleanWebpackPlugin(['dist']), // 在打包之前,可以删除dist文件夹下的所有内容

    ]
};
Entry与Output的基础配置
在打包多入口文件时的配置
基本用法:在 webpack.config.js 中:
const HtmlWebpackPlugin = require('html-webpack-plugin');
const CleanWebpackPlugin = require('clean-webpack-plugin');
const path = require('path');

module.exports = {
  entry: {
   	main: './src/index.js',
    sub: './src/index.js'
  },
  output: {
    publicPath: 'http://cdn.com.cn', //将注入到html中的js文件前面加上地址
    path: path.resolve(__dirname, 'dist'),
    filename: '[name].js'
  },
    plugins: [
        new HtmlWebpackPlugin({
        template: 'src/index.html' //在打包之后,以.html为模板,把打包生成的js自动引入到这个html文件中
    }),
        new CleanWebpackPlugin(['dist']), // 在打包之前,可以删除dist文件夹下的所有内容

    ]
};
详细请看官网:Output output-management
SourceMap 的配置
sourcemap:打包编译后的文件和源文件的映射关系,用于开发者调试用。
-
source-map 把映射文件生成到单独的文件,最完整但最慢
-
cheap-module-source-map 在一个单独的文件中产生一个不带列映射的Map
-
eval-source-map 使用eval打包源文件模块,在同一个文件中生成完整sourcemap
-
cheap-module-eval-source-map sourcemap和打包后的JS同行显示,没有映射列
development环境推荐使用: devtool: 'cheap-module-eval-source-map', production环境推荐使用: devtool: 'cheap-module-source-map',
webpack.config.js
const path = require('path');
const HtmlWebpackPlugin = require('html-webpack-plugin');
const CleanWebpackPlugin = require('clean-webpack-plugin');

module.exports = {
	mode: 'development',
    devtool: 'cheap-module-eval-source-map',
	//devtool:'none',//在开发者模式下,默认开启sourcemap,将其关闭
    //devtool:'source-map'//开启映射打包会变慢
    //devtool:'inline-source-map'//不单独生成.map文件,会将生成的映射文件以base64的形式插入到打包后的js文件的底部
    //devtool:'cheap-inline-source-map'//代码出错提示不用精确显示第几行的第几个字符出错,只显示第几行出错,会提高一些性能
    //devtool:'cheap-module-inline-source-map'//不仅管自己的业务代码出错,也管第三方模块和loader的一些报错
    //devtool:'eval'//执行效率最快,性能最好,但是针对比较复杂的代码的情况下,提示内容不全面
	//devtool: 'cheap-module-eval-source-map',//在开发环境推荐使用,提示比较全,打包速度比较快
    //devtool: 'cheap-module-source-map',//在生产环境中推荐使用,提示效果会好一些


	entry: {
		main: './src/index.js'
	},
	module: {
		rules: [{
			test: /\.(jpg|png|gif)$/,
			use: {
				loader: 'url-loader',
				options: {
					name: '[name]_[hash].[ext]',
					outputPath: 'images/',
					limit: 10240
				}
			}
		}, {
			test: /\.(eot|ttf|svg)$/,
			use: {
				loader: 'file-loader'
			}
		}, {
			test: /\.scss$/,
			use: [
				'style-loader',
				{
					loader: 'css-loader',
					options: {
						importLoaders: 2
					}
				},
				'postcss-loader',
				'sass-loader',

			]
		}]
	},
	plugins: [new HtmlWebpackPlugin({
		template: 'src/index.html'
	}), new CleanWebpackPlugin(['dist'])],
	output: {
		filename: '[name].js',
		path: path.resolve(__dirname, 'dist')
	}
}
详细请看官网:devtool
使用WebpackDevServer 提升开发效率
解决每次在src里编写完代码都需要手动重新运行 npm run dev
1.在 package.json 中配置
{
  "name": "haiyang",
  "version": "1.0.0",
  "description": "",
  "main": "index.js",
  "scripts": {
    "bundle": "webpack",
    "watch": "webpack --watch",// 加--watch自动监听代码的变化

  },

}
2.在 webpack.config.js 中,加 devServer
安装 npm i webpack-dev-server –D
- contentBase :配置开发服务运行时的文件根目录
- open :自动打开浏览器
- host:开发服务器监听的主机地址
- compress :开发服务器是否启动gzip等压缩
- port:开发服务器监听的端口
const path = require('path');
const HtmlWebpackPlugin = require('html-webpack-plugin');
const CleanWebpackPlugin = require('clean-webpack-plugin');

module.exports = {
	mode: 'development',
	devtool: 'cheap-module-eval-source-map',
	entry: {
		main: './src/index.js'
	},
+	devServer: {
		contentBase: './dist',
		open: true,
		port: 8080,
    	proxy: {//配置跨域,访问的域名会被代理到本地的3000端口
      		'/api': 'http://localhost:3000'
    	}
	},
	module: {
		rules: []
	},
	plugins: [],
	output: {
		filename: '[name].js',
		path: path.resolve(__dirname, 'dist')
	}
}
在 package.json 中:
{
  "name": "haiyang",
  "version": "1.0.0",
  "description": "",
  "main": "index.js",
  "scripts": {
    "bundle": "webpack",
    "watch": "webpack --watch",// 加--watch自动监听代码的变化
    "start": "webpack-dev-server",//配置热更新

  },

}
详细请看官网 :dev-server
扩充知识:自己写一个类似webpackdevserver的工具
了解即可,功能不全,自行扩展。
在 package.json 中:
{
  "name": "haiyang",
  "version": "1.0.0",
  "description": "",
  "main": "index.js",
  "scripts": {
    "bundle": "webpack",
    "watch": "webpack --watch",// 加--watch自动监听代码的变化
    "start": "webpack-dev-server",//配置热更新
+	"server" : "node server.js" //自己写一个类似webpackdevserver的工具
  },

}
安装 :npm i express webpack-dev-middleware -D
在 项目根目录下创建 server.js 文件
在 server.js 中
const express = require('express');
const webpack = require('webpack');
const webpackDevMiddleware = require('webpack-dev-middleware');
const config = require('./webpack.config.js');
const complier = webpack(config);

const app = express();

app.use(webpackDevMiddleware(complier, {}));

app.listen(3000, () => {
	console.log('server is running');
});
模块热替换(hot module replacement)
在 package.json 中:
{
  "name": "haiyang",
  "version": "1.0.0",
  "description": "",
  "main": "index.js",
  "scripts": {
    "start": "webpack-dev-server" //将文件打包到内存中,有助于开发
  },
}
在 webpack.config.js 中
const path = require('path');
const HtmlWebpackPlugin = require('html-webpack-plugin');
const CleanWebpackPlugin = require('clean-webpack-plugin');
const webpack = require('webpack');

module.exports = {
	mode: 'development',
	devtool: 'cheap-module-eval-source-map',
	entry: {
		main: './src/index.js'
	},
	devServer: {
		contentBase: './dist',
		open: true,
		port: 8080,
+		hot: true,//开启热更新
+		hotOnly: true//尽管html功能没有实现,也不让浏览器刷新
	},
	module: {
		rules: [{
			test: /\.(jpg|png|gif)$/,
			use: {
				loader: 'url-loader',
				options: {
					name: '[name]_[hash].[ext]',
					outputPath: 'images/',
					limit: 10240
				}
			}
		}, {
			test: /\.(eot|ttf|svg)$/,
			use: {
				loader: 'file-loader'
			}
		}, {
			test: /\.scss$/,
			use: [
				'style-loader',
				{
					loader: 'css-loader',
					options: {
						importLoaders: 2
					}
				},
				'postcss-loader',
				'sass-loader',

			]
		}, {
			test: /\.css$/,
			use: [
				'style-loader',
				'css-loader',
				'postcss-loader'
			]
		}]
	},
	plugins: [
		new HtmlWebpackPlugin({
			template: 'src/index.html'
		}),
		new CleanWebpackPlugin(['dist']),
+		new webpack.HotModuleReplacementPlugin() //使用模块热更新插件
	],
	output: {
		filename: '[name].js',
		path: path.resolve(__dirname, 'dist')
	}
}
index.js
//如果模块启用了HMR,就可以用 module.hot.accept(),监听模块的更新。
if (module.hot) {
  module.hot.accept('./library.js', function() {
    // 使用更新过的 library 模块执行某些操作...
  })
}
注意点:
引入css,用框架Vue,React 时,不需要写 module.hot.accept(),因为在使用css-loader,vue-loader,babel-preset时,就已经配置好了HMR,不需要自己写
详细请看官方文档:hot-module-replacement api/hot-module-replacement concepts/hot-module-replacement
使用 Babel 处理 ES6/7 语法 转义为ES5
BABEL官网:babeljs.io/setup
安装依赖包:
npm i babel-loader @babel/core @babel/preset-env -D
//生产依赖,兼容低版本浏览器
npm install --save @babel/polyfill
在 webpack.config.js 中
module: {
  rules: [
    {
        test: /\.js$/,
     	exclude: /node_modules/,//不需要对第三方模块进行转换,耗费性能
     	loader: "babel-loader" ,
        options:{
            "presets": [["@babel/preset-env",{
                targets: {//这个项目运行在大于什么版本的浏览器上,已经支持es6的语法的高版本浏览器就不需要转义成es5了
                    edge: "17",
                    firefox: "60",
                    chrome: "67",
                    safari: "11.1",
                  },
                useBuiltIns:'usage' //按需添加polyfill,把用到的代码都转成低版本浏览器兼容的
            }]]
        }
    }
  ]
}
在 index.js 中:
//在业务代码运行之前最顶部导入
import "@babel/polyfill";
注意:在开发类库,第三方模块或组件库时不能用 @babel/polyfill 这种方案,因为会把声明的变量变成全局变量,会污染全局环境。
安装:
npm install --save-dev @babel/plugin-transform-runtime
npm install --save @babel/runtime
npm install --save @babel/runtime-corejs2
在 webpack.config.js 中
module: {
  rules: [
    {
        test: /\.js$/,
     	exclude: /node_modules/,//不需要对第三方模块进行转换,耗费性能
     	loader: "babel-loader" ,
        options:{
            "plugins": [["@babel/plugin-transform-runtime",{
                "corejs": 2,
                "helpers": true,
                "regenerator": true,
                "useESModules": false
            }]]
        }
    }
  ]
}
由于babel需要配置的内容非常多,我们需要在项目根目录下创建一个 .babelrc 文件。
就不需要在 webpack.config.js 中写 babel 的配置了。
在 .babelrc 中:
{
            "plugins": [["@babel/plugin-transform-runtime",{
                "corejs": 2,
                "helpers": true,
                "regenerator": true,
                "useESModules": false
            }]]
        }
配置 React 代码的打包
业务代码:
在 .babelrc 中:
	{
            "presets": [
                ["@babel/preset-env",{
                targets: {
                    edge: "17",
                    firefox: "60",
                    chrome: "67",
                    safari: "11.1",
                  },
                useBuiltIns:'usage'
            		}
                ],
                "@babel/preset-react"
            ]
        }
//执行顺序:从下往上,从右向左的顺序
安装:
npm i react react-dom --save
npm install --save-dev @babel/preset-react
详细内容请看官网:babel-loader
三:Webpack进阶
Tree Shaking:只支持 ES Module 例如 import 和 export 的静态结构特性的引入。当引入一个模块时,不引入所有的代码,只引入需要的代码
在 webpack.config.js 中:
const path = require('path');
const HtmlWebpackPlugin = require('html-webpack-plugin');
const CleanWebpackPlugin = require('clean-webpack-plugin');
const webpack = require('webpack');

module.exports = {
	mode: 'development',
	devtool: 'cheap-module-eval-source-map',
	entry: {
		main: './src/index.js'
	},
	devServer: {
		contentBase: './dist',
		open: true,
		port: 8080,
		hot: true,
		hotOnly: true
	},
	module: {
		rules: []
	},
	plugins: [],
+	optimization: { //在开发环境中加,生产环境不加
		usedExports: true
	},
	output: {
		filename: '[name].js',
		path: path.resolve(__dirname, 'dist')
	}
}
在 package.json 中:
{
+ "sideEffects": ["*.css"], //对 所有的css文件 不使用Tree shaking。如果填 false,就是都需要用到Tree shaking
}
详细内容请看官网:tree-shaking
Develoment 和Production模式的区分打包
在项目根目录下创建两个文件,webpack.dev.js,webpack.prod.js
webpack.dev.js
const path = require('path');
const HtmlWebpackPlugin = require('html-webpack-plugin');
const CleanWebpackPlugin = require('clean-webpack-plugin');
const webpack = require('webpack');

module.exports = {
	mode: 'development',
	devtool: 'cheap-module-eval-source-map',
	entry: {
		main: './src/index.js'
	},
	devServer: {
		contentBase: './dist',
		open: true,
		port: 8080,
		hot: true,
		hotOnly: true
	},
	module: {
		rules: [{
			test: /\.js$/,
			exclude: /node_modules/,
			loader: 'babel-loader',
		}, {
			test: /\.(jpg|png|gif)$/,
			use: {
				loader: 'url-loader',
				options: {
					name: '[name]_[hash].[ext]',
					outputPath: 'images/',
					limit: 10240
				}
			}
		}, {
			test: /\.(eot|ttf|svg)$/,
			use: {
				loader: 'file-loader'
			}
		}, {
			test: /\.scss$/,
			use: [
				'style-loader',
				{
					loader: 'css-loader',
					options: {
						importLoaders: 2
					}
				},
				'postcss-loader',
				'sass-loader',

			]
		}, {
			test: /\.css$/,
			use: [
				'style-loader',
				'css-loader',
				'postcss-loader'
			]
		}]
	},
	plugins: [
		new HtmlWebpackPlugin({
			template: 'src/index.html'
		}),
		new CleanWebpackPlugin(['dist']),
		new webpack.HotModuleReplacementPlugin()
	],
	optimization: {
		usedExports: true
	},
	output: {
		filename: '[name].js',
		path: path.resolve(__dirname, 'dist')
	}
}
webpack.prod.js
const path = require('path');
const HtmlWebpackPlugin = require('html-webpack-plugin');
const CleanWebpackPlugin = require('clean-webpack-plugin');
const webpack = require('webpack');

module.exports = {
	mode: 'production',
	devtool: 'cheap-module-source-map',
	entry: {
		main: './src/index.js'
	},

	module: {
		rules: [{
			test: /\.js$/,
			exclude: /node_modules/,
			loader: 'babel-loader',
		}, {
			test: /\.(jpg|png|gif)$/,
			use: {
				loader: 'url-loader',
				options: {
					name: '[name]_[hash].[ext]',
					outputPath: 'images/',
					limit: 10240
				}
			}
		}, {
			test: /\.(eot|ttf|svg)$/,
			use: {
				loader: 'file-loader'
			}
		}, {
			test: /\.scss$/,
			use: [
				'style-loader',
				{
					loader: 'css-loader',
					options: {
						importLoaders: 2
					}
				},
				'postcss-loader',
				'sass-loader',

			]
		}, {
			test: /\.css$/,
			use: [
				'style-loader',
				'css-loader',
				'postcss-loader'
			]
		}]
	},
	plugins: [
		new HtmlWebpackPlugin({
			template: 'src/index.html'
		}),
		new CleanWebpackPlugin(['dist']),

	],

	output: {
		filename: '[name].js',
		path: path.resolve(__dirname, 'dist')
	}
}
在 package.json 中:
{
  "scripts": {
    "dev": "webpack-dev-server --config webpack.dev.js",
    "build": "webpack --config webpack.prod.js"
  },
}
解决 webpack.dev.js,webpack.prod.js 存在大量重复代码,在项目根目录下创建一个 webpack.common.js 文件,把公共代码提取出来
安装 :
npm i webpack-merge -D
webpack.common.js
const path = require('path');
const HtmlWebpackPlugin = require('html-webpack-plugin');
const CleanWebpackPlugin = require('clean-webpack-plugin');
const webpack = require('webpack');

module.exports = {

	entry: {
		main: './src/index.js'
	},

	module: {
		rules: [{
			test: /\.js$/,
			exclude: /node_modules/,
			loader: 'babel-loader',
		}, {
			test: /\.(jpg|png|gif)$/,
			use: {
				loader: 'url-loader',
				options: {
					name: '[name]_[hash].[ext]',
					outputPath: 'images/',
					limit: 10240
				}
			}
		}, {
			test: /\.(eot|ttf|svg)$/,
			use: {
				loader: 'file-loader'
			}
		}, {
			test: /\.scss$/,
			use: [
				'style-loader',
				{
					loader: 'css-loader',
					options: {
						importLoaders: 2
					}
				},
				'postcss-loader',
				'sass-loader',

			]
		}, {
			test: /\.css$/,
			use: [
				'style-loader',
				'css-loader',
				'postcss-loader'
			]
		}]
	},
	plugins: [
		new HtmlWebpackPlugin({
			template: 'src/index.html'
		}),
        new CleanWebpackPlugin(['dist'],{
            root:path.resolve(__dirname,'../')
        }),

	],

	output: {
		filename: '[name].js',
		path: path.resolve(__dirname, '../dist')
	}
}
webpack.dev.js
const webpack = require('webpack');
const merge = require('webpack-merge')
const commenConfig = require('./webpack.commin.js')

const devConfig = {
	mode: 'development',
	devtool: 'cheap-module-eval-source-map',

	devServer: {
		contentBase: './dist',
		open: true,
		port: 8080,
		hot: true,
		hotOnly: true
	},

	plugins: [
		new webpack.HotModuleReplacementPlugin()
	],
	optimization: {
		usedExports: true
	},
}
//将开发配置和公共配置做结合
module.exports = merge(commenConfig, devConfig)
webpack.prod.js
const merge = require('webpack-merge')
const commenConfig = require('./webpack.commin.js')

const prodConfig = {
	mode: 'production',
	devtool: 'cheap-module-source-map',
}
//将线上配置和公共配置做结合
module.exports = merge(commenConfig, prodConfig)
最后在根目录下创建一个build文件夹,将 webpack.common.js , webpack.dev.js ,webpack.prod.js 放在build文件夹下,统一管理。
在 package.json 中:
{
  "scripts": {
    "dev": "webpack-dev-server --config ./build/webpack.dev.js",
    "build": "webpack --config ./build/webpack.prod.js"
  },
}
详细请看官网文档:guides/production
Webpack和Code Splitting
安装: npm i lodash --save npm i babel-plugin-dynamic-import-webpack -D
代码分割,和webpack无关,为了提升性能 webpack中实现代码分割,两种方式:
第一种方法:同步代码: 只需要在webpack.common.js中做optimization的配置即可
第二种方法:异步代码(import): 异步代码,无需做任何配置,会自动进行代码分割,放置到新的文件中
第一种方法:在 webpack.common.js 中
module.exports = {
	entry: {
		main: './src/index.js'
	},

	module: {
		rules: []
	},
	plugins: [],
+    optimization:{
+       splitChunks:{ //启动代码分割,有默认配置项
+            chunks:'all'
+        }
+    },

	output: {}
}
第二种方法在 .babelrc 中:
{
	presets: [
		[
			"@babel/preset-env", {
				targets: {
					chrome: "67",
				},
				useBuiltIns: 'usage'
			}
		],
		"@babel/preset-react"
	],
+	plugins: ["dynamic-import-webpack"]
}
详细内容请看官网:code-splitting
SplitChunksPlugin 配置参数详解
安装:npm install --save-dev @babeL/plugin-syntax-dynamic-import
在业务 index.js 中:
 function getComponent() {
 	return import(/* webpackChunkName:"lodash" */ 'lodash').then(({ default: _ }) => {
 		var element = document.createElement('div');
		element.innerHTML = _.join(['1', '2'], '-');
 		return element;
	})
}

 getComponent().then(element => {
 	document.body.appendChild(element);
 });
在 .babelrc 中:
{
	presets: [
		[
			"@babel/preset-env", {
				targets: {
					chrome: "67",
				},
				useBuiltIns: 'usage'
			}
		],
		"@babel/preset-react"
	],
+	plugins: ["@babeL/plugin-syntax-dynamic-import"]
}
在 webpack.common.js 中:
module.exports = {
	entry: {
		main: './src/index.js'
	},

	module: {
		rules: []
	},
	plugins: [],
+    optimization:{
+       splitChunks:{ //启动代码分割,不写有默认配置项
+            chunks: 'all',//参数all/initial/async,只对所有/同步/异步进行代码分割
              minSize: 30000, //大于30kb才会对代码分割
              maxSize: 0,
              minChunks: 1,//打包生成的文件,当一个模块至少用多少次时才会进行代码分割
              maxAsyncRequests: 5,//同时加载的模块数最多是5个
              maxInitialRequests: 3,//入口文件最多3个模块会做代码分割,否则不会
              automaticNameDelimiter: '~',//文件自动生成的连接符
              name: true,
            cacheGroups:{//对同步代码走缓存组
             vendors: {
                  test: /[\\/]node_modules[\\/]/,
                  priority: -10,//谁优先级大就把打包后的文件放到哪个组
    			filename:'vendors.js'
                },
            default: {
              minChunks: 2,
              priority: -20,
              reuseExistingChunk: true,//模块已经被打包过了,就不用再打包了,复用之前的就可以
              filename:'common.js' //打包之后的文件名
            }
        }
+        }
+    },

	output: {}
}
详细请看官方文档:split-chunks-plugin
Lazy Loading 懒加载,Chunk是什么?
用户当前需要用什么功能就只加载这个功能对应的代码,也就是所谓的按需加载 在给单页应用做按需加载优化时,一般采用以下原则:
- 对网站功能进行划分,每一类一个chunk
- 对于首次打开页面需要的功能直接加载,尽快展示给用户
- 某些依赖大量代码的功能点可以按需加载
- 被分割出去的代码需要一个按需加载的时机
每一个文件就是一个 chunk
详细请看官方文档:lazy-loading
打包分析,Preloading,Prefetching
打开网址:webpack分析工具:https://github.com/webpack/analyse
在 package.json 中
{
  "scripts": {
    "dev-build": "webpack --profile --json > stats.json --config ./build/webpack.dev.js", //把打包过程的描述放在stats.json文件中
    "dev": "webpack-dev-server --config ./build/webpack.dev.js",
    "build": "webpack --config ./build/webpack.prod.js"
  },
}
在控制台运行 npm run dev-build ,在根目录下生成 stats.json 文件。打开网址 http://webpack.github.io/analyse/ ,把stats.json文件传上去,会出现分析结果。
详细请看官方文档:bundle-analysis 打包分析工具
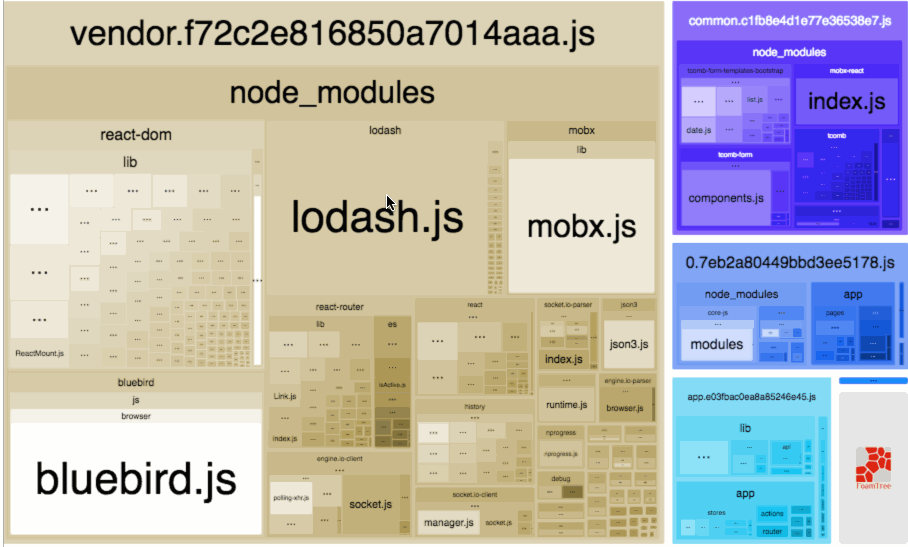
介绍 webpack-bundle-analyzer 的使用:
通过使用webpack-bundle-analyzer可以看到项目各模块的大小,可以按需优化。
官网图镇楼:
安装:
# NPM
npm install --save-dev webpack-bundle-analyzer
# Yarn
yarn add -D webpack-bundle-analyzer
配置:在 webpack.config.js 中:
const BundleAnalyzerPlugin = require('webpack-bundle-analyzer').BundleAnalyzerPlugin;

module.exports = {
  plugins: [
    new BundleAnalyzerPlugin(
    	{
              analyzerMode: 'server',
              analyzerHost: '127.0.0.1',
              analyzerPort: 8889,
              reportFilename: 'report.html',
              defaultSizes: 'parsed',
              openAnalyzer: true,
              generateStatsFile: false,
              statsFilename: 'stats.json',
              statsOptions: null,
              logLevel: 'info'
            }
    )
  ]
}
输出:在 package.json 中:
"analyz": "NODE_ENV=production npm_config_report=true npm run build"
在线分析:在 控制台输入:
webpack --profile --json > stats.json
- profile:记录下构建过程中的耗时信息;
- json:以 JSON 的格式输出构建结果,最后只输出一个 .json 文件,这个文件中包括所有构建相关的信息。
- Webpack 官方提供了一个可视化分析工具 Webpack Analyse
- Modules:展示所有的模块,每个模块对应一个文件。并且还包含所有模块之间的依赖关系图、模块路径、模块ID、模块所属 Chunk、模块大小;
- Chunks:展示所有的代码块,一个代码块中包含多个模块。并且还包含代码块的ID、名称、大小、每个代码块包含的模块数量,以及代码块之间的依赖关系图;
- Assets:展示所有输出的文件资源,包括 .js、.css、图片等。并且还包括文件名称、大小、该文件来自哪个代码块;
- Warnings:展示构建过程中出现的所有警告信息;
- Errors:展示构建过程中出现的所有错误信息;
- Hints:展示处理每个模块的过程中的耗时。
打开谷歌控制台查看代码使用率,按 ctrl+shift+p ,输入 coverage 查看。
预取/预加载模块(prefetch/preload module)
假如有一个HomePage组件,其内部有一个LoginButton.js登陆组件,再点击后按需加载 LoginModel 组件。
LoginButton.js:
import(/* webpackPrefetch: true */ 'LoginModal');
这会生成 <link rel="prefetch" href="login-modal-chunk.js"> 并追加到页面头部,指示着浏览器在闲置时间预取 login-modal-chunk.js 文件。就是说,只要首页加载完成,就会在空闲时间把登录模块也加载了。
总结:
/* webpackPrefetch: true */:把主加载流程加载完毕,在空闲时在加载其他,等再点击其他时,只需要从缓存中读取即可,性能更好。推荐使用,提高代码利用率。把一些交互后才能用到的代码写到异步组件里,通过懒加载的形式,去把这块的代码逻辑加载进来,性能提升,页面访问速度更快。
/* webpackPreload: true */: 和主加载流程一起并行加载。
详细请看官方文档:prefetchingpreloading-modules
CSS文件的代码分割
在 webpack.config.js 中
module.exports = {
	entry: {
		main: './src/index.js'
	},
    module: {

    },
    plugins: [],
	optimization: {
		splitChunks: {
      	 chunks: 'all'
    }
	},
	output: {
		filename: '[name].js',//入口文件打包后生成的文件名
+         chunkFilename: '[name].chunk.js',//main.js异步加载的间接的js文件。用来打包import('module')方法中引入的模块
		path: path.resolve(__dirname, '../dist')
	}
}
因为CSS的下载和JS可以并行,当一个HTML文件很大的时候,我们可以把CSS单独提取出来加载
- mini-css-extract-plugin:一般在线上环境使用这个插件,因为在开发环境中不支持HMR。
- filename 打包入口文件
- chunkFilename 用来打包
import('module')方法中引入的模块
安装 :
//抽离css文件
npm install --save-dev mini-css-extract-plugin
//压缩css文件
npm i optimize-css-assets-webpack-plugin -D
在 webpack.prod.js 中:
const MiniCssExtractPlugin = require("mini-css-extract-plugin");
const OptimizeCSSAssetsPlugin = require("optimize-css-assets-webpack-plugin");
const merge = require('webpack-merge');
const commonConfig = require('./webpack.common.js');


const prodConfig = {
	mode: 'production',
	devtool: 'cheap-module-source-map',
	module: {
		rules:[{
			test: /\.scss$/,
			use: [
+				MiniCssExtractPlugin.loader,
				{
					loader: 'css-loader',
					options: {
						importLoaders: 2
					}
				},
				'postcss-loader',
				'sass-loader',

			]
		}, {
			test: /\.css$/,
			use: [
+				MiniCssExtractPlugin.loader,
				'css-loader',
				'postcss-loader'
			]
		}]
	},
+	optimization: {
		minimizer: [new OptimizeCSSAssetsPlugin({})]
	},
	plugins: [
+		new MiniCssExtractPlugin({
			filename: '[name].css',//直接引用的css文件
			chunkFilename: '[name].chunk.css'//间接引用的css文件
		})
	]
}

module.exports = merge(commonConfig, prodConfig);
在 webpack.dev.js
const webpack = require('webpack');
const merge = require('webpack-merge');
const commonConfig = require('./webpack.common.js');

const devConfig = {
	mode: 'development',
	devtool: 'cheap-module-eval-source-map',
	devServer: {
		contentBase: './dist',
		open: true,
		port: 8080,
		hot: true
	},
	module: {
		rules: [{
			test: /\.scss$/,
			use: [
				'style-loader',
				{
					loader: 'css-loader',
					options: {
						importLoaders: 2
					}
				},
				'postcss-loader',
				'sass-loader',

			]
		}, {
			test: /\.css$/,
			use: [
				'style-loader',
				'css-loader',
				'postcss-loader'
			]
		}]
	},
	plugins: [
		new webpack.HotModuleReplacementPlugin()
	],
}

module.exports = merge(commonConfig, devConfig);
在 webpack.common.js 中:
const path = require('path');
const HtmlWebpackPlugin = require('html-webpack-plugin');
const CleanWebpackPlugin = require('clean-webpack-plugin');

module.exports = {
	entry: {
		main: './src/index.js',
	},
	module: {
		rules: [{
			test: /\.js$/,
			exclude: /node_modules/,
			loader: 'babel-loader',
		}, {
			test: /\.(jpg|png|gif)$/,
			use: {
				loader: 'url-loader',
				options: {
					name: '[name]_[hash].[ext]',
					outputPath: 'images/',
					limit: 10240
				}
			}
		}, {
			test: /\.(eot|ttf|svg)$/,
			use: {
				loader: 'file-loader'
			}
		}]
	},
	plugins: [
		new HtmlWebpackPlugin({
			template: 'src/index.html'
		}),
		new CleanWebpackPlugin(['dist'], {
			root: path.resolve(__dirname, '../')
		})
	],
	optimization: {
		usedExports: true,//TreeShaking
		splitChunks: {
      chunks: 'all'
    }
	},
	output: {
		filename: '[name].js',
		chunkFilename: '[name].chunk.js',
		path: path.resolve(__dirname, '../dist')
	}
}
在 package.json 中:
{
    "sideEffects": ["*.css"] //除了css文件,其余的都TreeShaking
}
详细请看官方文档:mini-css-extract-plugin
Webpack 与浏览器缓存(Caching)
在 webpack.common.js 中:
const path = require('path');
const HtmlWebpackPlugin = require('html-webpack-plugin');
const CleanWebpackPlugin = require('clean-webpack-plugin');

module.exports = {
	entry: {
		main: './src/index.js',
	},
	module: {
		rules: [{
			test: /\.js$/,
			exclude: /node_modules/,
			loader: 'babel-loader',
		}, {
			test: /\.(jpg|png|gif)$/,
			use: {
				loader: 'url-loader',
				options: {
					name: '[name]_[hash].[ext]',
					outputPath: 'images/',
					limit: 10240
				}
			}
		}, {
			test: /\.(eot|ttf|svg)$/,
			use: {
				loader: 'file-loader'
			}
		}]
	},
	plugins: [
		new HtmlWebpackPlugin({
			template: 'src/index.html'
		}),
		new CleanWebpackPlugin(['dist'], {
			root: path.resolve(__dirname, '../')
		})
	],
	optimization: {
+		runtimeChunk: {//兼容老版本webpack4,把manifest打包到runtime里,不影响业务代码和第三方模块
			name: 'runtime'
		},
		usedExports: true,
		splitChunks: {
      chunks: 'all',
      cacheGroups: {
      	vendors: {
      		test: /[\\/]node_modules[\\/]/,
      		priority: -10,
      		name: 'vendors',
      	}
      }
    }
	},
	performance: false,//禁止提示性能上的一些问题
+	output: {
		path: path.resolve(__dirname, '../dist')
	}
}
在 webpack.dev.js 中:
const webpack = require('webpack');
const merge = require('webpack-merge');
const commonConfig = require('./webpack.common.js');

const devConfig = {
	mode: 'development',
	devtool: 'cheap-module-eval-source-map',
	devServer: {
		contentBase: './dist',
		open: true,
		port: 8080,
		hot: true
	},
	module: {
		rules: [{
			test: /\.scss$/,
			use: [
				'style-loader',
				{
					loader: 'css-loader',
					options: {
						importLoaders: 2
					}
				},
				'postcss-loader',
				'sass-loader',

			]
		}, {
			test: /\.css$/,
			use: [
				'style-loader',
				'css-loader',
				'postcss-loader'
			]
		}]
	},
	plugins: [
		new webpack.HotModuleReplacementPlugin()
	],
+	output: {
		filename: '[name].js',
		chunkFilename: '[name].js',
	}
}

module.exports = merge(commonConfig, devConfig);
在 webpack.prod.js 中:
const MiniCssExtractPlugin = require("mini-css-extract-plugin");
const OptimizeCSSAssetsPlugin = require("optimize-css-assets-webpack-plugin");
const merge = require('webpack-merge');
const commonConfig = require('./webpack.common.js');

const prodConfig = {
	mode: 'production',
	devtool: 'cheap-module-source-map',
	module: {
		rules:[{
			test: /\.scss$/,
			use: [
				MiniCssExtractPlugin.loader,
				{
					loader: 'css-loader',
					options: {
						importLoaders: 2
					}
				},
				'postcss-loader'
				'sass-loader',

			]
		}, {
			test: /\.css$/,
			use: [
				MiniCssExtractPlugin.loader,
				'css-loader',
				'postcss-loader'
			]
		}]
	},
	optimization: {
		minimizer: [new OptimizeCSSAssetsPlugin({})]
	},
	plugins: [
		new MiniCssExtractPlugin({
			filename: '[name].css',
			chunkFilename: '[name].chunk.css'
		})
	],
+	output: {
		filename: '[name].[contenthash].js', //源代码不变,hash值就不会变,解决浏览器缓存问题。打包上线时,用户只需要更新有变化的代码,没有变化的从浏览器缓存读取
		chunkFilename: '[name].[contenthash].js'
	}
}

module.exports = merge(commonConfig, prodConfig);
详细请看官网文档:manifest
Shimming (垫片)
在 webpack.common.js 中:
const path = require('path');
const HtmlWebpackPlugin = require('html-webpack-plugin');
const CleanWebpackPlugin = require('clean-webpack-plugin');
const webpack = require('webpack');

module.exports = {
	entry: {
		main: './src/index.js',
	},
	module: {
		rules: [{
			test: /\.js$/,
			exclude: /node_modules/,
			use: [{
				loader: 'babel-loader'
			}, {
				loader: 'imports-loader?this=>window'
			}]
		}, {
			test: /\.(jpg|png|gif)$/,
			use: {
				loader: 'url-loader',
				options: {
					name: '[name]_[hash].[ext]',
					outputPath: 'images/',
					limit: 10240
				}
			}
		}, {
			test: /\.(eot|ttf|svg)$/,
			use: {
				loader: 'file-loader'
			}
		}]
	},
	plugins: [
		new HtmlWebpackPlugin({
			template: 'src/index.html'
		}),
		new CleanWebpackPlugin(['dist'], {
			root: path.resolve(__dirname, '../')
		}),
+		new webpack.ProvidePlugin({
			$: 'jquery',//发现模块中有$字符串,就自动引入iquery,就可以用jquery
			_join: ['lodash', 'join']//_join代表lodash里的join方法
		}),
	],
	optimization: {
		runtimeChunk: {
			name: 'runtime'
		},
		usedExports: true,
		splitChunks: {
      chunks: 'all',
      cacheGroups: {
      	vendors: {
      		test: /[\\/]node_modules[\\/]/,
      		priority: -10,
      		name: 'vendors',
      	}
      }
    }
	},
	performance: false,
	output: {
		path: path.resolve(__dirname, '../dist')
	}
}
如果想让每个js模块的this都指向window:
安装: npm install imports-loader -D
在 webpack.common.js 中:
const path = require('path');
const HtmlWebpackPlugin = require('html-webpack-plugin');
const CleanWebpackPlugin = require('clean-webpack-plugin');
const webpack = require('webpack');

module.exports = {
	entry: {
		main: './src/index.js',
	},
	module: {
		rules: [{
			test: /\.js$/,
			exclude: /node_modules/,
			use: [{
				loader: 'babel-loader'
			}, {//每个js模块的this都指向window
+				loader: 'imports-loader?this=>window'
			}]
		}, {
			test: /\.(jpg|png|gif)$/,
			use: {
				loader: 'url-loader',
				options: {
					name: '[name]_[hash].[ext]',
					outputPath: 'images/',
					limit: 10240
				}
			}
		}, {
			test: /\.(eot|ttf|svg)$/,
			use: {
				loader: 'file-loader'
			}
		}]
	},
	plugins: [
		new HtmlWebpackPlugin({
			template: 'src/index.html'
		}),
		new CleanWebpackPlugin(['dist'], {
			root: path.resolve(__dirname, '../')
		}),
+		new webpack.ProvidePlugin({
			$: 'jquery',//发现模块中有$字符串,就自动引入iquery,就可以用jquery
			_join: ['lodash', 'join']//_join代表lodash里的join方法
		}),
	],
	optimization: {
		runtimeChunk: {
			name: 'runtime'
		},
		usedExports: true,
		splitChunks: {
      chunks: 'all',
      cacheGroups: {
      	vendors: {
      		test: /[\\/]node_modules[\\/]/,
      		priority: -10,
      		name: 'vendors',
      	}
      }
    }
	},
	performance: false,
	output: {
		path: path.resolve(__dirname, '../dist')
	}
}
详细请看官方文档:imports-loader shimming
环境变量的使用
只需要一个common.js文件通过在package.json中传递不同的参数,区分是开发环境还是生产环境。
在 package.json 中:
{
  "name": "haiyang",
  "sideEffects": [
    "*.css"
  ],
  "version": "1.0.0",
  "description": "",
  "main": "index.js",
  "scripts": {
    "dev-build": "webpack --config ./build/webpack.common.js",
    "dev": "webpack-dev-server --config ./build/webpack.common.js",
    "build": "webpack --env.production --config ./build/webpack.common.js" //通过--env.production,把环境变量传进去
  },
  "author": "",
  "license": "ISC",
  "devDependencies": {
    "@babel/core": "^7.2.0",
    "@babel/plugin-syntax-dynamic-import": "^7.2.0",
    "@babel/plugin-transform-runtime": "^7.2.0",
    "@babel/preset-env": "^7.2.0",
    "@babel/preset-react": "^7.0.0",
    "autoprefixer": "^9.3.1",
    "babel-loader": "^8.0.4",
    "clean-webpack-plugin": "^1.0.0",
    "css-loader": "^1.0.1",
    "express": "^4.16.4",
    "file-loader": "^2.0.0",
    "html-webpack-plugin": "^3.2.0",
    "imports-loader": "^0.8.0",
    "mini-css-extract-plugin": "^0.5.0",
    "node-sass": "^4.10.0",
    "optimize-css-assets-webpack-plugin": "^5.0.1",
    "postcss-loader": "^3.0.0",
    "sass-loader": "^7.1.0",
    "style-loader": "^0.23.1",
    "url-loader": "^1.1.2",
    "webpack-cli": "^3.1.2",
    "webpack-dev-middleware": "^3.4.0",
    "webpack-dev-server": "^3.1.10",
    "webpack-merge": "^4.1.5"
  },
  "dependencies": {
    "@babel/polyfill": "^7.0.0",
    "@babel/runtime": "^7.2.0",
    "@babel/runtime-corejs2": "^7.2.0",
    "jquery": "^3.3.1",
    "lodash": "^4.17.11",
    "react": "^16.6.3",
    "react-dom": "^16.6.3",
    "webpack": "^4.25.1"
  }
}
在 webpack.common.js 中:
const path = require('path');
const HtmlWebpackPlugin = require('html-webpack-plugin');
const CleanWebpackPlugin = require('clean-webpack-plugin');
const webpack = require('webpack');
const merge = require('webpack-merge');
const devConfig = require('./webpack.dev.js');
const prodConfig = require('./webpack.prod.js');
const commonConfig = {
	entry: {
		main: './src/index.js',
	},
	module: {
		rules: [{
			test: /\.js$/,
			exclude: /node_modules/,
			use: [{
				loader: 'babel-loader'
			}, {
				loader: 'imports-loader?this=>window'
			}]
		}, {
			test: /\.(jpg|png|gif)$/,
			use: {
				loader: 'url-loader',
				options: {
					name: '[name]_[hash].[ext]',
					outputPath: 'images/',
					limit: 10240
				}
			}
		}, {
			test: /\.(eot|ttf|svg)$/,
			use: {
				loader: 'file-loader'
			}
		}]
	},
	plugins: [
		new HtmlWebpackPlugin({
			template: 'src/index.html'
		}),
		new CleanWebpackPlugin(['dist'], {
			root: path.resolve(__dirname, '../')
		}),
		new webpack.ProvidePlugin({
			$: 'jquery',
			_join: ['lodash', 'join']
		}),
	],
	optimization: {
		runtimeChunk: {
			name: 'runtime'
		},
		usedExports: true,
		splitChunks: {
      chunks: 'all',
      cacheGroups: {
      	vendors: {
      		test: /[\\/]node_modules[\\/]/,
      		priority: -10,
      		name: 'vendors',
      	}
      }
    }
	},
	performance: false,
	output: {
		path: path.resolve(__dirname, '../dist')
	}
}

module.exports = (env) => {
	if(env && env.production) {//线上环境
		return merge(commonConfig, prodConfig);
	}else {//开发环境
		return merge(commonConfig, devConfig);
	}
}
在 webpack.dev.js 中:
const webpack = require('webpack');

const devConfig = {
	mode: 'development',
	devtool: 'cheap-module-eval-source-map',
	devServer: {
		contentBase: './dist',
		open: true,
		port: 8080,
		hot: true
	},
	module: {
		rules: [{
			test: /\.scss$/,
			use: [
				'style-loader',
				{
					loader: 'css-loader',
					options: {
						importLoaders: 2
					}
				},
				'postcss-loader',
				'sass-loader',

			]
		}, {
			test: /\.css$/,
			use: [
				'style-loader',
				'css-loader',
				'postcss-loader'
			]
		}]
	},
	plugins: [
		new webpack.HotModuleReplacementPlugin()
	],
	output: {
		filename: '[name].js',
		chunkFilename: '[name].js',
	}
}

module.exports = devConfig;
在webpack.prod.js 中:
const MiniCssExtractPlugin = require("mini-css-extract-plugin");
const OptimizeCSSAssetsPlugin = require("optimize-css-assets-webpack-plugin");

const prodConfig = {
	mode: 'production',
	devtool: 'cheap-module-source-map',
	module: {
		rules:[{
			test: /\.scss$/,
			use: [
				MiniCssExtractPlugin.loader,
				{
					loader: 'css-loader',
					options: {
						importLoaders: 2
					}
				},
				'postcss-loader',
				'sass-loader',

			]
		}, {
			test: /\.css$/,
			use: [
				MiniCssExtractPlugin.loader,
				'css-loader',
				'postcss-loader'
			]
		}]
	},
	optimization: {
		minimizer: [new OptimizeCSSAssetsPlugin({})]
	},
	plugins: [
		new MiniCssExtractPlugin({
			filename: '[name].css',
			chunkFilename: '[name].chunk.css'
		})
	],
	output: {
		filename: '[name].[contenthash].js',
		chunkFilename: '[name].[contenthash].js'
	}
}

module.exports = prodConfig;
四:Webpack实战配置案例
Library的打包:库代码通过webpack进行打包
仓库源码 【41】
在 webpack.config.js 中:
const path = require('path');

module.exports = {
	mode: 'production',
	entry: './src/index.js',
	externals: 'lodash',
	output: {
		path: path.resolve(__dirname, 'dist'),
		filename: 'library.js',
		library: 'root', //支持通过<scritp src=ilibrary. js'></script> 标签引入,在全局变量增加一个root变量
		libraryTarget: 'umd' //别人用的时候,通过任何形式引入库都可以,比如AMD,CMD,ES MODULE,Commonjs

        // library: 'root',//打包生成全局变量root
		// libraryTarget: 'this' //把全局变量root挂载到this上,可以填umd,this,window,global

        // externals: {
        // 	lodash:{
        // 		root:'_', //是用script标签引入进来的,必须在全局注入一个 _ 变量,下面的library才能正常执行
        // 		commonjs:'lodash',//在用commonjs规范引入是,名字必须是lodash
        // 	}

        // }

	}
}
在 package.json 中:
"main": "./dist/library.js", //最终要给别人使用的
在 npm 官网注册一个账号,在命令行输入 :
//添加用户名和密码
npm adduser
//把项目发布到npm官网上
npm publish
//当别人用你发布的库时
npm i + 库名
详细请看官方文档:externals author-libraries
Progressive Web Application:在webpack中配置pwa
渐进式网络应用程序,PWA 可以用来做很多事。其中最重要的是,在**离线(offline)**时应用程序能够继续运行功能。这是通过使用名为 Service Workers 的 web 技术来实现的。线上环境时才用到pwa,开发时不需要
仓库源码 【42】
安装:
//模拟服务器
npm i http-server -D
//添加 workbox-webpack-plugin 插件,然后调整 webpack.config.js 文件
npm install workbox-webpack-plugin --save-dev
在 package.json 中:
"scripts": {
 +   "start": "http-server dist",//在dist目录下运行http-server服务
    "dev": "webpack-dev-server --config ./build/webpack.dev.js",
    "build": "webpack --config ./build/webpack.prod.js"
  },
线上环境时才用到pwa,开发时不需要,只需要改 webpack.prod.js ,
在 webpack.prod.js 中:
const WorkboxPlugin = require('workbox-webpack-plugin');
plugins: [
		new MiniCssExtractPlugin({
			filename: '[name].css',
			chunkFilename: '[name].chunk.css'
		}),
+		new WorkboxPlugin.GenerateSW({
			clientsClaim: true,
			skipWaiting: true
		})
	],
在业务代码 index.js 中使用pwa
console.log('hello, haiyang');

if ('serviceWorker' in navigator) { //如果浏览器支持serviceWorker,就执行以下代码
	window.addEventListener('load', () => {
		navigator.serviceWorker.register('/service-worker.js')
			.then(registration => {//注册成功
				console.log('service-worker registed');
			}).catch(error => {//没注册成功
				console.log('service-worker register error');
			})
	})
}
详细请看官方文档:progressive-web-application
TypeScript 的打包配置
TypeScript 是 JavaScript 的超集,为其增加了类型系统,可以编译为普通 JavaScript 代码。这篇指南里我们将会学习是如何将 webpack 和 TypeScript 进行集成。
仓库源码 【43】
安装:
npm install --save-dev typescript ts-loader
在 webpack.config.js 中:
const path = require('path');

module.exports = {
	mode: 'production',
	entry: './src/index.tsx',
	module: {
		rules: [{
			test: /\.tsx?$/,
			use: 'ts-loader',
			exclude: /node_modules/
		}]
	},
	output: {
		filename: 'bundle.js',
		path: path.resolve(__dirname, 'dist')
	}
}
在项目根目录下创建 tsconfig.json 文件:
{
	"compilerOpitons": {
		"outDir": "./dist",
		"module": "es6",//模块引入的方式
		"target": "es5",//转换为es5,在大部分浏览器都能运行
		"allowJs": true, //在typescript中允许引入js文件
	}
}
在从 npm 安装 third party library(第三方库) 时,一定要记得同时安装此 library 的类型声明文件(typing definition)。你可以从 TypeSearch 中找到并安装这些第三方库的类型声明文件。在使用时,哪有错可以有警告提示,方便改错。
安装:
//在typescript里用loadah
npm install --save-dev @types/lodash
详细请看官方文档:typescript
使用 WebpackDevServer 实现请求转发
仓库源码 【44】
安装:
//向服务器发送axios请求
npm i axios -D
在 index.js 中:
componentDidMount() {
		axios.get('/react/api/header.json')
			.then((res) => {
				console.log(res);
			})
	}
在 webpack.config.js 中:
devServer: {
		contentBase: './dist',
		open: true,
		port: 8080,
		hot: true,
		hotOnly: true,
+		proxy: {//开发时方便接口转发,线上不用
			'/react/api': {//访问 /react/api 时,代理到 target 上
				target: 'https://www.dell-lee.com',
				secure: false,//对https协议的网址的请求的转发
     //   拦截,请求的是html,不走代理直接返回  /index.html文件
	//bypass: function(req, res, proxyOptions) {
      //    if (req.headers.accept.indexOf('html') !== -1) {
      //      console.log('Skipping proxy for browser request.');
       //     return '/index.html';
       //   }
     //   },
				pathRewrite: {
					'header.json': 'demo.json' //最后拿的是demo.json的数据
				},
				changeOrigin: true,//解决网站对接口的限制
				headers: {//变更请求头
					host: 'www.dell-lee.com',
				}
			}
		}
	},
详细请看官方文档:devserverproxy
WebpackDevServer 解决单页面应用路由问题
仓库源码 【45】
安装:
npm i react-router-dom --save
在 webpack.config.js 中:
devServer: {//配置只在开发时有效,上线时后端也需配置
		contentBase: './dist',
		open: true,
		port: 8080,
		hot: true,
		hotOnly: true,
+		historyApiFallback: true,
    	//historyApiFallback: {
         // rewrites: [//访问任何路径都展示index.html页面
          //  { from: /\.*/, to: '/index.html' },
          //]
        //},
		proxy: {
			'/react/api': {
				target: 'https://www.dell-lee.com',
				secure: false,
				pathRewrite: {
					'header.json': 'demo.json'
				},
				changeOrigin: true,
				headers: {
					host: 'www.dell-lee.com',
				}
			}
		}
	},
详细请看官方文档:devserverhistoryapifallback
EsLint 在 Webpack 中的配置
仓库源码 【46】
安装:
//安装eslint工具,规范项目中的代码
npm i eslint -D
npm i babel-eslint -D
npm i eslint-loader -D
//快速生成eslint配置
npx eslint --init
在 .eslintrc.js 中:
module.exports = {
	"extends": "airbnb",
  "parser": "babel-eslint",
  "rules": {
    "react/prefer-stateless-function": 0,
    "react/jsx-filename-extension": 0
  },
  globals: {
    document: false
  }
};
详细请看官方文档:eslint
在 vscode 编辑器里安装 eslint 插件,自动检测语法错误。(推荐使用)
在 webpack.config.js 中:
devServer: {
+		overlay: true,//在浏览器弹出提示有错误
	},


rules: [{
			test: /\.js$/,
			exclude: /node_modules/,
	+		use: ['babel-loader', 'eslint-loader'] //先检查代码写的是否规范,然后在转换成es5
		},
        ...],
在真实项目中,也可以不在webpack 中配置eslint,在提交git仓库时,git 钩子 eslint src 。但是没有图形交互式的错误提示。
详细请看官方文档:eslint-loader
提升 webpack 打包速度的方法
仓库源码 【47】
1.跟上技术的迭代(Node,Npm,Yarn)
2.在尽可能少的模块上应用 Loader
3.Plugin 尽可能精简并确保可靠
4.resolve 参数合理配置
仓库源码 【48】
引入资源文件写后缀,像 图片文件(.jpg, .png, .svg),逻辑代码配置在extensions中:extensions: ['.js', '.jsx']
5.使用 DLLPlugin 提高打包速度
详细请看官方文档:dll-plugin
仓库源码 【49】
实现第三方模块只打包一次
安装:
npm i add-asset-html-webpack-plugin --save
在 build 文件夹里创建 webpack.dll.js 文件:把第三方模块单独进行打包,生成一个vendors.dll.js 文件,所有的第三方模块都在这个文件里。
const path = require('path');
const webpack = require('webpack');

module.exports = {
	mode: 'production',
	entry: {
		vendors: ['lodash'],
		react: ['react', 'react-dom'],
		jquery: ['jquery']
	},
	output: {
		filename: '[name].dll.js',
		path: path.resolve(__dirname, '../dll'),
		library: '[name]'//打包生成的库名,通过全局变量的形式暴露到全局
	},
	plugins: [
		new webpack.DllPlugin({//对暴露到全局的代码进行分析,生成vendors.manifest.json 的映射文件,
			name: '[name]',
			path: path.resolve(__dirname, '../dll/[name].manifest.json'),
		})
	]
}
在 webpack.common.js 中:
const AddAssetHtmlWebpackPlugin = require('add-asset-html-webpack-plugin');
const files = fs.readdirSync(path.resolve(__dirname, '../dll'));
files.forEach(file => {
	if(/.*\.dll.js/.test(file)) {
		plugins.push(new AddAssetHtmlWebpackPlugin({//将打包好的dll文件挂载到html中
			filepath: path.resolve(__dirname, '../dll', file)
		}))
	}
	if(/.*\.manifest.json/.test(file)) {
		plugins.push(new webpack.DllReferencePlugin({//分析第三方模块是否已经在dll文件里,如果里面有就不用再node_modules在分析打包了
			manifest: path.resolve(__dirname, '../dll', file)
		}))
	}
})
在 package.json 中 添加一个脚本:
"scripts": {
    "dev-build": "webpack --config ./build/webpack.dev.js",
    "dev": "webpack-dev-server --config ./build/webpack.dev.js",
    "build": "webpack --config ./build/webpack.prod.js",
 +   "build:dll": "webpack --config ./build/webpack.dll.js"
  }
在 控制台 先 执行 npm run build:dll 生成对应的 XXX.dll.js 和 XXX.manifest.json 文件。以后再执行 npm run build 或 npm run dev 时,就不用再node_modules查找对应模块进行分析,直接用打包好的 XXX.dll.js就可以,节省打包速度。
总结:
如果不使用使用 DLLPlugin 插件,当引入第三方模块时,每一次打包都要进行分析,是消耗打包的性能的。使用 DLLPlugin 提高打包速度,在第一次打包时,把第三方模块单独打包生成一个文件 vendors.dll.js ,之后在打包时就可以直接从 vendors.dll.js 中引入之前打包好的第三方模块,速度就会变快。
要想实现,就得做一些配置:
先配置 webpack.dll.js 文件,在 package.json中添加一个脚本,在配置 webpack.common.js 文件
==============================================================
.dll 为后缀的文件称为动态链接库,在一个动态链接库中可以包含给其他模块调用的函数和数据
- 把基础模块独立出来打包到单独的动态连接库里
- 当需要导入的模块在动态连接库里的时候,模块不能再次被打包,而是去动态连接库里获取 dll-plugin
定义Dll
- DllPlugin插件: 用于打包出一个个动态连接库
- DllReferencePlugin: 在配置文件中引入DllPlugin插件打包好的动态连接库
在 webpack.dll.js 中:
module.exports = {
    entry: {
        react: ['react'] //react模块打包到一个动态连接库
    },
    output: {
        path: path.resolve(__dirname, 'dist'),
        filename: '[name].dll.js', //输出动态连接库的文件名称
        library: '_dll_[name]' //全局变量名称
    },
    plugins: [
        new webpack.DllPlugin({
            name: '_dll_[name]', //和output.library中一致,值就是输出的manifest.json中的 name值
            path: path.join(__dirname, 'dist', '[name].manifest.json')
        })
    ]
}
webpack --config webpack.dll.config.js --mode production
使用动态链接库文件
在 webpack.common.js 中:
plugins: [
+        new webpack.DllReferencePlugin({
+            manifest: require(path.join(__dirname, 'dist', 'react.manifest.json')),
+        })
    ],
webpack --config webpack.config.js --mode development
==============================================================
6.控制包文件大小
配置 Tree shaking,把用不到的代码去除掉。配置 SplitChunksPlugin。
7.thread-loader,parallel-webpack,happypack 多进程打包
HappyPack
HappyPack就能让Webpack把任务分解给多个子进程去并发的执行,子进程处理完后再把结果发送给主进程。 happypack
安装:npm i happypack@next -D
配置:
module: {
        rules: [{
            test: /\.js$/,
            //把对.js文件的处理转交给id为babel的HappyPack实例
 +          use: 'happypack/loader?id=babel',
            include: path.resolve(__dirname, 'src'),
            exclude: /node_modules/
        }, {
            //把对.css文件的处理转交给id为css的HappyPack实例
            test: /\.css$/,
+           use: 'happypack/loader?id=css',
            include: path.resolve(__dirname, 'src')
        }],
        noParse: [/react\.min\.js/]
    },
plugins: [
        //用唯一的标识符id来代表当前的HappyPack是用来处理一类特定文件
        new HappyPack({
            id: 'babel',
            //如何处理.js文件,和rules里的配置相同
            loaders: [{
                loader: 'babel-loader',
                query: {
                    presets: [
                        "env", "react"
                    ]
                }
            }]
        }),
        new HappyPack({
            id: 'css',
            loaders: ['style-loader', 'css-loader'],
            threads: 4, //代表开启几个子进程去处理这一类型的文件
            verbose: true //是否允许输出日子
        })
    ],
ParallelUglifyPlugin
ParallelUglifyPlugin可以把对JS文件的串行压缩变为开启多个子进程并行执行
安装:npm i -D webpack-parallel-uglify-plugin
配置:
new ParallelUglifyPlugin({
            workerCount: 3, //开启几个子进程去并发的执行压缩。默认是当前运行电脑的 CPU 核数减去1
            uglifyJS: {
                output: {
                    beautify: false, //不需要格式化
                    comments: false, //不保留注释
                },
                compress: {
                    warnings: false, // 在UglifyJs删除没有用到的代码时不输出警告
                    drop_console: true, // 删除所有的 `console` 语句,可以兼容ie浏览器
                    collapse_vars: true, // 内嵌定义了但是只用到一次的变量
                    reduce_vars: true, // 提取出出现多次但是没有定义成变量去引用的静态值
                }
            },
        })
8.合理使用 sourceMap
9.结合 stats 分析打包结果
10. 开发环境内存编译
11.开发环境无用插件剔除
多页面打包配置
配置多个 entry 里的 html 页面,用HtmlWebpackPlugin 插件,将打包好的j多个js分别插入到对应的html页面中。
仓库源码 【410】
在 webpack.common.js 中:
const path = require('path');
const fs = require('fs');
const HtmlWebpackPlugin = require('html-webpack-plugin');
const CleanWebpackPlugin = require('clean-webpack-plugin');
const AddAssetHtmlWebpackPlugin = require('add-asset-html-webpack-plugin');
const webpack = require('webpack');


const makePlugins = (configs) => {
	const plugins = [
		new CleanWebpackPlugin(['dist'], {
			root: path.resolve(__dirname, '../')
		})
	];
	Object.keys(configs.entry).forEach(item => {
		plugins.push(
+			new HtmlWebpackPlugin({
				template: 'src/index.html',
				filename: `${item}.html`,
				chunks: ['runtime', 'vendors', item]
			})
		)
	});
	const files = fs.readdirSync(path.resolve(__dirname, '../dll'));
	files.forEach(file => {
		if(/.*\.dll.js/.test(file)) {
			plugins.push(new AddAssetHtmlWebpackPlugin({
				filepath: path.resolve(__dirname, '../dll', file)
			}))
		}
		if(/.*\.manifest.json/.test(file)) {
			plugins.push(new webpack.DllReferencePlugin({
				manifest: path.resolve(__dirname, '../dll', file)
			}))
		}
	});
	return plugins;
}

const configs = {
+	entry: {
		index: './src/index.js',
		list: './src/list.js',
		detail: './src/detail.js',
	},
	resolve: {
		extensions: ['.js', '.jsx'],
	},
	module: {
		rules: [{
			test: /\.jsx?$/,
			include: path.resolve(__dirname, '../src'),
			use: [{
				loader: 'babel-loader'
			}]
		}, {
			test: /\.(jpg|png|gif)$/,
			use: {
				loader: 'url-loader',
				options: {
					name: '[name]_[hash].[ext]',
					outputPath: 'images/',
					limit: 10240
				}
			}
		}, {
			test: /\.(eot|ttf|svg)$/,
			use: {
				loader: 'file-loader'
			}
		}]
	},
	optimization: {
		runtimeChunk: {
			name: 'runtime'
		},
		usedExports: true,
		splitChunks: {
      chunks: 'all',
      cacheGroups: {
      	vendors: {
      		test: /[\\/]node_modules[\\/]/,
      		priority: -10,
      		name: 'vendors',
      	}
      }
    }
	},
	performance: false,
	output: {
		path: path.resolve(__dirname, '../dist')
	}
}

configs.plugins = makePlugins(configs);

module.exports = configs
五:Webpack底层原理及脚手架工具分析
如何编写一个 Loader
仓库源码 【51】
mkdir make-loader
cd make-loader
npm init -y
npm i webpack webpack-cli -D
npm i loader-utils -D
在根目录下创建文件夹loaders,里面创建自己定义的loader.js文件
在 webpack.config.js 中:
const path = require('path');

module.exports = {
	mode: 'development',
	entry: {
		main: './src/index.js'
	},
	resolveLoader: { //先在 node_modules 中找用到的loader,如果没找到,再在loaders里查找
		modules: ['node_modules', './loaders']
	},
	module: {
		rules: [{
			test: /\.js/,
			use: [//使用自己写的replaceLoader
				{
					loader: 'replaceLoader',
				},
				{
					loader: 'replaceLoaderAsync',
					options: {
						name: 'lee'
					}
				},
			]
		}]
	},
	output: {
		path: path.resolve(__dirname, 'dist'),
		filename: '[name].js'
	}
}
详细请看官方文档:loaders#thisquery hiscallback thisasync
如何编写一个 Plugin
仓库源码 【52】
详细请看官方文档:compiler-hooks
Bundler 源码编写(模块分析)
应对 webpack 原理面试必备:
仓库源码 【53】
安装 :
//高亮显示代码的工具
npm i cli-highlight -g
//分析源代码
npm install @babel/parser --save
npm install @babel/core --save
npm install @babel/traverse --save
npm install @babel/preset-env --save
Bundler 源码编写(Dependencies Graph)
仓库源码 【54】
Bundler 源码编写(生成代码)
仓库源码 【55】
六:Create-React-App 和 Vue-Cli 3.0脚手架工具配置分析
通过CreateReactApp深入学习Webpack配置
仓库源码 【56】
详细请看官方文档:CreateReactApp
快速开始:
npx create-react-app my-app
cd my-app
npm start
把隐藏的配置项展现出来:不可逆操作
npm run eject
就会多出来两个文件夹,config,scripts文件夹
Vue-Cli 3.0
仓库源码 【57】
