

目录导航
17、Generator
是 ES6 提供的一种异步编程解决方案。 语法上是一个状态机,封装了多个内部状态 。执行 Generator 函数会返回一个遍历器对象。这一点跟promise很像,promise是一个容器,里面保存着某个未来才会结束的事件(通常是一个异步操作)的结果。
Generator 函数是一个普通函数,但是有两个特征。
1、function关键字与函数名之间有一个星号(位置不固定);
2、函数体内部使用yield表达式,定义不同的内部状态(yield在英语里的意思就是“产出”)。
    function* helloWorldGenerator() {
      yield 'hello';
      yield 'world';
      return 'ending';
    }
    var hw = helloWorldGenerator();
    hw.next()  // { value: 'hello', done: false }
    hw.next()// { value: 'world', done: false }
    hw.next()// { value: 'ending', done: true }
    hw.next() // { value: undefined, done: true }
该函数有三个状态:hello,world 和 return 语句(结束执行)。调用 Generator 函数后,该函数并不执行,返回的也不是函数运行结果,而是一个指向内部状态的指针对象,也就是上一章介绍的遍历器对象(Iterator Object)。下一步,必须调用遍历器对象的next方法,使得指针移向下一个状态(执行yield后面的语句,直到遇到yield或者return语句)。
17.1、 yield表达式
yield表达式就是暂停标志。并将紧跟在yield后面的那个表达式的值,作为返回的对象的value属性值。yield表达式后面的表达式,只有当调用next方法、内部指针指向该语句时才会执行。 yield表达式与return语句既有相似之处,也有区别。相似之处在于,都能返回紧跟在语句后面的那个表达式的值。区别在于每次遇到yield,函数暂停执行,下一次再从该位置继续向后执行,而return语句不具备位置记忆的功能。
注意:
1、 yield表达式只能用在 Generator 函数里面,用在其他地方都会报错。
2、 yield表达式如果用在另一个表达式之中,必须放在圆括号里面。
    function* demo() {
      console.log('Hello' + yield); // SyntaxError
      console.log('Hello' + yield 123); // SyntaxError
      console.log('Hello' + (yield)); // OK
      console.log('Hello' + (yield 123)); // OK
    }
3、 yield表达式用作函数参数或放在赋值表达式的右边,可以不加括号。
    function* demo() {
      foo(yield 'a', yield 'b'); // OK
      let input = yield; // OK
    }
任意一个对象的Symbol.iterator方法,等于该对象的遍历器生成函数,调用该函数会返回该对象的一个遍历器对象。
Generator 函数就是遍历器生成函数,因此可以把 Generator 赋值给对象的Symbol.iterator属性,从而使得该对象具有 Iterator 接口。
    var myIterable = {};
    myIterable[Symbol.iterator] = function* () {
      yield 1;
      yield 2;
      yield 3;
    };
    [...myIterable] // [1, 2, 3]
Generator 函数执行后,返回一个遍历器对象。该对象本身也具有Symbol.iterator属性,执行后返回自身。
    function* gen(){
      // some code
    }
    var g = gen();
    g[Symbol.iterator]() === g   // true
17.2、 next方法的参数
yield表达式本身没有返回值,或者说总是返回undefined。next方法可以带一个参数,该参数就会被当作上一个yield表达式的返回值。 从语义上讲,第一个next方法用来启动遍历器对象,所以不用带有参数。
    function* f() {
      for(var i = 0; true; i++) {
        var reset = yield i;
        if(reset) { i = -1; }
      }
    }
    var g = f();
    console.log(g.next()) // { value: 0, done: false }
    console.log (g.next()) // { value: 1, done: false }
    console.log (.next(true) )// { value: 0, done: false } 执行i=-1,然后i++变成了0
再看下面的一个例子
    function* foo(x) {
      var y = 2 * (yield (x + 1));
      var z = yield (y / 3);
      return (x + y + z);
    }
    var a = foo(5);
    console.log(a.next()) // Object{value:6, done:false}
    console.log(a.next()) // Object{value:NaN, done:false},此时的y等于undefined
    console.log(a.next()) // Object{value:NaN, done:true}
    var b = foo(5);
    console.log(b.next()) // { value:6, done:false }
    console.log(b.next(12)) // { value:8, done:false } 此时的y=2*12
    console.log(b.next(13)) // { value:42, done:true } 5+24+13
通过next方法的参数,向 Generator 函数内部输入值的例子。
    //例子1
    function* dataConsumer() {
      console.log('Started');
      console.log(`1. ${yield}`);
      console.log(`2. ${yield}`);
      return 'result';
    }
    let genObj = dataConsumer();
    genObj.next();// Started。执行了 console.log('Started');和`1. ${yield}`这两句
    genObj.next('a') // 1. a。执行了 console.log(`1. ${yield}`);和`2. ${yield}`这两句
    console.log(genObj.next('b') )   //2.b    {value: "result", done: true}。执行了console.log(`2. ${yield}`);和return 'result';这两句
上面的console.log(1. ${yield});分两步执行,首先执行yield,等到执行next()时再执行console.log();
    //例子2
    function* dataConsumer() {
      console.log('Started');
      yield 1;
      yield;
      var a=yield;
      console.log("1. "+a);
      var b=yield;
      console.log("2. "+b);
      return 'result';
    }
    let genObj = dataConsumer();
    console.log( genObj.next())
    console.log(genObj.next());
    console.log(genObj.next('a'))
    console.log( genObj.next('b'));
输出结果如下:四次输出结果如红线框中所示

17.3、 for…of
for...of循环可以自动遍历 Generator 函数运行时生成的Iterator对象,且此时不再需要调用next方法。
    function* foo() {
      yield 1;
      yield 2;
      yield 3;
      yield 4;
      yield 5;
      return 6;
    }
    for (let v of foo()) {
      console.log(v);
    }
    // 1 2 3 4 5
一旦next方法的返回对象的done属性为true,for...of循环就会中止,且不包含该返回对象,所以上面代码的return语句返回的6,不包括在for...of循环之中。
除了for...of循环以外,扩展运算符(...)、解构赋值和Array.from方法内部调用的,都是遍历器接口。这意味着,它们都可以将 Generator 函数返回的 Iterator 对象,作为参数,并且遇到Generator 函数中的return语句结束。
    function* numbers () {
      yield 1
      yield 2
      return 3
      yield 4
    }
    // 扩展运算符
    [...numbers()] // [1, 2]
    // Array.from 方法
    Array.from(numbers()) // [1, 2]
    // 解构赋值
    let [x, y] = numbers();
    x // 1
    y // 2
    // for...of 循环
    for (let n of numbers()) {
      console.log(n)
    }
    // 1,2
17.4、 Generator.prototype.throw()
在函数体外抛出错误,然后在 Generator 函数体内捕获。如果是全局throw()命令,只能被函数体外的catch语句捕获。
    var g = function* () {
      try {
        yield;
      } catch (e) {
        console.log('内部捕获', e);
      }
    };
    var i = g();
    i.next();
    try {
      i.throw('a');//被内部捕获,所以下面的代码还能正常运行
      i.throw('b');//被外部捕获
    } catch (e) {
      console.log('外部捕获', e);
    }
    // 内部捕获 a
    // 外部捕获 b
如果 Generator 函数内部没有部署try...catch代码块,那么throw方法抛出的错误,将被外部try...catch代码块捕获。
    var g = function* () {
      while (true) {
        yield;
        console.log('内部捕获', e);
      }
    };
    var i = g();
    i.next();
    try {
      i.throw('a');//被外部捕获,所以下面的代码不运行了
      i.throw('b');
    } catch (e) {
      console.log('外部捕获', e);
    }
    // 外部捕获 a
如果 Generator 函数内部和外部,都没有部署try...catch代码块,那么程序将报错,直接中断执行。 throw方法抛出的错误要被内部捕获,前提是必须至少执行过一次next方法。
    function* gen() {
      try {
        yield 1;
      } catch (e) {
        console.log('内部捕获');
      }
    }

    var g = gen();
    g.throw(1);
    // Uncaught 1
throw方法被捕获以后,会附带执行下一条yield表达式。也就是说,会附带执行一次next方法。
    var gen = function* gen(){
      try {
        yield console.log('a');
      } catch (e) {
        // ...
      }
      yield console.log('b');
      yield console.log('c');
    }
    var g = gen();
    g.next() // a
    g.throw() // b
    g.next() // c
另外,throw命令与g.throw方法是无关的,两者互不影响。
    var gen = function* gen(){
      yield console.log('hello');
      yield console.log('world');
    }

    var g = gen();
    g.next();

    try {
      throw new Error();
    } catch (e) {
      g.next();
    }
    // hello
    // world
一旦 Generator 执行过程中抛出错误,且没有被内部捕获,就不会再执行下去了。如果此后还调用next方法,将返回一个value属性等于undefined、done属性等于true的对象,即 JavaScript 引擎认为这个 Generator 已经运行结束了。
    function* g() {
      yield 1;
      console.log('throwing an exception');
      throw new Error('generator broke!');//中断函数的运行
      yield 2;
      yield 3;
    }

    function log(generator) {
      var v;
      console.log('starting generator');
      try {
        v = generator.next();
        console.log('第一次运行next方法', v);
      } catch (err) {
        console.log('捕捉错误', v);
      }
      try {
        v = generator.next();
        console.log('第二次运行next方法', v);//因为上面代码调用时报错了,所以不会执行该语句
      } catch (err) {
        console.log('捕捉错误', v);
      }
      try {
        v = generator.next();
        console.log('第三次运行next方法', v);
      } catch (err) {
        console.log('捕捉错误', v);
      }
      console.log('caller done');
    }
    log(g());
    // starting generator
    // 第一次运行next方法 { value: 1, done: false }
    // throwing an exception
    // 捕捉错误 { value: 1, done: false }
    // 第三次运行next方法 { value: undefined, done: true }
    // caller done
17.5、 Generator.prototype.return()
返回给定的值,并且终结遍历 Generator 函数。
    function* gen() {
      yield 1;
      yield 2;
      yield 3;
    }
    var g = gen();
    g.next()        // { value: 1, done: false }
    g.return('foo') // { value: "foo", done: true } //
    g.next()        // { value: undefined, done: true }
如果 Generator 函数内部有try...finally代码块,且正在执行try代码块,那么return方法会推迟到finally代码块执行完再执行。
    function* numbers () {
      yield 1;
      try {
        yield 2;
        yield 3;
      } finally {
        yield 4;
        yield 5;
      }
      yield 6;
    }
    var g = numbers();
    g.next() // { value: 1, done: false }
    g.next() // { value: 2, done: false }
    g.return(7) // { value: 4, done: false }
    g.next() // { value: 5, done: false }
    g.next() // { value: 7, done: true }
    g.next() // { value: undefined, done: true }
17.6、 next()、throw()、return()的共同点及区别
它们的作用都是让 Generator 函数恢复执行,并且使用不同的语句替换yield表达式。
next()是将yield表达式替换成一个值。
throw()是将yield表达式替换成一个throw语句。
return()是将yield表达式替换成一个return语句。
17.7、 yield* 表达式
用到yield*表达式,用来在一个 Generator 函数里面执行另一个 Generator 函数。
    function* foo() {
        yield 'a';
        yield 'b';
    }
    function* bar() {
      yield 'x';
      yield* foo(); //
      yield 'y';
    }
    // 等同于
    function* bar() {
      yield 'x';
      yield 'a';
      yield 'b';
      yield 'y';
    }
    // 等同于
    function* bar() {
      yield 'x';
      for (let v of foo()) {
        yield v;
      }
      yield 'y';
    }
    for (let v of bar()){
      console.log(v);
    }
    // "x"   // "a"   // "b"   // "y"
    function* inner() {
        yield 'hello!';
    	return "test"
    }
    function* outer1() {
      yield 'open';
      yield inner();
      yield 'close';
    }
    var gen = outer1()
    console.log(gen.next().value) // "open"
    var test=gen.next().value // 返回一个遍历器对象
    console.log(test.next().value) //"hello"
    console.log(test.next().value)// "test"
    console.log(gen.next().value) // "close"
yield*后面的 Generator 函数(没有return语句时),等同于在 Generator 函数内部,部署一个for...of循环。
    function* concat(iter1, iter2) {
      yield* iter1;
      yield* iter2;
    }
    // 等同于
    function* concat(iter1, iter2) {
      for (var value of iter1) {
        yield value;
      }
      for (var value of iter2) {
        yield value;
      }
    }
如果yield*后面跟着一个数组,由于数组原生支持遍历器,因此就会遍历数组成员。
    function* gen(){
      yield* ["a", "b", "c"];
    }
    console.log(gen().next()) // { value:"a", done:false }
实际上,任何数据结构只要有 Iterator 接口,就可以被yield*遍历。 如果被代理的 Generator 函数有return语句,那么就可以向代理它的 Generator 函数返回数据。
    function* foo() {
      yield 2;
      yield 3;
      return "foo";
    }

    function* bar() {
      yield 1;
      var v = yield* foo();
      console.log("v: " + v);
      yield 4;
    }
    var it = bar();
    it.next()
    // {value: 1, done: false}
    it.next()
    // {value: 2, done: false}
    it.next()
    // {value: 3, done: false}
    it.next();
    // "v: foo"
    // {value: 4, done: false}
    it.next()
    // {value: undefined, done: true}

    function* iterTree(tree) {
      if (Array.isArray(tree)) {
        for(let i=0; i < tree.length; i++) {
          yield* iterTree(tree[i]);
        }
      } else {
        yield tree;
      }
    }
    const tree = [ 'a', ['b', 'c'], ['d', 'e'] ];
    for(let x of iterTree(tree)) {
      console.log(x);
    }
    // a  // b   // c   // d   // e
17.8、 作为对象的属性的Generator函数
    let obj = {
      * myGeneratorMethod() {
        •••
      }
    };
17.9、 Generator函数的this
Generator 函数总是返回一个遍历器,ES6 规定这个遍历器是 Generator 函数的实例,也继承了 Generator 函数的prototype对象上的方法。
    function* g() {}
    g.prototype.hello = function () {
      return 'hi!';
    };
    let obj = g();
    obj instanceof g // true
    obj.hello() // 'hi!'
通过生成一个空对象,使用call方法绑定 Generator 函数内部的this。
    function* F() {
      this.a = 1;
      yield this.b = 2;
      yield this.c = 3;
    }
    var obj = {};
    var f = F.call(obj);//调动F()并且把obj作为this传进去,这样给obj添加a、b、c属性
    console.log(f.next());  // Object {value: 2, done: false}
    console.log(f.next());  // Object {value: 3, done: false}
    console.log(f.next());  // Object {value: undefined, done: true}
    console.log(obj.a) // 1
    console.log(obj.b) // 2
    console.log(obj.c) // 3
将obj换成F.prototype。将这两个对象统一起来。再将F改成构造函数,就可以对它执行new命令了。
    function* gen() {
      this.a = 1;
      yield this.b = 2;
      yield this.c = 3;
    }
    function F() {
      return gen.call(gen.prototype);
    }
    var f = new F();
    f.next();  // Object {value: 2, done: false}
    f.next();  // Object {value: 3, done: false}
    f.next();  // Object {value: undefined, done: true}
    f.a // 1
    f.b // 2
    f.c // 3
多个线程(单线程情况下,即多个函数)可以并行执行,但是只有一个线程(或函数)处于正在运行的状态,其他线程(或函数)都处于暂停态(suspended),线程(或函数)之间可以交换执行权。并行执行、交换执行权的线程(或函数),就称为协程。
17.10、 应用
1、 异步操作的同步表达。 通过 Generator 函数部署 Ajax 操作,可以用同步的方式表达。
    function makeAjaxCall(url,callBack){
        var xhr;
        if (window.XMLHttpRequest)
        {
            //IE7+, Firefox, Chrome, Opera, Safari 浏览器执行代码
            xhr=new XMLHttpRequest();
        }else{
            // IE6, IE5 浏览器执行代码
            xhr=new ActiveXObject("Microsoft.XMLHTTP");
        }
        xhr.open("GET",makeAjaxCall,true);//确保浏览器兼容性。
        xhr.onreadystatechange=function(){
            if (xhr.readyState==4 && xhr.status==200)
            {
               if(xhr.status>=200&&xhr.status<300||xhr.status==304){
                  callBack(xhr.responseText;);
               }
            }
        }
        xmlhttp.send();
    }

    function* main() {
        var result = yield request("https://juejin.im/editor/posts/5cb209e36fb9a068b52fb360");
        var resp = JSON.parse(result);
        console.log(resp.value);
    }
    function request(url) {
          makeAjaxCall(url, function(response){
            it.next(response);//将response作为上一次yield的返回值
          });
    }
    var it = main();
    it.next();
使用yield表达式可以手动逐行读取文件。
    function* numbers() {
      let file = new FileReader("numbers.txt");
      try {
        while(!file.eof) {
          yield parseInt(file.readLine(), 10);
        }
      } finally {
        file.close();
      }
    }
2、 控制流管理
    step1(function (value1) {
      step2(value1, function(value2) {
        step3(value2, function(value3) {
          step4(value3, function(value4) {
            // Do something with value4
          });
        });
      });
    });
使用Promise
    Promise.resolve(step1)
      .then(step2)
      .then(step3)
      .then(step4)
      .then(function (value4) {
        // Do something with value4
      }, function (error) {
        // Handle any error from step1 through step4
      })
      .done();
使用Generator
    function* longRunningTask(value1) {
      try {
        var value2 = yield step1(value1);
        var value3 = yield step2(value2);
        var value4 = yield step3(value3);
        var value5 = yield step4(value4);
        // Do something with value4
      } catch (e) {
        // Handle any error from step1 through step4
      }
    }
    scheduler(longRunningTask(initialValue));
    function scheduler(task) {
      var taskObj = task.next(task.value);
      // 如果Generator函数未结束,就继续调用
      if (!taskObj.done) {
        task.value = taskObj.value
        scheduler(task);
      }
    }
    function step1(value){
    	return value*2;
    }
    function step2(value){
    	return value*2;
    }
    function step3(value){
    	return value*2;
    }
    function step4(value){
    	return value*2;
    }
注意,上面这种做法,只适合同步操作,即所有的task都必须是同步的,不能有异步操作。 3、 部署iterator接口
    function* iterEntries(obj) {
      let keys = Object.keys(obj);
      for (let i=0; i < keys.length; i++) {
        let key = keys[i];
        yield [key, obj[key]];
      }
    }
    let myObj = { foo: 3, bar: 7 };
    for (let [key, value] of iterEntries(myObj)) {
      console.log(key, value);
    }
    // foo 3
    // bar 7
4、 作为数据结构
    function* doStuff() {
      yield fs.readFile.bind(null, 'hello.txt');
      yield fs.readFile.bind(null, 'world.txt');
      yield fs.readFile.bind(null, 'and-such.txt');
    }
    for (task of doStuff()) {}
      // task是一个函数,可以像回调函数那样使用它
17.11、 Generator函数的异步调用(**需要好好理解弄懂**)
异步编程的方法主要有这几种:1、回调函数(耦合性太强)
2、事件监听
3、发布/订阅
4、Promise 对象
5、generator
1. 使用Generator来封装异步函数
    var fetch = require('node-fetch');
    function* gen(){
      var url = 'https://api.github.com/users/github';
      var result = yield fetch(url);
      console.log(result.bio);
    }
    var g = gen();
    var result = g.next();
    result.value.then(function(data){
      return data.json();
    }).then(function(data){
      g.next(data);
    });
首先执行 Generator 函数,获取遍历器对象,然后使用next方法(第二行),执行异步任务的第一阶段。由于Fetch模块返回的是一个 Promise 对象,因此要用then方法调用下一个next方法。
2. Thunk函数
编译器的“传名调用”实现,往往是将参数放到一个临时函数之中,再将这个临时函数传入函数体。这个临时函数就叫做 Thunk 函数。
    function f(m) {
      return m * 2;
    }
    f(x + 5);
    // 等同于
    var thunk = function () {
      return x + 5;
    };
    function f(thunk) {
      return thunk() * 2;
    }
    f(thunk)
    // 正常版本的readFile(多参数版本)
    fs.readFile(fileName, callback);
    // Thunk版本的readFile(单参数版本)
    var Thunk = function (fileName) {
      return function (callback) {
        return fs.readFile(fileName, callback);
      };
    };
    var readFileThunk = Thunk(fileName);
    readFileThunk(callback);
3. 基于 Promise 对象的自动执行
    var fs = require('fs');
    var readFile = function (fileName){
      return new Promise(function (resolve, reject){
        fs.readFile(fileName, function(error, data){
          if (error) return reject(error);
          resolve(data);
        });
      });
    };
    var gen = function* (){
      var f1 = yield readFile('/etc/fstab');
      var f2 = yield readFile('/etc/shells');
      console.log(f1.toString());
      console.log(f2.toString());
    };
然后,手动执行上面的 Generator 函数。
    var g = gen();
    g.next().value.then(function(data){
      g.next(data).value.then(function(data){
        g.next(data);
      });
    });
自动执行器写法:
    function run(gen){
      var g = gen();
      function next(data){
        var result = g.next(data);
        if (result.done) return result.value;
        result.value.then(function(data){
          next(data);
        });
      }
      next();
    }
    run(gen);
18、async函数
async函数是Generator 函数的语法糖。async函数就是将 Generator 函数的星号(*)替换成async,将yield替换成await,仅此而已。 async函数对 Generator 函数的改进,体现在以下四点。
- 内置执行器。 调用了asyncReadFile函数,然后它就会自动执行,输出最后结果。也就是说,async函数的执行,与普通函数一模一样,只要一行。
- 更好的语义。 async表示函数里有异步操作,await表示紧跟在后面的表达式需要等待结果。
- 更广的适用性。 await命令后面,可以是 Promise 对象和原始类型的值(数值、字符串和布尔值,但这时会自动转成立即 resolved 的 Promise 对象)。
- 返回值是 Promise。 async函数的返回值是 Promise 对象,进一步说,async函数完全可以看作多个异步操作,包装成的一个 Promise 对象,而await命令就是内部then命令的语法糖。
18.1、 Async的语法
1、async函数返回一个 Promise 对象。
async函数内部return语句返回的值,会成为then方法回调函数的参数。async函数内部抛出错误,会导致返回的 Promise 对象变为reject状态。抛出的错误对象会被catch方法回调函数接收到。
    async function f() {
      return 'hello world';
    }
    f().then(v => console.log(v))
    // "hello world"
    async function f() {
      throw new Error('出错了');
    }
    f().then(
      v => console.log(v),
      e => console.log(e)
    )
2、Promise对象的状态变化。
async函数返回的 Promise 对象,必须等到内部所有await命令后面的 Promise 对象执行完,才会发生状态改变,除非遇到return语句或者抛出错误。也就是说,只有async函数内部的异步操作执行完,才会执行then方法指定的回调函数。
18.2、 Await命令
正常情况下,await命令后面是一个 Promise 对象,返回该对象的结果。如果不是 Promise 对象,就直接返回对应的值。
    async function f() {
      // 等同于
      // return 123;
      return await 123;
    }
    f().then(v => console.log(v))
    // 123
另一种情况是,await命令后面是一个thenable对象(即定义then方法的对象),那么await会将其等同于 Promise 对象。
18.3、 错误处理
如果await后面的异步操作出错,那么等同于async函数返回的 Promise 对象被reject。
    async function f() {
      await new Promise(function (resolve, reject) {
        throw new Error('出错了');
      });
    }
    f()
    .then(v => console.log(v))
    .catch(e => console.log(e))
    // Error:出错了
18.4、 使用注意点
1) await命令后面的Promise对象,运行结果可能是rejected,所以最好把await命令放在try...catch代码块中。
    async function myFunction() {
      try {
        await somethingThatReturnsAPromise();
      } catch (err) {
        console.log(err);
      }
    }
    // 另一种写法
    async function myFunction() {
      await somethingThatReturnsAPromise()
      .catch(function (err) {
        console.log(err);
      });
    }
2) 多个await命令后面的异步操作,如果不存在继发关系,最好让它们同时触发。
    // 写法一
    let [foo, bar] = await Promise.all([getFoo(), getBar()]);
    // 写法二
    let fooPromise = getFoo();
    let barPromise = getBar();
    let foo = await fooPromise;//直接返回
    let bar = await barPromise;
3) await命令只能用在async函数之中,如果用在普通函数,就会报错。
    async function dbFuc(db) {
      let docs = [{}, {}, {}];
      // 报错
      docs.forEach(function (doc) {
        await db.post(doc);
      });
    }
如果确实希望多个请求并发执行,可以使用Promise.all方法。
    async function dbFuc(db) {
      let docs = [{}, {}, {}];
      let promises = docs.map((doc) => db.post(doc));
      let results = await Promise.all(promises);
      console.log(results);
    }
4) async 函数可以保留运行堆栈。
    const a = () => {
      b().then(() => c());
    };
当b()运行的时候,函数a()不会中断,而是继续执行。等到b()运行结束,可能a()早就运行结束了,b()所在的上下文环境已经消失了。如果b()或c()报错,错误堆栈将不包括a()。
    const a = async () => {
      await b();
      c();
    };
b()运行的时候,a()是暂停执行,上下文环境都保存着。一旦b()或c()报错,错误堆栈将包括a()。
18.5、 实例:按顺序完成异步操作
    async function logInOrder(urls) {
      for (const url of urls) {
        const response = await fetch(url);
        console.log(await response.text());
      }
    }
上面代码的问题是所有远程操作都是继发。只有前一个 URL 返回结果,才会去读取下一个 URL,这样做效率很差,非常浪费时间。
    async function logInOrder(urls) {
      // 并发读取远程URL
      const textPromises = urls.map(async url => {
        const response = await fetch(url);
        return response.text();
      });
      // 按次序输出
      for (const textPromise of textPromises) {
        console.log(await textPromise);
      }
    }
虽然map方法的参数是async函数,但它是并发执行的,因为只有async函数内部是继发执行,外部不受影响。
18.6、 异步遍历器
异步遍历器的最大的语法特点,就是调用遍历器的next方法,返回的是一个 Promise 对象。
    asyncIterator
      .next()
      .then(
        ({ value, done }) => /* ... */
      );
18.7、 异步 Generator 函数
语法上,异步 Generator 函数就是async函数与 Generator 函数的结合。
    async function* gen() {
      yield 'hello';
    }
    const genObj = gen();
    genObj.next().then(x => console.log(x));
    // { value: 'hello', done: false }
异步 Generator 函数内部,能够同时使用await和yield命令。可以这样理解,await命令用于将外部操作产生的值输入函数内部,yield命令用于将函数内部的值输出。
19、Class
19.1、class的基本语法
新的class写法只是让对象原型的写法更加清晰、更像面向对象编程的语法 而已。ES6 的类,完全可以看作构造函数的另一种写法。 事实上,类的所有方法都定义在类的prototype属性上面。
1、ES6 的类,完全可以看作构造函数的另一种写法。类本身就指向构造函数。
Point === Point.prototype.constructor // true
2、类的所有方法都定义在类的prototype属性上面。
3、在类的实例上面调用方法,其实就是调用原型上的方法。
    p1.constructor === Point.prototype.constructor // true

    function Point(x, y) {
      this.x = x;
      this.y = y;
    }
    Point.prototype.toString = function () {
      return '(' + this.x + ', ' + this.y + ')';
    };
    var p = new Point(1, 2);
    //改成类的写法
    class Point {
      constructor(x, y) {
        this.x = x;
        this.y = y;
      }
      toString() {
        return '(' + this.x + ', ' + this.y + ')';
      }
    }
    typeof Point // "function"
    Point === Point.prototype.constructor // true 类本身就指向构造函数。
    var p1=new Point(2,4);
    p1.constructor === Point.prototype.constructor // true

    Point.prototype.constructor === Point // true
    Object.keys(Point.prototype)// []
上面代码中,toString方法是Point类内部定义的方法,它是不可枚举的。这一点与 ES5 的行为不一致。
19.1、 constructor方法
constructor方法默认返回实例对象(即this),完全可以指定返回另外一个对象。类必须使用new调用,否则会报错。
    class Foo {
      constructor() {
        return Object.create(null);
      }
    }
    new Foo() instanceof Foo
    // false
19.2、 类的实例
与 ES5 一样,实例的属性除非显式定义在其本身(即定义在this对象上),否则都是定义在原型上(即定义在class上)。
    //定义类
    class Point {
      constructor(x, y) {
        this.x = x;
        this.y = y;
      }
      toString() {
        return '(' + this.x + ', ' + this.y + ')';
      }
    }
    var point = new Point(2, 3);
    point.toString() // (2, 3)
    point.hasOwnProperty('x') // true
    point.hasOwnProperty('y') // true
    point.hasOwnProperty('toString') // false
    point.__proto__.hasOwnProperty('toString') // true
    //toString是原型上的方法,构造方法中的才是实例属性
与 ES5 一样,类的所有实例共享一个原型对象。
    var p1 = new Point(2,3);
    var p2 = new Point(3,2);
    p1.__proto__ === p2.__proto__
    //true
19.3、取值函数(getter)和存值函数(setter)
在“类”的内部可以使用get和set关键字,对某个属性设置存值函数和取值函数,拦截该属性的存取行为。
19.4、 属性表达式
    let methodName = 'getArea';
    class Square {
      constructor(length) {
        // ...
      }
      [methodName]() {
        // ...
      }
    }
19.5、 Class表达式
    const MyClass = class Me {
      getClassName() {
        return Me.name;
      }
    };
这个类的名字是Me,但是Me只在 Class 的内部可用,指代当前类。在 Class 外部,这个类只能用MyClass引用。
    let inst = new MyClass();
    inst.getClassName() // Me
    Me.name // ReferenceError: Me is not defined
如果类的内部没用到的话,可以省略Me。
const MyClass = class { /* ... */ };
采用 Class 表达式,可以写出立即执行的 Class。
    let person = new class {
      constructor(name) {
        this.name = name;
      }
      sayName() {
        console.log(this.name);
      }
    }('张三');
    person.sayName(); // "张三"
class的注意事项:
1、严格模式。类和模块的内部,默认就是严格模式。
2、不存在提升。类不存在变量提升。
3、name属性总是返回紧跟在class关键字后面的类名。
4、Generator 方法。Symbol.iterator方法返回一个Foo类的默认遍历器,for...of循环会自动调用这个遍历器。
    class Foo {
      constructor(...args) {
        this.args = args;
      }
      * [Symbol.iterator]() {
        for (let arg of this.args) {
          yield arg;
        }
      }
    }
    for (let x of new Foo('hello', 'world')) {
      console.log(x); // hello,world
    }
5、 This的指向。 类的方法内部如果含有this,它默认指向类的实例。 但是,必须非常小心,一旦单独使用该方法,很可能报错。this会指向该方法运行时所在的环境(由于 class 内部是严格模式,所以 this 实际指向的是undefined)
    class Logger {
      printName(name = 'there') {
        this.print(`Hello ${name}`);
      }
      print(text) {
        console.log(text);
      }
    }
    const logger = new Logger();
    const { printName } = logger;
    printName(); // TypeError: Cannot read property 'print' of undefined 本来是实例的方法,但是此时printName()不是实例调用的,所以this指向不明,默认为undefined
一个比较简单的解决方法是,在构造方法中绑定this,这样就不会找不到print方法了。
    class Logger {
      constructor() {
        this.printName = this.printName.bind(this);
      }
      // ...
    }
19.6、 静态方法
如果在一个方法前,加上static关键字,就表示该方法不会被实例继承,而是直接通过类来调用,这就称为“静态方法”。 如果静态方法包含this关键字,这个this指的是类,而不是实例。静态方法可以与非静态方法重名。 class Foo {
static bar() {
this.baz();
}
static baz() {
console.log('hello');
}
baz() {
console.log('world');
}
}
Foo.bar() // hello
父类的静态方法,可以被子类继承。
    class Foo {
      static classMethod() {
        return 'hello';
      }
    }
    class Bar extends Foo {
    }
    Bar.classMethod() // 'hello'
静态方法也是可以从super对象上调用的。
    class Foo {
      static classMethod() {
        return 'hello';
      }
    }
    class Bar extends Foo {
      static classMethod() {
        return super.classMethod() + ', too';
      }
    }
    Bar.classMethod() // "hello, too"
19.7、 实力属性的新写法
这个属性也可以定义在类的最顶层,其他都不变。这种新写法的好处是,所有实例对象自身的属性都定义在类的头部,看上去比较整齐,一眼就能看出这个类有哪些实例属性。
    class IncreasingCounter {
      _count = 0;
      get value() {
        console.log('Getting the current value!');
        return this._count;
      }
      increment() {
        this._count++;
      }
    }
19.8、 静态属性
    class MyClass {
      static myStaticProp = 42;
      constructor() {
        console.log(MyClass.myStaticProp); // 42
      }
    }
19.9、 私有方法和私有属性
1、 将私有方法移出模块,因为模块内部的所有方法都是对外可见的。
    class Widget {
      foo (baz) {
        bar.call(this, baz);
      }
      // ...
    }
    function bar(baz) {
      return this.snaf = baz;
    }
2、利用Symbol值的唯一性,将私有方法的名字命名为一个Symbol值。一般情况下无法获取到它们,因此达到了私有方法和私有属性的效果。但是也不是绝对不行,Reflect.ownKeys()依然可以拿到它们。
    const bar = Symbol('bar');
    const snaf = Symbol('snaf');
    export default class myClass{
      // 公有方法
      foo(baz) {
        this[bar](baz);
      }
      // 私有方法
      [bar](baz) {
        return this[snaf] = baz;
      }
      // ...
    };
19.10、new.target()
ES6 为new命令引入了一个new.target属性,该属性一般用在构造函数之中,返回new命令作用于的那个构造函数 。如果构造函数不是通过new命令或Reflect.construct()调用的,new.target会返回undefined,因此这个属性可以用来确定构造函数是怎么调用的。 Class 内部调用new.target,返回当前Class。在函数外部,使用new.target会报错。
    function Person(name) {
        if (new.target !== undefined) {
        this.name = name;
    } else {
            throw new Error('必须使用 new 命令生成实例');
        }
    }
    // 另一种写法
    function Person(name) {
        if (new.target === Person) {
            this.name = name;
        } else {
            throw new Error('必须使用 new 命令生成实例');
        }
    }
    var person = new Person('张三'); // 正确
    var notAPerson = Person.call(person, '张三');  // 报错
子类继承父类时,new.target会返回子类。主要是看new后面的类是哪个
    class Rectangle {
    constructor(length, width) {
        console.log(new.target === Rectangle);
        // ...
      }
    }
    class Square extends Rectangle {
      constructor(length,width) {
        super(length, width);
      }
    }
    var c=new Rectangle(1,2);
    var obj = new Square(3); // 输出 false
19.11、 类的继承
Class 可以通过extends关键字实现继承,这比 ES5 的通过修改原型链实现继承,要清晰和方便很多。 class ColorPoint extends Point {
constructor(x, y, color) {
super(x, y); // 调用父类的constructor(x, y)
this.color = color;
}
toString() {
return this.color + ' ' + super.toString(); // 调用父类的toString()
}
}
1、 super关键字,它在这里表示父类的构造函数,用来新建父类的this对象。
2、 子类必须在constructor方法中调用super方法,否则新建实例时会报错。这是因为子类自己的this对象,必须先通过父类的构造函数完成塑造,得到与父类同样的实例属性和方法,然后再对其进行加工,加上子类自己的实例属性和方法。如果不调用super方法,子类就得不到this对象。 或者是不写constructor(){},写了必须写super()。
    class Point { /* ... */ }
    class ColorPoint extends Point {
          constructor() {
          }
    }
    let cp = new ColorPoint(); // ReferenceError
    ————————————————————————————————————————————————————————————
    class ColorPoint extends Point {
    }
    // 等同于
    class ColorPoint extends Point {
      constructor(...args) {
        super(...args);
      }
    }
3、 ES5 的继承,实质是先创造子类的实例对象this,然后再将父类的方法添加到this上面(Parent.apply(this))。ES6 的继承机制完全不同,实质是先将父类实例对象的属性和方法,加到this上面(所以必须先调用super方法),然后再用子类的构造函数修改this。
4、 在子类的构造函数中,只有调用super之后,才可以使用this关键字,否则会报错。这是因为子类实例的构建,基于父类实例,只有super方法才能调用父类实例。 5 子类实例对象cp同时是ColorPoint和Point(父类)两个类的实例,这与 ES5 的行为完全一致。
6 父类的静态方法,也会被子类继承。
19.12、 Object.getPrototypeOf()
Object.getPrototypeOf方法可以用来从子类上获取父类。可以使用这个方法判断,一个类是否继承了另一个类。 Object.getPrototypeOf(ColorPoint) === Point// true
19.13、 Super关键字
1、 super作为函数调用时,代表父类的构造函数 。ES6 要求,子类的构造函数必须执行一次super函数。 super虽然代表了父类A的构造函数,但是返回的是子类B的实例。 作为函数时,super()只能用在子类的构造函数之中,用在其他地方就会报错。
    class A {
      constructor() {
        console.log(new.target.name);//new.targe构造函数
      }
    }
    class B extends A {
      constructor() {
        super();
      }
    }
    new A() // A
    new B() // B
2、 super作为对象时,在普通方法中,指向父类的原型对象;在静态方法中,指向父类。所以定义在父类实例上的方法或属性,是无法通过super调用的。
    lass A {
      p() {
        return 2;
      }
    }
    class B extends A {
      constructor() {
        super();
        console.log(super.p()); // 2
      }
    }
    let b = new B();
在子类普通方法中通过super调用父类的方法时,方法内部的this指向当前的子类实例。
    class A {
      constructor() {
        this.x = 1;
      }
      print() {
        console.log(this.x);
      }
    }
    class B extends A {
      constructor() {
        super();
        this.x = 2;
      }
      m() {
        super.print();
      }
    }
    let b = new B();
    b.m() // 2
由于this指向子类实例,所以如果通过super对某个属性赋值,这时super就是this,赋值的属性会变成子类实例的属性。
    class A {
      constructor() {
        this.x = 1;
      }
    }
    class B extends A {
      constructor() {
        super();
        this.x = 2;
        super.x = 3;//此时的super相当于this
        console.log(super.x); // undefined
        console.log(this.x); // 3
      }
    }
    let b = new B();
而当读取super.x的时候,读的是A.prototype.x,所以返回undefined。
    class A {
      constructor() {
        this.x = 1;
      }
      static print() {
        console.log(this.x);
      }
    }
    class B extends A {
      constructor() {
        super();
        this.x = 2;
      }
      static m() {
        super.print();
      }
    }
    B.x = 3;
    B.m() // 3
静态方法B.m里面,super.print指向父类的静态方法。这个方法里面的this指向的是B,而不是B的实例。
19.14、 类的 prototype 属性和__proto__属性
ES5 实现之中,每一个对象都有__proto__属性,指向对应的构造函数的prototype属性。
instance.__proto__===A.prototype//instance是A的实例
Class作为构造函数的语法糖,同时有prototype属性和__proto__属性,因此同时存在两条继承链。
(1)子类的__proto__属性,表示构造函数的继承, 总是指向父类。
(2)子类prototype属性的__proto__属性,**表示方法的继承,**总是指向父类的prototype属性。
    class A {
    }
    class B extends A {
    }
    console.log(B.__proto__ === A) // true,
    console.log(B.prototype.__proto__ === A.prototype )// true,
    // 等同于
    Object.create(A.prototype);
作为一个对象,子类(B)的原型(__proto__属性)是父类(A);作为一个构造函数,子类(B)的原型对象(prototype属性)是父类的原型对象(prototype属性)的实例。
19.15、实例的 __proto__ 属性
子类实例的__proto__属性的__proto__属性,指向父类实例的__proto__属性。也就是说,子类的原型的原型,是父类的原型。(p2是子类,p1是父类)
    p2.__proto__.__proto__ === p1.__proto__ // true
    解析:
    p2.__proto__===p2的类.prototype;
    p2的类.prototype.__proto__===p2的类的父类的.prototype
    p1.__proto__===p2的类的父类的.prototype。
因此,通过子类实例的__proto__.__proto__属性,可以修改父类实例的行为。
    p2.__proto__.__proto__.printName = function () {
      console.log('Ha');
    };
    p1.printName() // "Ha"
20、Module
20、1 严格模式
ES6 的模块自动采用严格模式,不管你有没有在模块头部加上"use strict";。 严格模式主要有以下限制。
- 变量必须声明后再使用。
- 函数的参数不能有同名属性,否则报错。
- 不能使用with语句。
- 不能对只读属性赋值,否则报错。
- 不能使用前缀 0 表示八进制数,否则报错。
- 不能删除不可删除的属性,否则报错。
- 不能删除变量delete prop,会报错,只能删除属性delete global[prop]。
- eval不会在它的外层作用域引入变量(没懂)。
- eval和arguments不能被重新赋值。
- arguments不会自动反映函数参数的变化。
- 不能使用arguments.callee。(指向用于arguments对象的函数)
- 不能使用arguments.caller,值为undefined。(caller属性保存着调动当前函数的函数的引用)
- 禁止this指向全局对象。
- 不能使用fn.caller和fn.arguments获取函数调用的堆栈。
- 增加了保留字(比如protected、static和interface)。
20.2 export的用法
export命令用于规定模块的对外接口,import命令用于输入其他模块提供的功能。 export写法种类:
1、使用大括号指定所要输出的一组变量。export {firstName, lastName, year}; 2、直接使用export关键字输出该变量。export var year = 1958;
    export var firstName = 'Michael';
    export var lastName = 'Jackson';
    export var year = 1958;
    等同于下面这中写法
    var firstName = 'Michael';
    var lastName = 'Jackson';
    var year = 1958;
    export {firstName, lastName, year};
通常情况下,export输出的变量就是本来的名字,但是可以使用as关键字重命名。
    function v1() { ... }
    function v2() { ... }
    export {
      v1 as streamV1,
      v2 as streamV2,
      v2 as streamLatestVersion
    };
注意1:export命令规定的是对外的接口,必须与模块内部的变量建立一一对应关系。
    // 报错
    export 1;
    // 报错
    var m = 1;
    export m;
    // 报错
    function f() {}
    export f;
注意2:export语句输出的接口,与其对应的值是动态绑定关系 ,即通过该接口,可以取到模块内部实时的值。
    export var foo = 'bar';
    setTimeout(() => foo = 'baz', 500);
注意3:export命令可以出现在模块的任何位置,只要处于模块顶层就可以。
    function foo() {
      export default 'bar' // SyntaxError
    }
    foo()
20、3 import的用法
import命令输入的变量都是只读的,因为它的本质是输入接口。也就是说,不允许在加载模块的脚本里面,改写接口。 import {a} from './xxx.js'
a = {}; // Syntax Error : 'a' is read-only;
但是,如果a是一个对象,改写a的属性是允许的。
import {a} from './xxx.js'
a.foo = 'hello'; // 合法操作
import后面的from指定模块文件的位置,可以是相对路径,也可以是绝对路径,.js后缀可以省略。如果只是模块名,不带有路径,那么必须有配置文件,告诉 JavaScript 引擎该模块的位置。
    import {myMethod} from 'util';
    //util是模块文件名,由于不带有路径,必须通过配置,告诉引擎怎么取到这个模块。
注意,import命令具有提升效果,会提升到整个模块的头部,首先执行。import是静态执行,所以不能使用表达式和变量 ,这些只有在运行时才能得到结果的语法结构。
    // 报错
    import { 'f' + 'oo' } from 'my_module';
    // 报错
    let module = 'my_module';
    import { foo } from module;
    // 报错
    if (x === 1) {
      import { foo } from 'module1';
    } else {
      import { foo } from 'module2';
    }
逐一指定要加载的方法:
    import { area, circumference } from './circle';
    console.log('圆面积:' + area(4));
    console.log('圆周长:' + circumference(14));
20、4 模块的整体加载 import *
整体加载的写法: import * from "module"
    import * as circle from './circle';
    console.log('圆面积:' + circle.area(4));
    console.log('圆周长:' + circle.circumference(14));
20、5 export default
用到export default命令,为模块指定默认输出。 // export-default.js
export default function () {
console.log('foo');
}
// import-default.js
import customName from './export-default';
//因为是默认输出的,所以这时import命令后面,不使用大括号。并且可以随意取名。
customName(); // 'foo'
1、下面代码中,foo函数的函数名foo,在模块外部是无效的。加载的时候,视同匿名函数加载。
    function foo() {
      console.log('foo');
    }
    export default foo;
2、一个模块只能有一个默认输出,因此export default命令只能使用一次。所以,import命令后面才不用加大括号,因为只可能唯一对应export default命令。 本质上,export default就是输出一个叫做default的变量或方法,然后系统允许你为它取任意名字。但是建议import时还是用default后面的名字。
    // modules.js
    function add(x, y) {
      return x * y;
    }
    export {add as default};
    // 等同于
    // export default add;
    // app.js
    import { default as foo } from 'modules';
    // 等同于
    // import foo from 'modules';
3、因为export default命令的本质是将后面的值,赋给default变量,所以可以直接将一个值写在export default之后。
    // 正确
    export default 42;
    // 报错
    export 42;
4、如果想在一条import语句中,同时输入默认方法(default)和其他接口,可以写成下面这样。
import _, { each, forEach } from 'lodash';
5、 export default也可以用来输出类。
    // MyClass.js
    export default class { ... }
    // main.js
    import MyClass from 'MyClass';
    let o = new MyClass();
20、5 export和import的复合写法
    export { foo, bar } from 'my_module';
    // 可以简单理解为
    import { foo, bar } from 'my_module';
    export { foo, bar };
写成一行以后,foo和bar实际上并没有被导入当前模块,只是相当于对外转发了这两个接口,导致当前模块不能直接使用foo和bar。 默认接口的写法如下。
export { default } from 'foo';
具名接口改为默认接口的写法如下。
    export { es6 as default } from './someModule';
    // 等同于
    import { es6 } from './someModule';
    export default es6;
同样地,默认接口也可以改名为具名接口。
export { default as es6 } from './someModule';
20、6 模块的继承
    // circleplus.js
    export * from 'circle';
    export var e = 2.71828182846;
    export default function(x) {
      return Math.exp(x);
    }
上面代码中的export*,表示再输出circle模块的所有属性和方法。*注意,export 命令会忽略circle模块的default方法。
    // main.js
    import * as math from 'circleplus';//整体加载的写法
    import exp from 'circleplus';
    console.log(exp(math.e));
    import exp表示,将circleplus模块的默认方法加载为exp方法。
20、7 Import()
可以实现动态加载。运行时执行,也就是说,什么时候运行到这一句,就会加载指定的模块。import()返回一个 Promise 对象。
注意:import()加载模块成功以后,这个模块会作为一个对象,当作then方法的参数。因此,可以使用对象解构赋值的语法,获取输出接口。
    import('./myModule.js')
    .then(({export1, export2}) => {
      // ...•
    });
上面代码中,export1和export2都是myModule.js的输出接口,可以解构获得。 如果模块有default输出接口,可以用参数直接获得。
    import('./myModule.js')
    .then(myModule => {
      console.log(myModule.default);
    });
上面的代码也可以使用具名输入的形式。
    import('./myModule.js')
    .then(({default: theDefault}) => {
      console.log(theDefault);
    });
20、8 module的加载实现
浏览器加载 ES6 模块,也使用script标签,但是要加入type="module"属性。 <script type="module" src="./foo.js"></script>
<!-- 等同于 -->
<script type="module" src="./foo.js" defer></script>
对于外部的模块脚本(上例是foo.js),有几点需要注意。
1、 代码是在模块作用域之中运行,而不是在全局作用域运行。模块内部的顶层变量,外部不可见。
2、 模块脚本自动采用严格模式,不管有没有声明use strict。
3、 模块之中,可以使用import命令加载其他模块(.js后缀不可省略,需要提供绝对 URL 或相对 URL),也可以使用export命令输出对外接口。
4、 模块之中,顶层的this关键字返回undefined,而不是指向window。也就是说,在模块顶层使用this关键字,是无意义的。
5、 同一个模块如果加载多次,将只执行一次。
利用顶层的this等于undefined这个语法点,可以侦测当前代码是否在 ES6 模块之中。
const isNotModuleScript = this !== undefined;
20、9 ES6 模块与 CommonJS 模块
ES6 模块与 CommonJS 模块完全不同。 它们有两个重大差异。1、CommonJS 模块输出的是一个值的拷贝,ES6 模块输出的是值的引用。
2、 CommonJS 模块是运行时加载。 ,ES6 模块是编译时输出接口。 。
第二个差异是因为 CommonJS 加载的是一个对象(即module.exports属性),该对象只有在脚本运行完才会生成。而 ES6 模块不是对象,它的对外接口只是一种静态定义,在代码静态解析阶段就会生成。
第一个差异是因为CommonJS 模块输出的是值的拷贝,也就是说,一旦输出一个值,模块内部的变化就影响不到这个值。ES6模块是动态引用,并且不会缓存值,模块里面的变量绑定其所在的模块。
    // lib.js
    var counter = 3;
    function incCounter() {
      counter++;
    }
    module.exports = {
      counter: counter,
      incCounter: incCounter,
    };
    // main.js
    var mod = require('./lib');
    console.log(mod.counter);  // 3
    mod.incCounter();
    console.log(mod.counter); // 3
这是因为mod.counter是一个原始类型的值 ,会被缓存。除非写成一个函数,才能得到内部变动后的值。
    // lib.js
    var counter = 3;
    function incCounter() {
      counter++;
    }
    module.exports = {
      get counter() {
        return counter
      },
      incCounter: incCounter,
    };
    // main.js
    var mod = require('./lib');
    console.log(mod.counter);  // 3
    mod.incCounter();
    console.log(mod.counter); // 4
可以对obj添加属性,但是重新赋值就会报错。 因为变量obj指向的地址是只读的,不能重新赋值,这就好比main.js创造了一个名为obj的const变量。
    // lib.js
    export let obj = {};
    // main.js
    import { obj } from './lib';
    obj.prop = 123; // OK
    obj = {}; // TypeError
commonJS和ES6内部变量的区别:
1、ES6 模块之中,顶层的this指向undefined;CommonJS 模块的顶层this指向当前模块。
2、以下这些顶层变量在 ES6 模块之中都是不存在的。
- arguments
- require
- module
- exports
- __filename
- __dirname
20.10、 ES6加载CommonJS模块(整体输入)
Node 会自动将module.exports属性,当作模块的默认输出,即等同于export default xxx。 // a.js
module.exports = {
foo: 'hello',
bar: 'world'
};
// 等同于
export default {
foo: 'hello',
bar: 'world'
};
由于 ES6 模块是编译时确定输出接口,CommonJS 模块是运行时确定输出接口,所以采用import命令加载 CommonJS 模块时,不允许采用下面的写法。
    // 不正确
    import { readFile } from 'fs';
因为fs是 CommonJS格式,只有在运行时才能确定readFile接口,而import命令要求编译时就确定这个接口。解决方法就是改为整体输入。
    // 正确的写法一
    import * as express from 'express';
    const app = express.default();
    // 正确的写法二
    import express from 'express';
    const app = express();
20.11、 CommonJS加载ES6模块(import()函数)
CommonJS 模块加载 ES6 模块,不能使用require命令,而要使用import()函数。ES6 模块的所有输出接口,会成为输入对象的属性。20.12、 CommonJS 模块的加载原理。
require命令第一次加载该脚本,就会执行整个脚本,然后在内存生成一个对象。 {
id: '...',
exports: { ... },
loaded: true,
...
}
该对象的id属性是模块名,exports属性是模块输出的各个接口,loaded属性是一个布尔值,表示该模块的脚本是否执行完毕。其他还有很多属性,这里都省略了。以后需要用到这个模块的时候,就会到exports属性上面取值。即使再次执行require命令,也不会再次执行该模块,而是到缓存之中取值。也就是说,CommonJS 模块无论加载多少次,都只会在第一次加载时运行一次,以后再加载,就返回第一次运行的结果,除非手动清除系统缓存。
20.13、 CommonJS的循环加载
一旦出现某个模块被"循环加载",就只输出已经执行的部分,还未执行的部分不会输出。 //a.js
exports.done = false;
var b = require('./b.js');
console.log('在 a.js 之中,b.done = %j', b.done);
exports.done = true;
console.log('a.js 执行完毕');
//b.js
exports.done = false;
var a = require('./a.js');
console.log('在 b.js 之中,a.done = %j', a.done);
exports.done = true;
console.log('b.js 执行完毕');
//main.js
var a = require('./a.js');
var b = require('./b.js');
console.log('在 main.js 之中, a.done=%j, b.done=%j', a.done, b.done);
$ node main.js
执行结果如下:
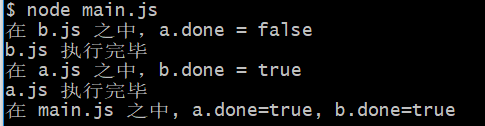
在main.js中的详细执行过程如下:
a.js脚本先输出一个done变量,然后加载另一个脚本文件b.js。注意,此时a.js代码就停在这里,等待b.js执行完毕,再往下执行。 b.js执行到第二行,就会去加载a.js,这时,就发生了“循环加载”。系统会去a.js模块对应对象的exports属性取值,可是因为a.js还没有执行完,从exports属性只能取回已经执行的部分,而不是最后的值。(a.js已经执行的部分,只有一行。)然后,b.js接着往下执行,等到全部执行完毕,再把执行权交还给a.js。于是,a.js接着往下执行,直到执行完毕。
20.14、 ES6模块的循环加载
ES6 模块是动态引用,如果使用import从一个模块加载变量(即import foo from 'foo'),那些变量不会被缓存,而是成为一个指向被加载模块的引用
    // a.mjs
    import {bar} from './b';
    console.log('a.mjs');
    console.log(bar);
    export let foo = 'foo';
    //function foo() { return 'foo' }
    //export {foo};
    // b.mjs
    import {foo} from './a';
    console.log('b.mjs');
    console.log(foo);
    export let bar = 'bar';
    //function bar() { return 'bar' }
    //export {bar};

    $ node --experimental-modules a.mjs
    b.mjs
    ReferenceError: foo is not defined
上述代码的详细执行过程如下:
首先,执行a.mjs以后,引擎发现它加载了b.mjs,因此会优先执行b.mjs,然后再执行a.mjs。接着,执行b.mjs的时候,已知它从a.mjs输入了foo接口,这时不会去执行a.mjs,而是认为这个接口已经存在了,继续往下执行。执行到第三行console.log(foo)的时候,才发现这个接口根本没定义,因此报错。这可以通过将foo写成函数来解决这个问题。 这是因为函数具有提升作用(提升到顶部),在执行import {bar} from './b'时,函数foo就已经有定义了,所以b.mjs加载的时候不会报错。这也意味着,如果把函数foo改写成函数表达式,也会报错。
21、编程风格(性能优化)
- 建议不再使用var命令,而是使用let命令取代。
- 在let和const之间,建议优先使用const,尤其是在全局环境,不应该设置变量,只应设置常量。 原因:一个是const可以提醒阅读程序的人,这个变量不应该改变;另一个是const比较符合函数式编程思想,运算不改变值,只是新建值,而且这样也有利于将来的分布式运算;最后一个原因是 JavaScript 编译器会对const进行优化,所以多使用const,有利于提高程序的运行效率,也就是说let和const的本质区别,其实是编译器内部的处理不同。
- 静态字符串一律使用单引号或反引号,不使用双引号。动态字符串使用反引号。
    // bad
    const a = "foobar";
    const b = 'foo' + a + 'bar';
    // good
    const a = 'foobar';
    const b = `foo${a}bar`;
- 解构赋值 使用数组成员对变量赋值时,优先使用解构赋值。
    const arr = [1, 2, 3, 4];
    // bad
    const first = arr[0];
    const second = arr[1];
    // good
    const [first, second] = arr;
函数的参数如果是对象的成员,优先使用解构赋值。
    // bad
    function getFullName(user) {
      const firstName = user.firstName;
      const lastName = user.lastName;
    }
    // good
    function getFullName(obj) {
      const { firstName, lastName } = obj;
    }
    // best
    function getFullName({ firstName, lastName }) {
    }
- 对象
单行定义的对象,最后一个成员不以逗号结尾。多行定义的对象,最后一个成员以逗号结尾。
    // bad
    const a = { k1: v1, k2: v2, };
    const b = {
      k1: v1,
      k2: v2
    };
    // good
    const a = { k1: v1, k2: v2 };
    const b = {
      k1: v1,
      k2: v2,
    };
对象尽量静态化,一旦定义,就不得随意添加新的属性。如果添加属性不可避免,要使用Object.assign方法。
    // bad
    const a = {};
    a.x = 3;
    // if reshape unavoidable
    const a = {};
    Object.assign(a, { x: 3 });
    // good
    const a = { x: null };
    a.x = 3;
- 使用扩展运算符(...)拷贝数组。使用 Array.from 方法,将类似数组的对象转为数组。
    const itemsCopy = [...items];
    const foo = document.querySelectorAll('.foo');
    const nodes = Array.from(foo);
- 简单的、单行的、不会复用的函数,建议采用箭头函数。如果函数体较为复杂,行数较多,还是应该采用传统的函数写法。
- 不要在函数体内使用 arguments 变量,使用 rest 运算符(...)代替。
    // bad
    function concatenateAll() {
      const args = Array.prototype.slice.call(arguments);
      return args.join('');
    }
    // good
    function concatenateAll(...args) {
      return args.join('');
    }
- 使用默认值语法设置函数参数的默认值。
    // bad
    function handleThings(opts) {
      opts = opts || {};
    }
    // good
    function handleThings(opts = {}) {
      // ...
    }
- 注意区分 Object 和 Map,只有模拟现实世界的实体对象时,才使用 Object。如果只是需要key: value的数据结构,使用 Map 结构。因为 Map 有内建的遍历机制。
- 总是用 Class,取代需要 prototype 的操作。因为 Class 的写法更简洁,更易于理解。
    // bad
    function Queue(contents = []) {
      this._queue = [...contents];
    }
    Queue.prototype.pop = function() {
      const value = this._queue[0];
      this._queue.splice(0, 1);
      return value;
    }
    // good
    class Queue {
      constructor(contents = []) {
        this._queue = [...contents];
      }
      pop() {
        const value = this._queue[0];
        this._queue.splice(0, 1);
        return value;
      }
    }
- 使用extends实现继承,因为这样更简单,不会有破坏instanceof运算的危险。
- 如果模块只有一个输出值,就使用export default,如果模块有多个输出值,就不使用export default。export default与普通的export不要同时使用。
- 不要在模块输入中使用通配符。因为这样可以确保你的模块之中,有一个默认输出(export default)。
    // bad
    import * as myObject from './importModule';
    // good
    import myObject from './importModule';
- 如果模块默认输出一个函数,函数名的首字母应该小写。如果模块默认输出一个对象,对象名的首字母应该大写。
    function makeStyleGuide() {
    }
    export default makeStyleGuide;//函数
    const StyleGuide = {
      es6: {
      }
    };
    export default StyleGuide;//对象
