

系列文章
Webpack系列-第一篇基础杂记
Webpack系列-第二篇插件机制杂记
Webpack系列-第三篇流程杂记
前言
本文章个人理解, 只是为了理清webpack流程, 没有关注内部过多细节, 如有错误, 请轻喷~
调试
1.使用以下命令运行项目,./scripts/build.js是你想要开始调试的地方
node --inspect-brk ./scripts/build.js --inline --progress
2.打开chrome://inspect/#devices即可调试
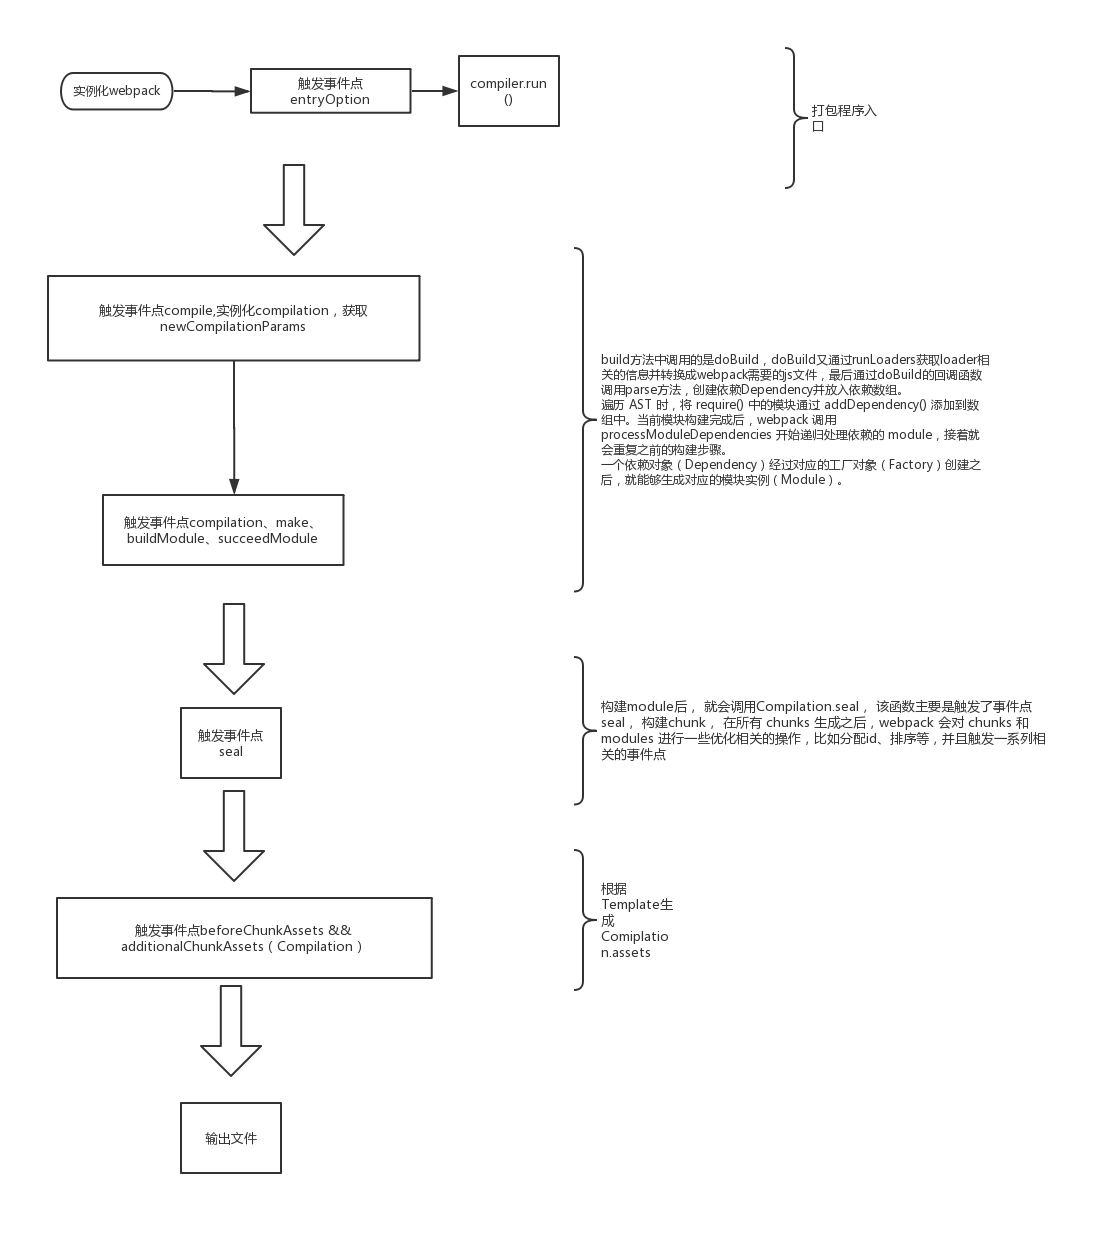
流程图
入口
入口处在bulid.js,可以看到其中的代码是先实例化webpack,然后调用compiler的run方法。
function build(previousFileSizes) {
  let compiler = webpack(config);
  return new Promise((resolve, reject) => {
    compiler.run((err, stats) => {
      ...
  });
}
entry-option(compiler)
webpack.js
webpack在node_moduls下面的\webpack\lib\webpack.js(在此前面有入口参数合并),找到该文件可以看到相关的代码如下
const webpack = (options, callback) => {
	......
	let compiler;
	// 处理多个入口
	if (Array.isArray(options)) {
		compiler = new MultiCompiler(options.map(options => webpack(options)));
	} else if (typeof options === "object") {
        // webpack的默认参数
        options = new WebpackOptionsDefaulter().process(options);
        console.log(options) // 见下图
        // 实例化compiler
		compiler = new Compiler(options.context);
		compiler.options = options;
		// 对webpack的运行环境处理
		new NodeEnvironmentPlugin().apply(compiler);
		// 根据上篇的tabpable可知 这里是为了注册插件
		if (options.plugins && Array.isArray(options.plugins)) {
			for (const plugin of options.plugins) {
				plugin.apply(compiler);
			}
		}
		// 触发两个事件点 environment/afterEnviroment
		compiler.hooks.environment.call();
		compiler.hooks.afterEnvironment.call();
		// 设置compiler的属性并调用默认配置的插件,同时触发事件点entry-option
		compiler.options = new WebpackOptionsApply().process(options, compiler);
	} else {
		throw new Error("Invalid argument: options");
	}
	if (callback) {
		......
		compiler.run(callback);
	}
	return compiler;
};

可以看出options保存的就是本次webpack的一些配置参数,而其中的
plugins属性则是webpack中最重要的插件。
new WebpackOptionsApply().process
process(options, compiler) {
    let ExternalsPlugin;
    compiler.outputPath = options.output.path;
    compiler.recordsInputPath = options.recordsInputPath || options.recordsPath;
    compiler.recordsOutputPath =
    	options.recordsOutputPath || options.recordsPath;
    compiler.name = options.name;
    compiler.dependencies = options.dependencies;
    if (typeof options.target === "string") {
    	let JsonpTemplatePlugin;
    	let FetchCompileWasmTemplatePlugin;
    	let ReadFileCompileWasmTemplatePlugin;
    	let NodeSourcePlugin;
    	let NodeTargetPlugin;
    	let NodeTemplatePlugin;

    	switch (options.target) {
    		case "web":
    			JsonpTemplatePlugin = require("./web/JsonpTemplatePlugin");
    			FetchCompileWasmTemplatePlugin = require("./web/FetchCompileWasmTemplatePlugin");
    			NodeSourcePlugin = require("./node/NodeSourcePlugin");
    			new JsonpTemplatePlugin().apply(compiler);
    			new FetchCompileWasmTemplatePlugin({
    				mangleImports: options.optimization.mangleWasmImports
    			}).apply(compiler);
    			new FunctionModulePlugin().apply(compiler);
    			new NodeSourcePlugin(options.node).apply(compiler);
    			new LoaderTargetPlugin(options.target).apply(compiler);
    			break;
    		case "webworker":......
    		......
    	}
    }
    new JavascriptModulesPlugin().apply(compiler);
    new JsonModulesPlugin().apply(compiler);
    new WebAssemblyModulesPlugin({
    	mangleImports: options.optimization.mangleWasmImports
    }).apply(compiler);

    new EntryOptionPlugin().apply(compiler);
    // 触发事件点entry-options并传入参数 context和entry
    compiler.hooks.entryOption.call(options.context, options.entry);
    new CompatibilityPlugin().apply(compiler);
    ......
    new ImportPlugin(options.module).apply(compiler);
    new SystemPlugin(options.module).apply(compiler);
}
run(compiler)
调用run时,会先在内部触发beforeRun事件点,然后再在读取recodes(关于records可以参考该文档)之前触发run事件点,这两个事件都是异步的形式,注意run方法是实际上整个webpack打包流程的入口。可以看到,最后调用的是compile方法,同时传入的是onCompiled函数
run(callback) {
    if (this.running) return callback(new ConcurrentCompilationError());
    const finalCallback = (err, stats) => {
    	......
    };
    this.running = true;

    const onCompiled = (err, compilation) => {
    	....
    };

    this.hooks.beforeRun.callAsync(this, err => {
    	if (err) return finalCallback(err);

    	this.hooks.run.callAsync(this, err => {
    		if (err) return finalCallback(err);

    		this.readRecords(err => {
    			if (err) return finalCallback(err);

    			this.compile(onCompiled);
    		});
    	});
    });
}
compile(compiler)
compile方法主要上触发beforeCompile、compile、make等事件点,并实例化compilation,这里我们可以看到传给compile的newCompilationParams参数, 这个参数在后面相对流程中也是比较重要,可以在这里先看一下
compile(callback) {
    const params = this.newCompilationParams();
    // 触发事件点beforeCompile,并传入参数CompilationParams
    this.hooks.beforeCompile.callAsync(params, err => {
    	if (err) return callback(err);
        // 触发事件点compile,并传入参数CompilationParams
    	this.hooks.compile.call(params);
        // 实例化compilation
    	const compilation = this.newCompilation(params);
        // 触发事件点make
    	this.hooks.make.callAsync(compilation, err => {
    		....
    	});
    });
}
newCompilationParams返回的参数分别是两个工厂函数和一个Set集合
newCompilationParams() {
    const params = {
    	normalModuleFactory: this.createNormalModuleFactory(),
    	contextModuleFactory: this.createContextModuleFactory(),
    	compilationDependencies: new Set()
    };
    return params;
}
compilation(compiler)
从上面的compile方法看, compilation是通过newCompilation方法调用生成的,然后触发事件点thisCompilation和compilation,可以看出compilation在这两个事件点中最早当成参数传入,如果你在编写插件的时候需要尽快使用该对象,则应该在该两个事件中进行。
createCompilation() {
	return new Compilation(this);
}
newCompilation(params) {
    const compilation = this.createCompilation();
    compilation.fileTimestamps = this.fileTimestamps;
    compilation.contextTimestamps = this.contextTimestamps;
    compilation.name = this.name;
    compilation.records = this.records;
    compilation.compilationDependencies = params.compilationDependencies;
    // 触发事件点thisCompilation和compilation, 同时传入参数compilation和params
    this.hooks.thisCompilation.call(compilation, params);
    this.hooks.compilation.call(compilation, params);
    return compilation;
}
下面是打印出来的compilation属性
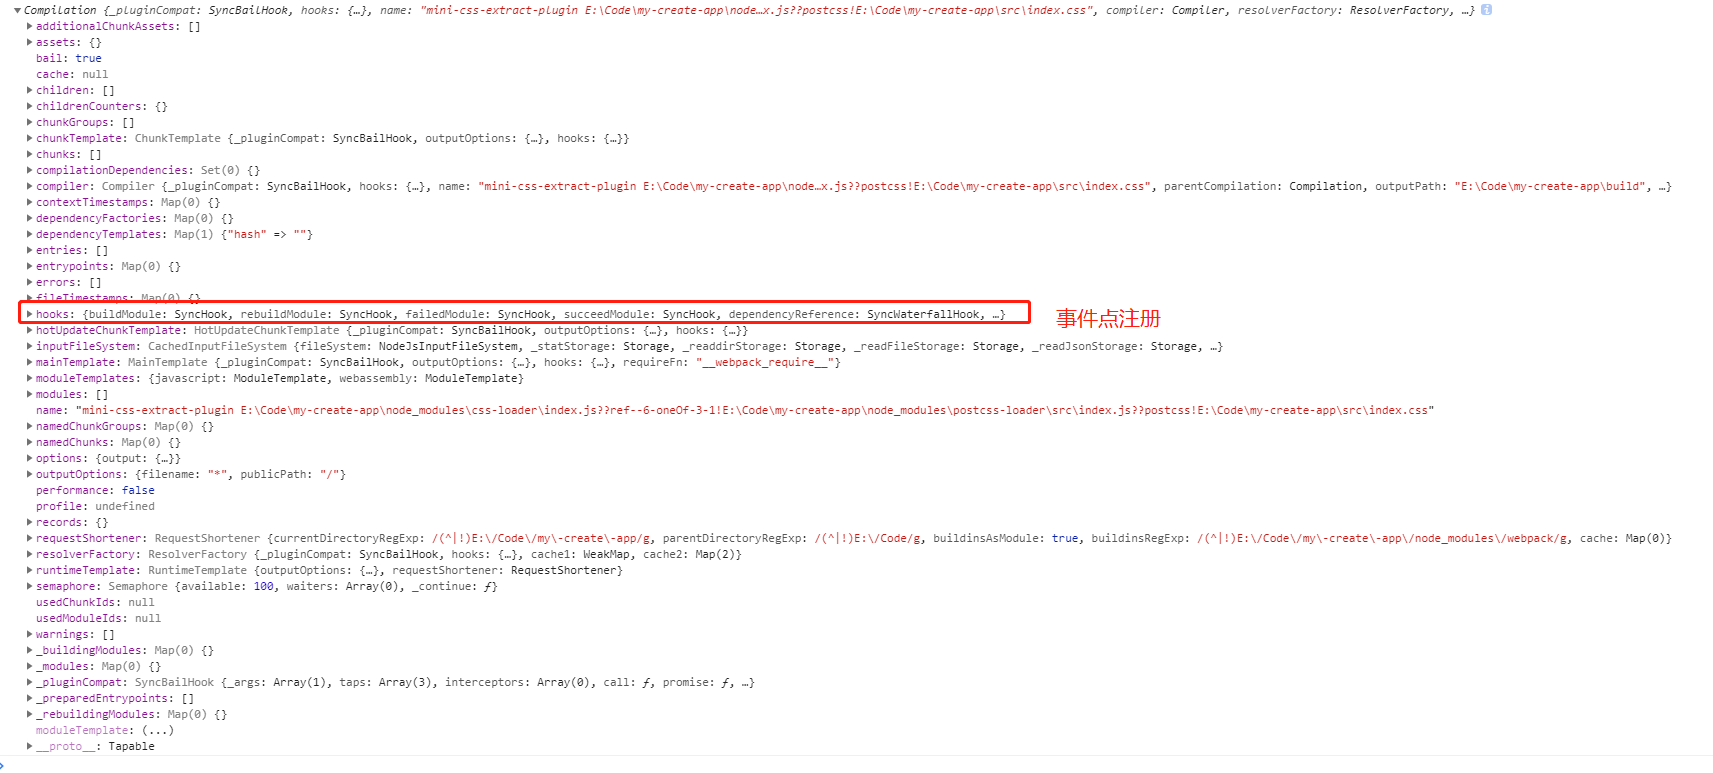
关于这里为什么要有thisCompilation这个事件点和子编译器(childCompiler),可以参考该文章
总结起来就是:
子编译器拥有完整的模块解析和chunk生成阶段,但是少了某些事件点,如"make", "compile", "emit", "after-emit", "invalid", "done", "this-compilation"。 也就是说我们可以利用子编译器来独立(于父编译器)跑完一个核心构建流程,额外生成一些需要的模块或者chunk。
make(compiler)
从上面的compile方法知道, 实例化Compilation后就会触发make事件点了。
触发了make时, 因为webpack在前面实例化SingleEntryPlugin或者MultleEntryPlugin,SingleEntryPlugin则在其apply方法中注册了一个make事件,
apply(compiler) {
    compiler.hooks.compilation.tap(
    	"SingleEntryPlugin",
    	(compilation, { normalModuleFactory }) => {
    		compilation.dependencyFactories.set(
    			SingleEntryDependency,
    			normalModuleFactory  // 工厂函数,存在compilation的dependencyFactories集合
    		);
    	}
    );

    compiler.hooks.make.tapAsync(
    	"SingleEntryPlugin",
    	(compilation, callback) => {
    		const { entry, name, context } = this;

    		const dep = SingleEntryPlugin.createDependency(entry, name);
    		// 进入到addEntry
    		compilation.addEntry(context, dep, name, callback);
    	}
    );
}
事实上addEntry调用的是Comilation._addModuleChain,acquire函数比较简单,主要是处理module时如果任务太多,就将moduleFactory.create存入队列等待
_addModuleChain(context, dependency, onModule, callback) {
    ......
    // 取出对应的Factory
    const Dep = /** @type {DepConstructor} */ (dependency.constructor);
    const moduleFactory = this.dependencyFactories.get(Dep);
    ......
    this.semaphore.acquire(() => {
    	moduleFactory.create(
    		{
    			contextInfo: {
    				issuer: "",
    				compiler: this.compiler.name
    			},
    			context: context,
    			dependencies: [dependency]
    		},
    		(err, module) => {
    			......
    		}
    	);
    });
    }
moduleFactory.create则是收集一系列信息然后创建一个module传入回调
buildModule(compilation)
回调函数主要上执行buildModule方法
this.buildModule(module, false, null, null, err => {
    ......
    afterBuild();
});
buildModule(module, optional, origin, dependencies, thisCallback) {
    // 处理回调函数
    let callbackList = this._buildingModules.get(module);
    if (callbackList) {
    	callbackList.push(thisCallback);
    	return;
    }
    this._buildingModules.set(module, (callbackList = [thisCallback]));

    const callback = err => {
    	this._buildingModules.delete(module);
    	for (const cb of callbackList) {
    		cb(err);
    	}
    };
    // 触发buildModule事件点
    this.hooks.buildModule.call(module);
    module.build(
    	this.options,
    	this,
    	this.resolverFactory.get("normal", module.resolveOptions),
    	this.inputFileSystem,
    	error => {
    		......
    	}
    );
    }
build方法中调用的是doBuild,doBuild又通过runLoaders获取loader相关的信息并转换成webpack需要的js文件,最后通过doBuild的回调函数调用parse方法,创建依赖Dependency并放入依赖数组
return this.doBuild(options, compilation, resolver, fs, err => {
    // 在createLoaderContext函数中触发事件normal-module-loader
    const loaderContext = this.createLoaderContext(
    	resolver,
    	options,
    	compilation,
    	fs
    );
    .....
    const handleParseResult = result => {
    	this._lastSuccessfulBuildMeta = this.buildMeta;
    	this._initBuildHash(compilation);
    	return callback();
    };

    try {
        // 调用parser.parse
    	const result = this.parser.parse(
    		this._ast || this._source.source(),
    		{
    			current: this,
    			module: this,
    			compilation: compilation,
    			options: options
    		},
    		(err, result) => {
    			if (err) {
    				handleParseError(err);
    			} else {
    				handleParseResult(result);
    			}
    		}
    	);
    	if (result !== undefined) {
    		// parse is sync
    		handleParseResult(result);
    	}
    } catch (e) {
    	handleParseError(e);
    }
    });
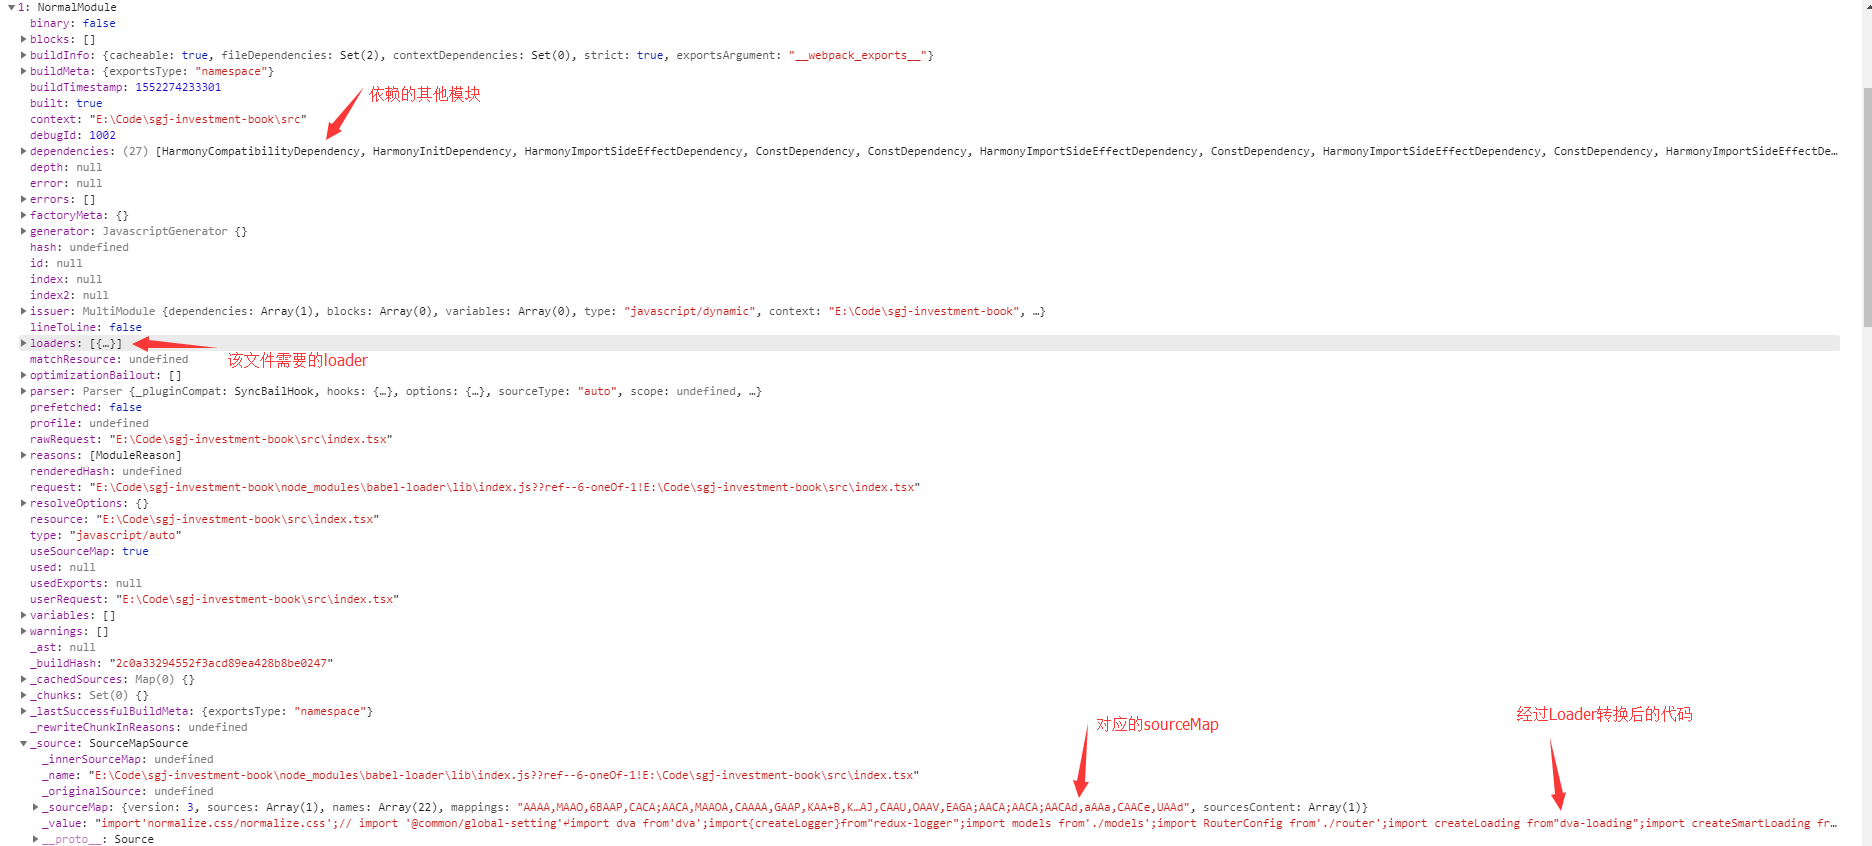
在ast转换过程中也很容易得到了需要依赖的哪些其他模块。
succeedModule(compilation)
最后执行了module.build的回调函数,触发了事件点succeedModule,并回到Compilation.buildModule函数的回调函数
module.build(
    this.options,
    this,
    this.resolverFactory.get("normal", module.resolveOptions),
    this.inputFileSystem,
    error => {
    	......
    	触发了事件点succeedModule
    	this.hooks.succeedModule.call(module);
    	return callback();
    }
);

this.buildModule(module, false, null, null, err => {
    ......
    // 执行afterBuild
    afterBuild();
});
对于当前模块,或许存在着多个依赖模块。当前模块会开辟一个依赖模块的数组,在遍历 AST 时,将 require() 中的模块通过 addDependency() 添加到数组中。当前模块构建完成后,webpack 调用 processModuleDependencies 开始递归处理依赖的 module,接着就会重复之前的构建步骤。
 Compilation.prototype.addModuleDependencies = function(module, dependencies, bail, cacheGroup, recursive, callback) {
  // 根据依赖数组(dependencies)创建依赖模块对象
  var factories = [];
  for (var i = 0; i < dependencies.length; i++) {
    var factory = _this.dependencyFactories.get(dependencies[i][0].constructor);
    factories[i] = [factory, dependencies[i]];
  }
  ...
  // 与当前模块构建步骤相同
}
最后, 所有的模块都会被放入到Compilation的modules里面, 如下:
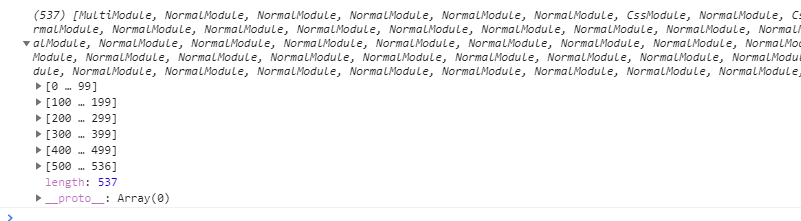
总结一下:
module 是 webpack 构建的核心实体,也是所有 module 的 父类,它有几种不同子类:NormalModule , MultiModule , ContextModule , DelegatedModule 等,一个依赖对象(Dependency,还未被解析成模块实例的依赖对象。比如我们运行 webpack 时传入的入口模块,或者一个模块依赖的其他模块,都会先生成一个 Dependency 对象。)经过对应的工厂对象(Factory)创建之后,就能够生成对应的模块实例(Module)。
seal(compilation)
构建module后, 就会调用Compilation.seal, 该函数主要是触发了事件点seal, 构建chunk, 在所有 chunks 生成之后,webpack 会对 chunks 和 modules 进行一些优化相关的操作,比如分配id、排序等,并且触发一系列相关的事件点
seal(callback) {
    // 触发事件点seal
    this.hooks.seal.call();
    // 优化
    ......
    this.hooks.afterOptimizeDependencies.call(this.modules);

    this.hooks.beforeChunks.call();
    // 生成chunk
    for (const preparedEntrypoint of this._preparedEntrypoints) {
    	const module = preparedEntrypoint.module;
    	const name = preparedEntrypoint.name;
    	// 整理每个Module和chunk,每个chunk对应一个输出文件。
    	const chunk = this.addChunk(name);
    	const entrypoint = new Entrypoint(name);
    	entrypoint.setRuntimeChunk(chunk);
    	entrypoint.addOrigin(null, name, preparedEntrypoint.request);
    	this.namedChunkGroups.set(name, entrypoint);
    	this.entrypoints.set(name, entrypoint);
    	this.chunkGroups.push(entrypoint);

    	GraphHelpers.connectChunkGroupAndChunk(entrypoint, chunk);
    	GraphHelpers.connectChunkAndModule(chunk, module);

    	chunk.entryModule = module;
    	chunk.name = name;

    	this.assignDepth(module);
    }
    this.processDependenciesBlocksForChunkGroups(this.chunkGroups.slice());
    this.sortModules(this.modules);
    this.hooks.afterChunks.call(this.chunks);

    this.hooks.optimize.call();

    ......
    this.hooks.afterOptimizeModules.call(this.modules);

    ......
    this.hooks.afterOptimizeChunks.call(this.chunks, this.chunkGroups);

    this.hooks.optimizeTree.callAsync(this.chunks, this.modules, err => {
        ......
        this.hooks.beforeChunkAssets.call();
    	this.createChunkAssets();  // 生成对应的Assets
    	this.hooks.additionalAssets.callAsync(...)
    });
    }
每个 chunk 的生成就是找到需要包含的 modules。这里大致描述一下 chunk 的生成算法:
1.webpack 先将 entry 中对应的 module 都生成一个新的 chunk
2.遍历 module 的依赖列表,将依赖的 module 也加入到 chunk 中
3.如果一个依赖 module 是动态引入的模块,那么就会根据这个 module 创建一个新的 chunk,继续遍历依赖
4.重复上面的过程,直至得到所有的 chunks
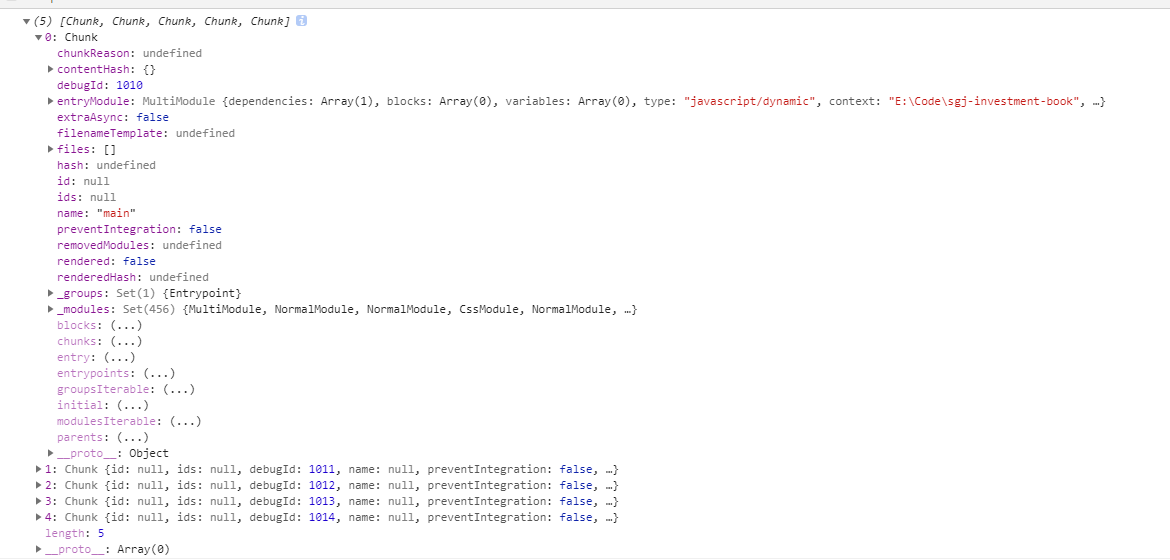
chunk属性图
beforeChunkAssets && additionalChunkAssets(Compilation)
在触发这两个事件点的中间时, 会调用Compilation.createCHunkAssets来创建assets,
createChunkAssets() {
    ......
    // 遍历chunk
    for (let i = 0; i < this.chunks.length; i++) {
    	const chunk = this.chunks[i];
    	chunk.files = [];
    	let source;
    	let file;
    	let filenameTemplate;
    	try {
    	    // 调用何种Template
    		const template = chunk.hasRuntime()
    			? this.mainTemplate
    			: this.chunkTemplate;
    		const manifest = template.getRenderManifest({
    			chunk,
    			hash: this.hash,
    			fullHash: this.fullHash,
    			outputOptions,
    			moduleTemplates: this.moduleTemplates,
    			dependencyTemplates: this.dependencyTemplates
    		}); // [{ render(), filenameTemplate, pathOptions, identifier, hash }]
    		for (const fileManifest of manifest) {
    			.....
    			}
    			.....
    			// 写入assets对象
    			this.assets[file] = source;
    			chunk.files.push(file);
    			this.hooks.chunkAsset.call(chunk, file);
    			alreadyWrittenFiles.set(file, {
    				hash: usedHash,
    				source,
    				chunk
    			});
    		}
    	} catch (err) {
    		......
    	}
    }
    }
createChunkAssets会生成文件名和对应的文件内容,并放入Compilation.assets对象, 这里有四个Template 的子类,分别是MainTemplate.js , ChunkTemplate.js ,ModuleTemplate.js , HotUpdateChunkTemplate.js
- MainTemplate.js: 对应了在 entry 配置的入口 chunk 的渲染模板
- ChunkTemplate: 动态引入的非入口 chunk 的渲染模板
- ModuleTemplate.js: chunk 中的 module 的渲染模板
- HotUpdateChunkTemplate.js: 对热替换模块的一个处理。
模块封装(引用自http://taobaofed.org/blog/2016/09/09/webpack-flow/)
模块在封装的时候和它在构建时一样,都是调用各模块类中的方法。封装通过调用 module.source() 来进行各操作,比如说 require() 的替换。
MainTemplate.prototype.requireFn = "__webpack_require__";
MainTemplate.prototype.render = function(hash, chunk, moduleTemplate, dependencyTemplates) {
    var buf = [];
    // 每一个module都有一个moduleId,在最后会替换。
    buf.push("function " + this.requireFn + "(moduleId) {");
    buf.push(this.indent(this.applyPluginsWaterfall("require", "", chunk, hash)));
    buf.push("}");
    buf.push("");
    ... // 其余封装操作
};
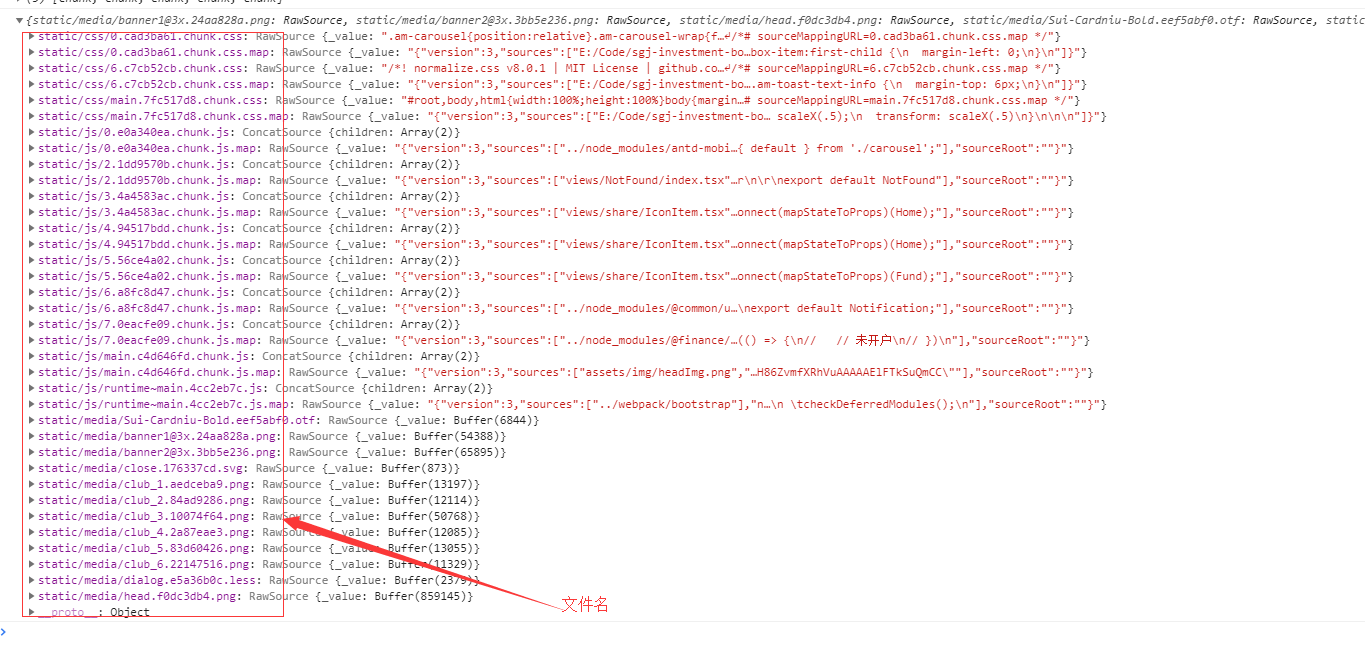
最后看看Compilation.assets对象
done(Compiler)
最后一步,webpack 调用 Compiler 中的 emitAssets() ,按照 output 中的配置项将文件输出到了对应的 path 中,从而 webpack 整个打包过程结束。要注意的是,若想对结果进行处理,则需要在 emit 触发后对自定义插件进行扩展。
总结
webpack的内部核心还是在于compilation\compiler\module\chunk等对象或者实例。写下这篇文章也有助于自己理清思路,学海无涯~~~
引用
玩转webpack(一):webpack的基本架构和构建流程
玩转webpack(二):webpack的核心对象
细说 webpack 之流程篇
