

一、父组件向子组件传参

写入属性名和属性值
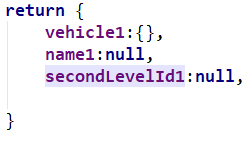
上面是父组件里面该写的
这是子组件里面的,取值:
this.$parent.secondLevelId1;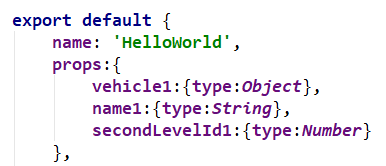
二、vue 路由传参
类似于get传参,显示在地址栏上
取值:var id = this.$route.query.id;
that.$router.push({
    name:"list",
    query:{
        vehicle:that.vehicle,
        name:name,
        econdLevelId:id
    }
});
类似于post传参,不显示在地址栏上
this.$route.params.vehiclethat.$router.push({
name:"list",
params:{
id:id,
}
});用什么传就用什么去取
// 字符串
<router-link to="apple"> to apple</router-link>
// 对象
<router-link :to="{path:'apple'}"> to apple</router-link>
// 命名路由
<router-link :to="{name: 'applename'}"> to apple</router-link>
//直接路由带查询参数query,地址栏变成 /apple?color=red
<router-link :to="{path: 'apple', query: {color: 'red' }}"> to apple</router-link>
// 命名路由带查询参数query,地址栏变成/apple?color=red
<router-link :to="{name: 'applename', query: {color: 'red' }}"> to apple</router-link>
//直接路由带路由参数params,params 不生效,如果提供了 path,params 会被忽略
<router-link :to="{path: 'apple', params: { color: 'red' }}"> to apple</router-link>
// 命名路由带路由参数params,地址栏是/apple/red
<router-link :to="{name: 'applename', params: { color: 'red' }}"> to apple</router-link>
三、设置title,跳转后到页面顶部
index.js
{
    path: '/helpCenter',
    component: helpCenter,
    children: [
        {path:'/', component:hlepIndex, meta: {title: '帮助中心'}},
        {path: 'lumai', component: lumai, meta: {title: '帮助中心-关于路迈'}},
        {path: 'refabrication', component: refabrication, meta: {title: '帮助中心'}},
        {path: 'contact', component: contact, meta: {title: '帮助中心-联系方式'}}
    ]
},
main.js
router.beforeEach((to, from, next) => {
    /* 路由发生变化修改页面title */
    if (to.meta.title) {
        document.title = to.meta.title
    }
    //适用不同的浏览器
    // chrome
    document.body.scrollTop = 0
    // firefox
    document.documentElement.scrollTop = 0
    // safari
    window.pageYOffset = 0
    next()
})
style scoped//当前文件下可用,其他文件不可用四、跳页面锚点
const scrollBehavior = function (to, from, savedPosition) {
    if (to.hash) {
        return {
            // 通过 to.hash 的值來找到对应的元素
            selector: to.hash
        }
    }
};
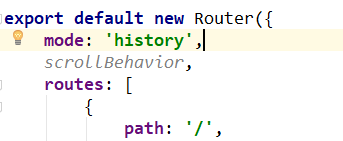
五、首次加载慢
{
    path: '/',
    name: 'HelloWorld',
    component: resolve=>require(['@/components/HelloWorld'],resolve),
},
component: resolve=>require(['@/components/HelloWorld'],resolve),六、体积
function getImageSizeInBytes(imgURL) {
    var request = new XMLHttpRequest();
    request.open("HEAD", imgURL, false);
    request.send(null);
    var headerText = request.getAllResponseHeaders();
    var re = /Content\-Length\s*:\s*(\d+)/i;
    re.exec(headerText);
    return parseInt(RegExp.$1);
  }

  var picLink = "http://www.remanshop.com/group1/M00/00/04/rBN8UFy0HICAehxhAE7vncwn03Q875.jpg";
  var size = this.getImageSizeInBytes(picLink);
  var size_image = size / 1024/1024;
七、关于vue-cli3的less全局变量
vue add style-resources-loader 选择想要的预处理器
pluginOptions: {
    'style-resources-loader': {
        preProcessor: 'less',
        patterns: [
            path.resolve(__dirname,'src/assets/css/public.less'),
        ],
    },
},
八、打包后去掉去掉console
在webpack.prod.config.js -->UglifyJsPlugin-->添加
warnings: false,
drop_debugger: true,
drop_console: true
vue-cli3
npm install terser-webpack-plugin -Dvue.config.jsconfigureWebpack: (config)=>{
    if(process.env.NODE_ENV === 'production'){
      config.optimization.minimizer[0].options.terserOptions.compress.drop_console = true
    }
  }
九、去掉打包后的.map文件
config/index.js设置
productionSourceMap: false,十、添加css前缀
npm i postcss-loader autoprefixer -D