

前言
在Taro 0.x的时候就写过一个小玩意,虽然没什么人玩. 最近正好看到Taro 1.2.x已经发布了
类React风格的小程序框架,部分地方针对小程序做了妥协.找点东西试试水,看看改进如何了.
刚好公司有个需求做个手机端的举报管理的程序, 开会上揽了过来;
对于这个框架,你除了需要有React的基本功外, 还需要这两方面的知识;
虽这个项目(仅微信端)不是很大,梳理下还是有挺多东东的,其他废话不多说,直入主题
问题汇总
生命周期及JSX的{}不支持箭头函数
用箭头函数会出现不可控的结果;
最常见的就是报错;
JSX里面仅支持onClick={this.xxxx.bind(this,args)这种写法- 生命周期用了会导致,
store亦或者render的结果异常(比如执行顺序和值的错误) - 至于其他常规函数则支持箭头函数的写法
动态样式
虽说Taro官方支持CSS Module,若是你考虑多平台的话..还是建议用常规的命名规划来维护好一些
至于className的动态css class处理..我倾向于使用classnames这个库
classname: 最普通的用法如下
// 在Taro的用法跟在React的用法差不多..Taro上需要放在{} ,不然会直接报错(就是= classnames对象这种写法)

import classnames from 'classnames'

 <View className={classnames({
  "tab-operator": true,
  "show": userIdList.length>0,
  "hide": userIdList.length === 0
})}>
  <View className="tab-content-top-counter">
    <View className="left-text">{userIdList.length === 0 ?'如需操作条目请勾选下面条目!':`选中了${userIdList.length}条`}</View>
    {userIdList.length === 0 ? null : <View className="unselect" onClick={this.unselect.bind(this)}>取消</View>}

</View>
自己封装的组件提示类型缺失的(TS)
比如你封装的组件里面依赖了Taro封装的一些组件,这时候暴露这个组件,
就会缺失你自己加进去的特性,导致编辑器会提示有错误信息..
最简便的就是用type或者interface,这样就不会报错了.比如下面
//方式一
type staticPropsSearchPanel={
  open: boolean,
  onClose?: () => void
}

// 也可以用interface ,与上面的区别,比较明显的是这个可以继承其他的
// 方式二
interface staticPropsSearchPanel {
     open: boolean,
     onClose?: () => void
}


class SearchPanel extends Component<staticPropsSearchPanel>{}
组件支持程度
-
不支持函数式组件:具体看官方说法 截止
1.2.x依旧不支持,只能写成class xx extends Component这种 -
不支持同个文件内直接多个
class xx extends且被引用
允许几种状态管理器的接入?
dva,mobx,redux 都有对应taro接入方案,后两者是taro官方维护
是否支持alias
最新版是支持的(可用),在config目录暴露了配置文件,当然很多其他webpack的配置也有一些直接暴露

至于eslint不识别alias符号的,这个暂时无解,我试过社区的一些方案,好像没啥用!
路由跳转注意点
- 中划线的坑 跳转的路由不支持中划线(目前),以后未知
开发模式和真机调试可以正常编译,打包上传就不能识别了...浪费我很多时间..
- 路径的坑
跳转的url必须全路径!!!!!,比如
// 重定向,会提供返回按钮
Taro.redirectTo({ url: '/pages/list/index' })

// 重载整个程序,关闭其他所有页面(清除堆栈的页面),然后打开你指定的页面
// 这个非常适合鉴权失败或者过期的时候.只打开注册页面
Taro.reLaunch({ url:'/pages/login/index'})

//还有其他`navigate`这些,基本都是微信文档写到的东西,taro封装了下
鉴权页面渲染突兀的改善姿势!
若是你在第一个页面做鉴权跳转,很容易就遇到渲染部分再跳转的
给人的视觉反馈不是很好,对于此,写一个中间鉴权页面作为第一页,跳转会改善很多(视觉上)
因为效果可以定制,而不渲染很多没必要的组件
比如我的,我的入口页面就是auth
import './index.less';

import { View } from '@tarojs/components';
import Taro, { Component, Config } from '@tarojs/taro';

class Auth extends Component {

  /**
   * 指定config的类型声明为: Taro.Config
   *
   * 由于 typescript 对于 object 类型推导只能推出 Key 的基本类型
   * 对于像 navigationBarTextStyle: 'black' 这样的推导出的类型是 string
   * 提示和声明 navigationBarTextStyle: 'black' | 'white' 类型冲突, 需要显示声明类型
   */
  config: Config = {
    navigationBarTitleText: 'xx小助手'
  }


  static options = {
    addGlobalClass: true
  }

  // 有token就可以进入内容区域,至于token是否有效是在里面去判断的;
  // 没有token乖乖去登录
  componentDidShow() {
    const token = Taro.getStorageSync('token');
    if (!!token) {
      Taro.redirectTo({ url: '/pages/list/index' })
      return
    }
    Taro.redirectTo({ url: '/pages/login/index' })

  }

  render() {
    return (
      <View className='auth-page'>loading....</View>
    )
  }
}

export default Auth
componentDidShow的注意点
previewImage(图片的点击全屏预览),在关掉后会再次触发该生命周期..
所以把请求放这里的需要自己权衡下..比如我的列表展开后,点击图片关闭后导致列表重刷;
挪到了componentWillMount就不会受previewImage的影响
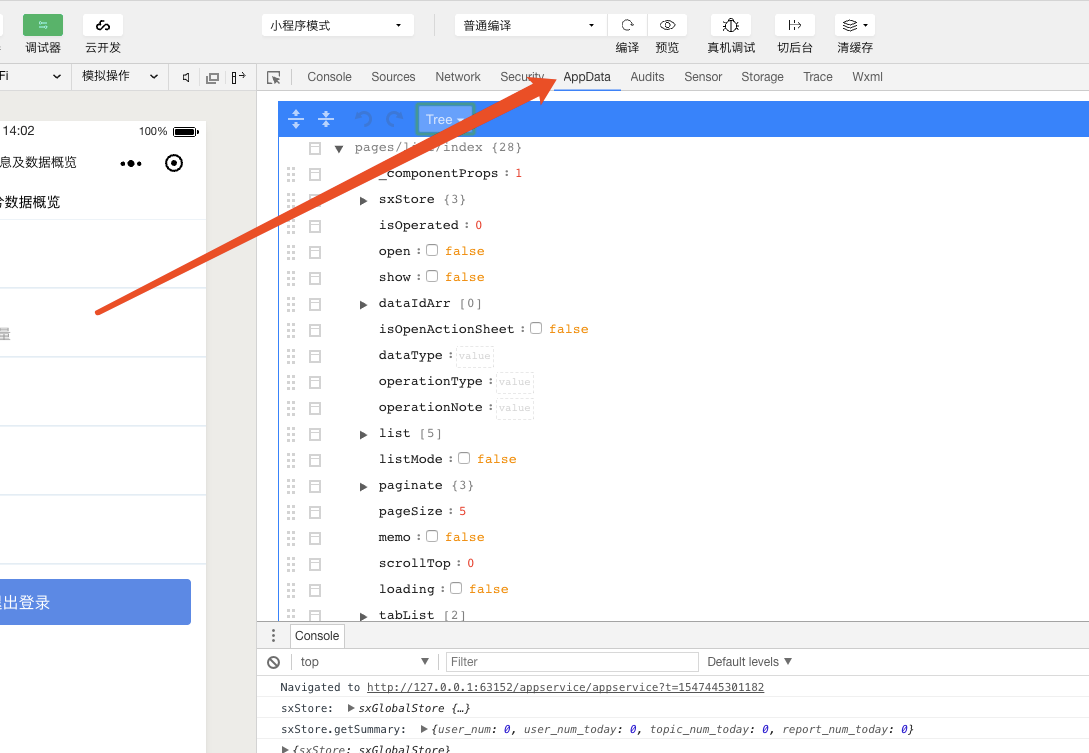
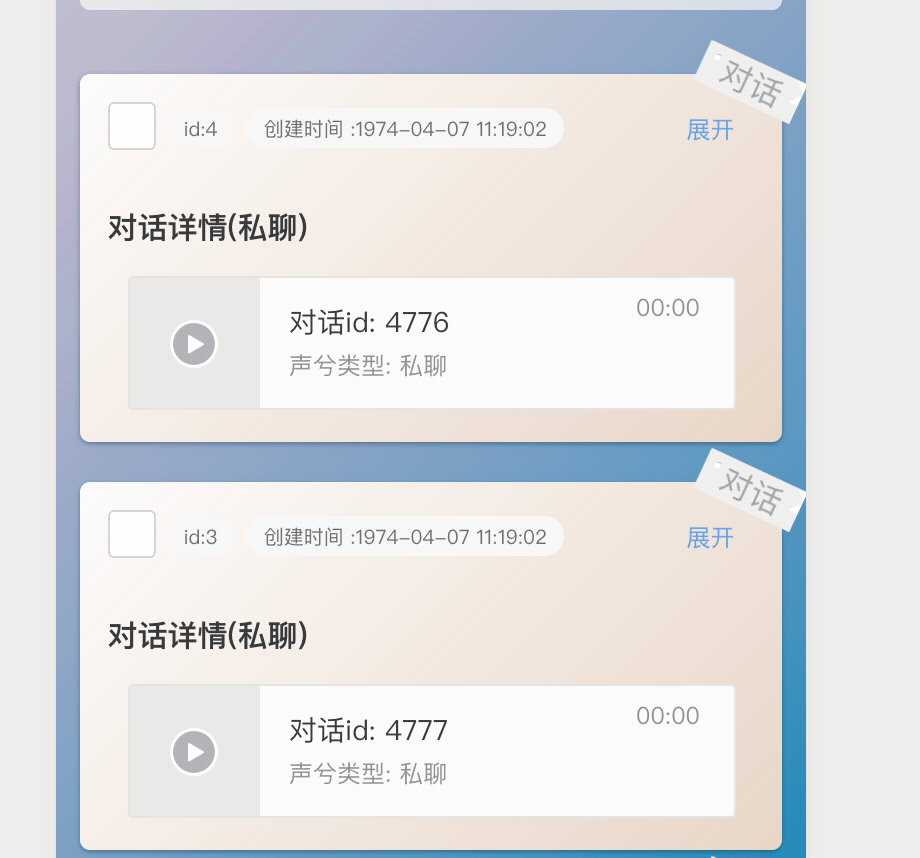
mobx的接入及数据观察?
mobx的接入和常规的接入差不多,用法基本也一致..
就是从mobx-react变成@tarojsw/mobx,由taro封装来提供
至于devtools这种.小程序目前只能从开发者工具看到,
虽然没专业的devtools那么清晰,但是总体上可以看到数据的组织和响应,如图
结合mobx在跳转前预请求?
比如详情页,展示类的页面,我们一般都是通过typeId去拿到具体的详情,再来展示
常规做法都是进到页面后在componentDidMount去触发请求,然后把结果集渲染到页面,
但这样一进去就会展示默认数据再替换,有点突兀;我们肯定想改善用户体验,那就把数据预请求
我们可以根据实际场景在跳转之前的生命周期入手,比如redirecTo可以在componentDidHide内调用函数dispatch
reLuanch可以在componentWillUnmount内触发;
跳转过去的页面,可以直接从props拿到渲染,不会那么突兀
时间戳及常见日期格式转换
对于日期的处理,我们最常用的是两种姿势的传递的时候用时间戳,展示的时候用可读性较强的YYYY-MM-DD这种
所以就没必要引入moment这个大库了用的是dayjs,很小功能比较全面的库,api类moment,用过都说好.
当然,你自己用函数封装一个转换也行,就不用引入多一个库了,见仁见智了.
获取结点信息注意点
若是要指定组件自身内的结点,this必须为this.$scope
微信小程序官方的this代表实例,在taro中this.$scope代表组件自身(实例)
  componentDidMount() {
    const query = Taro.createSelectorQuery().in(this.$scope);
    query.select('#list-card').boundingClientRect((res) => {
      console.log('res: ', res);
    }).exec()
  }
变动项目基础信息(微信小程序)
直接在开发者工具的选项里面勾选不会保存到项目内,比如基础库的切换;
有效的是直接操作根目录下的project.config.json
// 这份配置的参数可以具体看微信官方给出的解释,会更加全面
// https://developers.weixin.qq.com/miniprogram/dev/devtools/projectconfig.html?search-key=%E9%A1%B9%E7%9B%AE%E9%85%8D%E7%BD%AE

{
	"miniprogramRoot": "打包输出路径",
	"projectname": "项目名称",
	"description": "声兮管理后台小程序",
	"appid": "xxxx",
	"setting": {
		"urlCheck": true, // 是否检查安全域名和 TLS 版本
		"es6": false,  // 是否启用es6转换
		"postcss": true,  // 启用postcss的支持
		"minified": false,  // 是否压缩代码
		"newFeature": true  // 是否启用新特性的支持
	},
	"compileType": "miniprogram",  // 编译类型
	"libVersion": "2.5.0", // 基础库版本的指定
	"condition": {}
}
其他小程序有对应的配置文件,看官方链接
封装的一些小玩意
请求封装(TS)
request.tsx- 支持路由
prefix header的合并- 响应的拦截
- 支持路由
/*
 * @Author: CRPER
 * @LastEditors: CRPER
 * @Github: https://github.com/crper
 * @Motto: 折腾是一种乐趣,求知是一种追求。不懂就学,懂则分享。
 * @Description:请求接口封装
 */
import Taro from '@tarojs/taro';
import '@tarojs/async-await';

interface options {
  header: any,
  method?: string,
  dataType?: string,
  responseType?: string,
  success?: Function,
  fail?: Function,
  complete?:Function
}

/**
 *
 * @param url : 接口路径
 * @param method : 请求方法(RESTFUL,但是没有PATCH,看微信文档支持)
 * @param data : 传递的数据
 * @param options : 可以覆盖header这些
 * @param prefix : 接口额外的前缀
 */
export default async function(url: string, method?:string,data?: string | [any] | Object, options?: options, prefix?: string){

  // 不支持patch!!!!!微信自家的请求本身就不支持patch!!!

  // 微信端自己缓存token
  const wxToken:string|void =await Taro.getStorage({ key: 'token' })
    .then(res => res.data).catch(err => {
      if(err)  return
    } )

  // 默认值
  const defaultOtions: options = {
    method: 'GET',
    header:{}
  }


  // 若是存在token则赋予
  if (wxToken) {
    defaultOtions.header.Authorization = wxToken
  }

  const baseUrl: string = process.env.NODE_ENV === 'development' ? 'https://xxx.com/api/web' : 'https://xxx.com/api/web';
  const newUrl = prefix ? `${baseUrl}${prefix}${url}` : `${baseUrl}${url}`

  const requestObject: any = {
    url: newUrl,
    ...defaultOtions,
    ...options,
    method,
    data
  }

  const codeMessage: Object = {
    200: '服务器成功返回请求的数据。',
    201: '新建或修改数据成功。',
    202: '一个请求已经进入后台排队(异步任务)。',
    204: '删除数据成功。',
    400: '发出的请求有错误,服务器没有进行新建或修改数据的操作。',
    401: '用户没有权限(令牌、用户名、密码错误)。',
    403: '用户得到授权,但是访问是被禁止的。',
    404: '发出的请求针对的是不存在的记录,服务器没有进行操作。',
    406: '请求的格式不可得。',
    410: '请求的资源被永久删除,且不会再得到的。',
    412: '访问被拒绝,请重新登录',
    422: '当创建一个对象时,发生一个验证错误。',
    500: '服务器发生错误,请检查服务器。',
    502: '网关错误。',
    503: '服务不可用,服务器暂时过载或维护。',
    504: '网关超时。',
  };


  // 检测请求状态
  const checkStatusAndFilter = (response):Promise<any> | undefined => {
    if (response.statusCode >= 200 && response.statusCode < 300) {
      if (response.statusCode === 200 || response.statusCode === 304) {
        return response.data
      }
      return response;
    }

    // 除此之外的错所有遍历上面的错误信息抛出异常
    const errortext = codeMessage[response.statusCode] || response.errMsg;
    Taro.showToast({
      title: errortext,
      mask: true,
      icon: 'none',
      duration: 2000
    })
    return Promise.reject(response)
  };


  try {
     return await Taro.request(requestObject)
      .then(checkStatusAndFilter)
      .then(res => {
        // 这一块是我和后端协商的,接口内部为1则出错的,为0才有数据回来
        if (res.code === 1) {
          const errMsg = res.msg ? res.msg : '接口错误了';
          Taro.showToast({
            title: errMsg,
            mask: true,
            icon: 'none',
            duration: 2000
          })
          Promise.reject(errMsg)
        }
        if (res.code === 0) {
          if (res.data) {
            return res.data
          }
          return null
        }
        return res
      }).catch(errRes => {
        if (errRes.statusCode === 412) {
          Taro.reLaunch({ url:'/pages/login/index'})
        }
      })
  } catch (err) {
    Taro.showToast({
      title: '代码执行异常',
      mask: true,
      icon: 'none',
      duration: 2000
    })
  }
 }
- 用法
//  我配置了alias
import wxfetch from '@utils/request';

  // 比如我代码中的其中一个请求,处理行为
  // 切割列表数据
  spliceList = (dataIdArr: Array<string | number> = []) => {
    const {list, paginate: {total}} = this.state;
    // 若是只有一条,干掉后尝试请求列表判断是否还有新的数据
    if (list.length <= 1) {
      this.getList()
    }
    let tempArr: Array<Object> = list.filter((item) => {
      for (let i = 0; i < dataIdArr.length; i++) {
        let innerItemId = Number(dataIdArr[i]);
        if (item.id !== innerItemId) {
          return item
        }
      }
    })
    this.setState({
      list: tempArr,
      paginate: {
        total: total - dataIdArr.length
      },
      dataIdArr: []
    })
  }

  // 处理行为
  handleActionSheetClick = async (e: number): Promise<any> => {
    try {
      const actionParam = {operationType: e};
      const {dataIdArr, operationNote} = this.state;
      const isActionNoValid: boolean = !e || e === 0 || (Array.isArray(dataIdArr) && dataIdArr.length === 0);

      if (isActionNoValid) {
        Taro.atMessage({
          'message': '请再次您的行为是否正常,比如勾选数据!',
          'type': 'error',
          'duration': 1000
        })
        return false;
      }

      await wxfetch('/suspiciousDatas', 'POST', {
        dataIdArr,
        operationNote,
        ...actionParam
      });

      // 切割数组且关闭遮罩层
      this.spliceList(dataIdArr);
      this.handleActionSheetClose();
    } catch (err) {
      console.log(err);
    }
  }
简化版的节流器(TS)
throttle.tsx
/*
 * @Author: CRPER
 * @LastEditors: CRPER
 * @Github: https://github.com/crper
 * @Motto: 折腾是一种乐趣,求知是一种追求。不懂就学,懂则分享。
 * @Description: 简易版的节流函数
 */


/**
 * @param fn : 回调函数
 * @param threshold : 时间,单位毫秒
 */
export default function throttle(fn: Function, threshold: number = 1500) {
  if (threshold === null) {
    threshold = 1500
  }
  let _lastExecTime: null | number = null;
  let context = this
  return function (...args: any[]): void {
    let _nowTime: number = new Date().getTime();
    if (_nowTime - Number(_lastExecTime) > threshold || !_lastExecTime) {
      fn.apply(context, args);
      _lastExecTime = _nowTime
    }
  }
}
- 用法
在this.xxx.bind的基础上
import throttle from '@utils/throttle';

// 滚动到顶部触发
onScrolltoupper = throttle(() => {
    console.log('1111');
},3000)
下拉刷新显示内置的loading.
就是微信自家的三个小点, 这个需要配置下页面的一些自有属性.
Taro只要引入Config,即可在组件内声明页面属性
import Taro, { Component, Config } from '@tarojs/taro';
class ReportList extends Component {

  /**
   * 指定config的类型声明为: Taro.Config
   *
   * 由于 typescript 对于 object 类型推导只能推出 Key 的基本类型
   * 对于像 navigationBarTextStyle: 'black' 这样的推导出的类型是 string
   * 提示和声明 navigationBarTextStyle: 'black' | 'white' 类型冲突, 需要显示声明类型
   */
  config: Config = {
    navigationBarTitleText: '可疑数据汇总',
    enablePullDownRefresh: true,   // 这个是启用下拉刷新特性
    backgroundTextStyle: "dark",   // 把显示的文本颜色改成暗色调,亮色的话.你背景不改看不到,因为同色
    backgroundColor:'#f7f7f7' // 页面的背景色
  }

}

// 启用后,记得加对应的条件关闭,不然会一直显示
 // 下拉刷新
 onPullDownRefresh = () :void => {
    // 这个loading是 导航栏,页面标题那块显示一个loading  , 微信内置的
    Taro.showLoading({
      title: 'loading....'
    })

    // 因为我的接口请求都是 async await的姿势,所以可以队列执行
    this.getList();
    this.unselect();

    // 接口请求完毕后隐藏两个loading , 标题和下拉区域
    Taro.hideLoading();
    Taro.stopPullDownRefresh();
  }
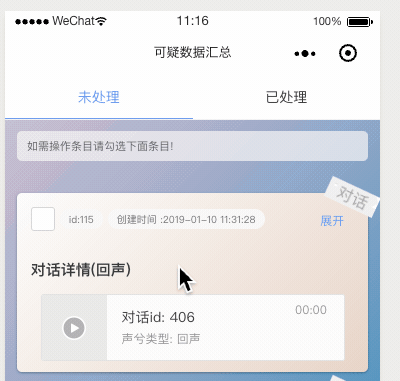
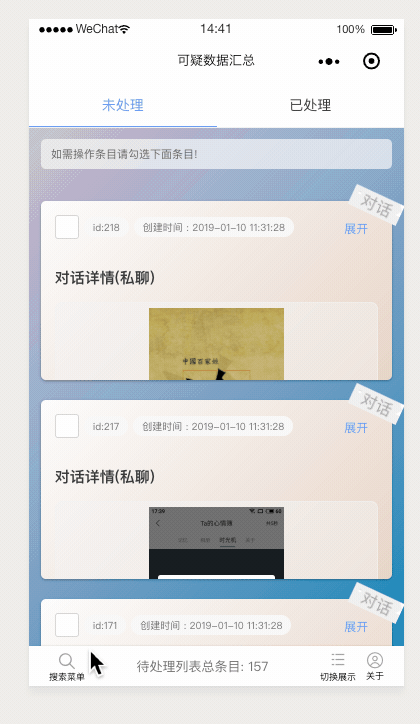
实现组件样式过渡?
实现一个组件过渡可以一定程度上增强体验,本质就是CSS3来写过渡,
比如看我这边实现的一个效果,自己感觉还看得过去
- 样式
//若是要产生视觉效应,那元素有偏移才能看出来,所以一般被作用的元素都不会在默认位置
// 这个项目用了less ,主要过渡

.testdiv{
    opacity: 0;
    transform: translateY(100vh) rotate(270deg) scale(0.5);
    &.fadeIn{
      opacity: 1;
      transform: translateY(0) rotate(0deg);
      transition:all 0.3s ease-in-out;
    }
    &.fadeOut{
      opacity: 0;
      transform:  rotate(-270deg) scale(0.2) translateX(-100vw);
      transition:all 0.3s ease-in-out;
    }

}
- 作用区域
这边用了classnames来动态追加class
<View className={classnames({ "search-panel": true, 'fadeIn': open, 'fadeOut': !open})} >
</View>
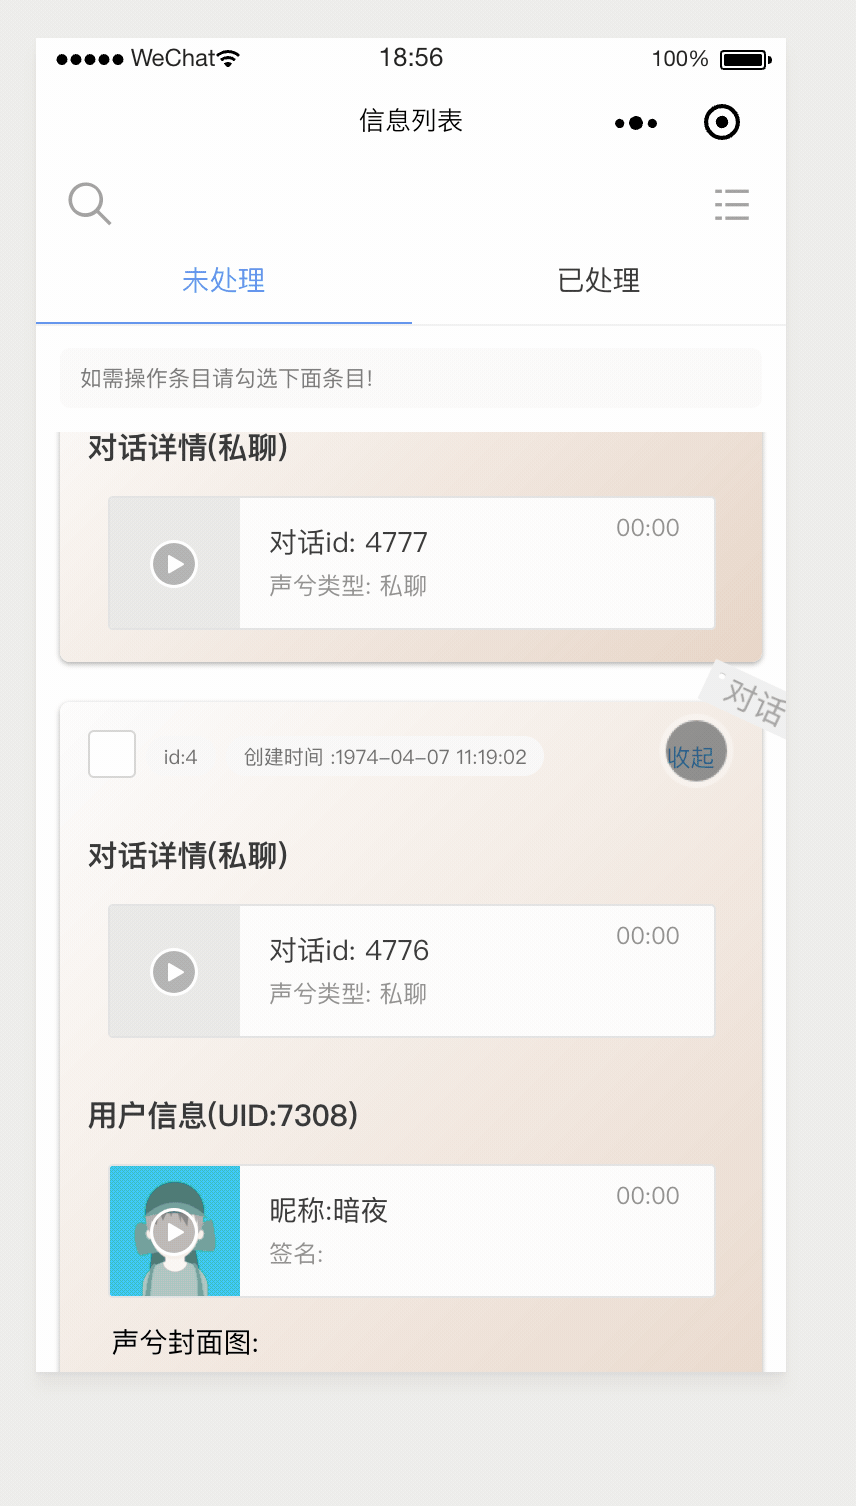
节点元素高度的过渡(CSS3)
就是让展开和收起有个过渡效果,
经过N多次的尝试(不能给元素设置height!!), 把元素初始化的高度设置max-height:0,
其他过渡设置合适的max-height即可解决
Taro里面对事件的支持
有些文档没说到,只能去翻源码...看common.d.ts一目了然,比如长按事件这些
css3 loading 引入
其实跟在普通开发模式上写法差不,基本还是CSS3的功能,DIV换成能识别的节点而已..比如Taro
// 样式部分

 .no-data-text {
    background-color: rgba(233, 228, 228, 0.726);
    color: #333;
    height: 100vh;
    width: 100%;
    display: flex;
    justify-content: center;
    align-items: center;
    flex-direction: column;
    font-size: 50px;
    font-weight: 700;
    .loading-text{
      font-size:28px;
      color:#555;
    }
  }

.spinner {
  width: 200px;
  height: 70px;
  text-align: center;
  font-size: 10px;
}

.spinner .rect {
  background-color: rgb(123, 176, 225);
  height: 100%;
  width: 10px;
  margin:0 5px;
  display: inline-block;

  -webkit-animation: stretchdelay 1.2s infinite ease-in-out;
  animation: stretchdelay 1.2s infinite ease-in-out;
}

.spinner .rect2 {
  -webkit-animation-delay: -1.1s;
  animation-delay: -1.1s;
}

.spinner .rect3 {
  -webkit-animation-delay: -1.0s;
  animation-delay: -1.0s;
}

.spinner .rect4 {
  -webkit-animation-delay: -0.9s;
  animation-delay: -0.9s;
}

.spinner .rect5 {
  -webkit-animation-delay: -0.8s;
  animation-delay: -0.8s;
}

@-webkit-keyframes stretchdelay {
  0%, 40%, 100% { -webkit-transform: scaleY(0.4) }
  20% { -webkit-transform: scaleY(1.0) }
}

@keyframes stretchdelay {
  0%, 40%, 100% {
    transform: scaleY(0.4);
    -webkit-transform: scaleY(0.4);
  }  20% {
    transform: scaleY(1.0);
    -webkit-transform: scaleY(1.0);
  }
}
<!--节点部分-->
<View className="no-data-text">
    <View className="spinner">
      <View className="rect rect1"></View>
      <View className="rect rect2"></View>
      <View className="rect rect3"></View>
      <View className="rect rect4"></View>
      <View className="rect rect5"></View>
    </View>
    <View className="loading-text">正在加载中......</View>
</View>
总结
截止该文章输出的时候,Taro的版本
👽 Taro v1.2.7


  Taro CLI 1.2.7 environment info:
    System:
      OS: macOS 10.14.2
      Shell: 5.3 - /bin/zsh
    Binaries:
      Node: 10.14.2 - /usr/local/bin/node
      Yarn: 1.13.0 - /usr/local/bin/yarn
      npm: 6.5.0 - /usr/local/bin/npm
    npmPackages:
      @tarojs/async-await: 1.2.7 => 1.2.7
      @tarojs/components: 1.2.7 => 1.2.7
      @tarojs/mobx: 1.2.7 => 1.2.7
      @tarojs/mobx-h5: 1.2.7 => 1.2.7
      @tarojs/mobx-rn: 1.2.7 => 1.2.7
      @tarojs/plugin-babel: 1.2.7 => 1.2.7
      @tarojs/plugin-csso: 1.2.7 => 1.2.7
      @tarojs/plugin-less: 1.2.7 => 1.2.7
      @tarojs/plugin-sass: 1.2.7 => 1.2.7
      @tarojs/plugin-uglifyjs: 1.2.7 => 1.2.7
      @tarojs/rn-runner: 1.2.7 => 1.2.7
      @tarojs/router: 1.2.7 => 1.2.7
      @tarojs/taro: 1.2.7 => 1.2.7
      @tarojs/taro-alipay: 1.2.7 => 1.2.7
      @tarojs/taro-h5: 1.2.7 => 1.2.7
      @tarojs/taro-swan: 1.2.7 => 1.2.7
      @tarojs/taro-tt: 1.2.7 => 1.2.7
      @tarojs/taro-weapp: 1.2.7 => 1.2.7
      @tarojs/webpack-runner: 1.2.7 => 1.2.7
      eslint-config-taro: 1.2.7 => 1.2.7
      eslint-plugin-taro: 1.2.7 => 1.2.7
Taro和Taro UI目前版本对ts的支持还有待提高,会偶尔碰到缺少types的
若是项目不大,对于想省心的,建议直接撸JS版本;
Taro社区目前还是很活跃的, 照这样的情况下去,再迭代两三个X.Y.Z(Y位)版本应该会好用很多.
ts的好处很明显,编辑器可以直接悬浮显示推断的类型,很多错误可以在开发过程避免了;
水文到此结束,有不对之处请留言,会及时修正,谢谢阅读.
