二维码扫描已经是移动app中很常见的功能了,原生端实现扫码是非常简单的事,Android一般使用ZXing库来实现,iOS可以使用原生SDK、ZXing或ZBar的SDK来实现。React Native中要实现二维码扫描无外乎两种方式:
- 原生端封装扫码功能组件,RN端render函数中以标签形式引用
- 原生端直接实现所有功能,RN端直接跳转到原生扫码界面
第一种方式,扫码相关的业务逻辑处理还是在RN端,第二种业务逻辑一般都在原生端,处理完毕后跳回RN页面。既然我们工程主体是以RN为主,所以这里只说明第一种实现扫码的方式,第二种方式实现也更简单,熟悉原生开发的应该都知道怎么做。
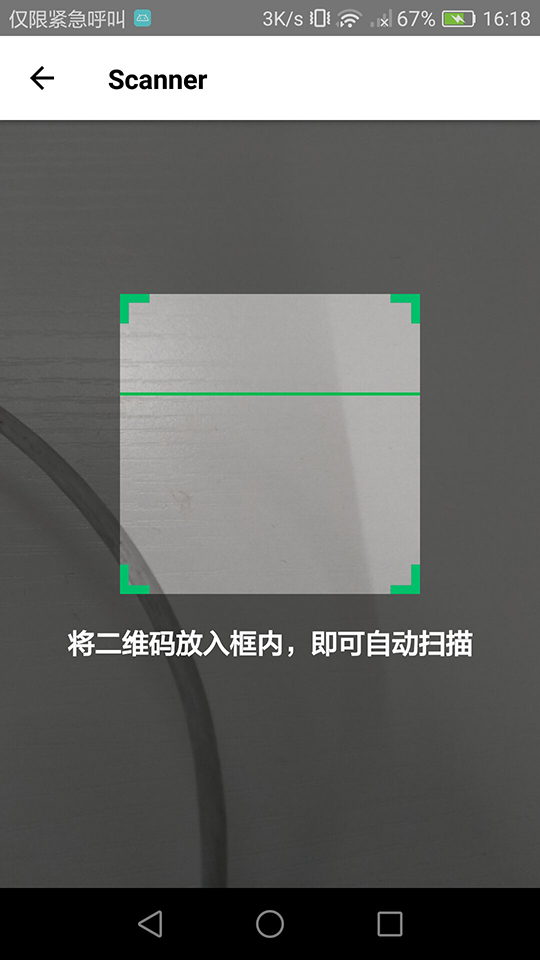
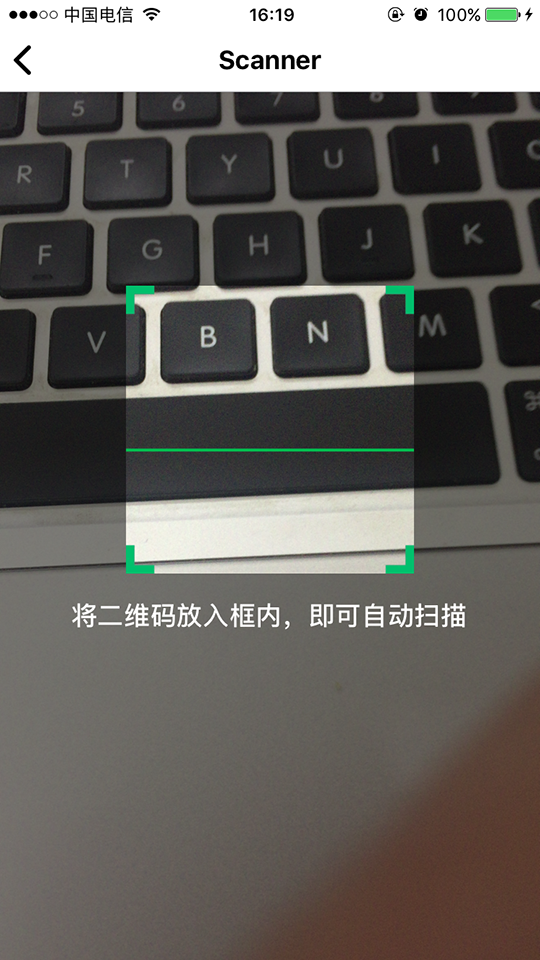
这里我使用了第三方的react-native-camera来实现扫码功能。二维码的生成则使用了react-native-qrcode-svg。下面是android和iOS扫码的效果图:
 android.jpg
  ios.png
生成二维码相对更简单,先来说明下RN中如何生成二维码。
生成二维码
之前在github上搜索了下RN生成二维码的库,很多人好像用的都是react-native-qrcode。我自己也尝试了下,确实可以生成二维码,但是生成的二维码无法识别,无论用微信、支付宝还是任何其它有扫码功能的app都识别不了,所以这个库生成的二维码是有问题的,根本不能用。
经过搜索和实践之后,我发现react-native-qrcode-svg才是RN端真正有效的二维码生成库。集成也非常简单,使用npm install --save或者yarn add命令安装react-native-qrcode-svg、react-native-svg,然后react-native link react-native-svg就行了。
react-native-svg是react-native-qrcode-svg的基础库必须安装,由react-native-community开源,可靠性更高。集成完毕后用法如下:
<QRCode
    value={"This is a QR code string, string cannot be null"}
    size={140}
/>
需要注意的是value不能是空字符串“”或者null,否则会报错。生成二维码用任何扫码功能的app扫都是可以识别的,包括本demo中的扫码功能。具体效果可以查看demo,地址在文末。
扫描二维码
扫描二维码推荐使用第三方库react-native-camera,也是react-native-community出品。这里提醒一下,RN端很多扫码的第三方库也是依赖于此库的,而且有些已经过期不再维护了,这是RN端最可靠的扫码库。
iOS集成
iOS集成非常简单,按照文档说明安装就可以了。步骤如下:
- yarn add react-native-camera安装
- react-native link react-native-camera
- 用Xcode打开iOS工程,找到TARGETS——>点击target在右侧找到Build Phases——>展开Link Binary With Libraries,删掉默认link进来的libRNCamera,点击+号重新搜索添加一遍。上面link react-native-svg的时候也是这个操作步骤。
- 在info.plist中添加相机使用权限”Privacy - Camera Usage Description“并写明使用权限的用处。
Android集成
安卓端集成有点头大,react-native-camera的文档中android的配置有点多。不仔细读清楚盲目配置容易出错。下面是我的demo项目中gradle的配置:
- android/build/gradle配置
// Top-level build file where you can add configuration options common to all sub-projects/modules.

buildscript {
    repositories {
        jcenter()
        google()
    }
    dependencies {
        classpath 'com.android.tools.build:gradle:3.0.1'

        // NOTE: Do not place your application dependencies here; they belong
        // in the individual module build.gradle files
    }
}

allprojects {
    repositories {
        mavenLocal()
        jcenter()
        maven {
            // All of React Native (JS, Obj-C sources, Android binaries) is installed from npm
            url "$rootDir/../node_modules/react-native/android"
        }
        maven { url "https://jitpack.io" }
        google()
    }
}

ext {
    buildToolsVersion = "26.0.3"
    minSdkVersion = 16
    compileSdkVersion = 26
    targetSdkVersion = 26
    supportLibVersion = "26.1.0"
}

subprojects {
  project.configurations.all {
     resolutionStrategy.eachDependency { details ->
       if (details.requested.group == 'com.android.support'
             && !details.requested.name.contains('multidex') ) {
          details.useVersion "26.1.0"
      }
    }
  }
}
- android/gradle/wrapper/gradle-wrapper.properties中修改distributionUrl为:
distributionUrl=https\://services.gradle.org/distributions/gradle-4.1-all.zip
- android/app/build.gradle中主要配置如下(从"android {" 这行开始往下):
android {
    compileSdkVersion rootProject.ext.compileSdkVersion
    buildToolsVersion rootProject.ext.buildToolsVersion

    defaultConfig {
        applicationId "com.qrcode"
        minSdkVersion rootProject.ext.minSdkVersion
        targetSdkVersion rootProject.ext.targetSdkVersion
        versionCode 1
        versionName "1.0"
        ndk {
            abiFilters "armeabi-v7a", "x86"
        }
    }
    splits {
        abi {
            reset()
            enable enableSeparateBuildPerCPUArchitecture
            universalApk false  // If true, also generate a universal APK
            include "armeabi-v7a", "x86"
        }
    }
    buildTypes {
        release {
            minifyEnabled enableProguardInReleaseBuilds
            proguardFiles getDefaultProguardFile("proguard-android.txt"), "proguard-rules.pro"
        }
    }
    // applicationVariants are e.g. debug, release
    applicationVariants.all { variant ->
        variant.outputs.each { output ->
            // For each separate APK per architecture, set a unique version code as described here:
            // http://tools.android.com/tech-docs/new-build-system/user-guide/apk-splits
            def versionCodes = ["armeabi-v7a":1, "x86":2]
            def abi = output.getFilter(OutputFile.ABI)
            if (abi != null) {  // null for the universal-debug, universal-release variants
                output.versionCodeOverride =
                        versionCodes.get(abi) * 1048576 + defaultConfig.versionCode
            }
        }
    }
}

dependencies {
    compile project(':react-native-camera')
    compile project(':react-native-svg')
    compile fileTree(dir: "libs", include: ["*.jar"])
    compile "com.android.support:appcompat-v7:${rootProject.ext.supportLibVersion}"
    compile "com.facebook.react:react-native:+"  // From node_modules
}

// Run this once to be able to run the application with BUCK
// puts all compile dependencies into folder libs for BUCK to use
task copyDownloadableDepsToLibs(type: Copy) {
    from configurations.compile
    into 'libs'
}
gradle配置需要特别注意保持版本的统一,不然很容易出错。
- 在AndroidManifest文件中添加权限:
<uses-permission android:name="android.permission.CAMERA" />
    <uses-permission android:name="android.permission.RECORD_AUDIO"/>
    <uses-permission android:name="android.permission.READ_EXTERNAL_STORAGE" />
    <uses-permission android:name="android.permission.WRITE_EXTERNAL_STORAGE" />
    <uses-permission android:name="android.permission.VIBRATE"/>
其实这里只需要CAMERA和VIBRATE(震动)的权限就可以了,因为我们只用到了react-native-camera扫码的功能,录视频和读写存储的没用到。
RN端调用扫码
新建一个js页面作为扫码页面,在render函数中渲染RNCamera组件。需要注意的是在demo中我给Android和iOS都分别指定了组件的扫码类别type。因为我们只需要扫二维码,所以 指定type以免其它类型的码也被扫出来了,这个根据项目需要设置。
由于android和iOS原生实现方式不一样,所以在RN中调用组件时,type的属性名不一致,iOS中是barCodeTypes,它是一个数组,可以指定多个扫码类型:
<RNCamera
    style={styles.preview}
    type={RNCamera.Constants.Type.back}
    barCodeTypes={[RNCamera.Constants.BarCodeType.qr]}
    flashMode={RNCamera.Constants.FlashMode.auto}
    onBarCodeRead={(e) => this.barcodeReceived(e)}
>
而android中是googleVisionBarcodeType,用于单个扫码类型:
<RNCamera
    style={styles.preview}
    type={RNCamera.Constants.Type.back}
    googleVisionBarcodeType={RNCamera.Constants.GoogleVisionBarcodeDetection.BarcodeType.QR_CODE}
    flashMode={RNCamera.Constants.FlashMode.auto}
    onBarCodeRead={(e) => this.barcodeReceived(e)}
>
总结
至此RN调用第三方扫码和生成二维码就完成了。主要用到以下库:
- react-native-camera
- react-native-qrcode-svg
- react-native-svg
RN扫码用react-native-camera,界面可以自己发挥定制。生成二维码用react-native-qrcode-svg和react-native-svg更可靠。
Demo地址:github.com/mrarronz/re…