

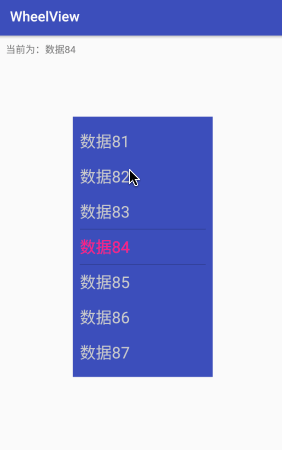
关于 Android 实现 iOS 上的滚轮选择效果的控件,到 github 上一搜一大堆,之所以还要造这个轮子,目的是为了更好的学习自定义控件,这个控件是几个月前写的了,经过一段时间的完善,现在开源,顺便写这一篇简单的介绍文章。 效果如下,录屏软件看起来可能有点卡顿,具体可以下载源码运行:
-
measure
测量过程比较简单,以文本大小所需要的尺寸,再加上 padding。
@Override protected void onMeasure(int widthMeasureSpec, int heightMeasureSpec) { super.onMeasure(widthMeasureSpec, heightMeasureSpec); int wantWith = getPaddingLeft() + getPaddingRight(); int wantHeight = getPaddingTop() + getPaddingBottom(); calculateTextSize(); wantWith += mTextRect.width(); //可见 item 数量计算文本尺寸 if (mVisibilityCount > 0) { wantHeight += mTextRect.height() * mVisibilityCount; } else { wantHeight += mTextRect.height() * DEFALUT_VISIBILITY_COUNT; } setMeasuredDimension( resolveSize(wantWith, widthMeasureSpec), resolveSize(wantHeight, heightMeasureSpec) ); mNeedCalculate = true; } -
draw
绘制过程是通过 canvas 的位移去绘制不同位置的部件,包括文本内容和选择框之类的,这里可能需要注意下的地方是,不要一次性把所有文本绘制出来,只需要绘制可见文本即可。
@Override protected void onDraw(Canvas canvas) { super.onDraw(canvas); if (hasDataSource()) { // 省略 // 这里计算下需要绘制的数量,+2 只是确保不会出现空白 final int drawCount = mContentRect.height() / mTextRect.height() + 2; int invisibleCount = 0; int dy = -mDistanceY; // 省略 // 通过 translate 绘制文本 for (int i = 0; (i < drawCount && mDataSources.size() > (invisibleCount + i)); i++) { final int position = invisibleCount + i; String text = mDataSources.get(position); if (i > 0) { canvas.translate(0, mTextRect.height()); } final PointF pointF = calculateTextGravity(text); mTextPaint.setTextSize(mTextSize); if (position == selctPosition) { mTextPaint.setColor(mSelectedTextColor); } else { mTextPaint.setColor(mNormalTextColor); } canvas.drawText(text, pointF.x, pointF.y, mTextPaint); } canvas.restoreToCount(saveCount); } // 绘制选择框 int saveCount = canvas.save(); mDrawPaint.setColor(mSelectedLineColor); canvas.translate(mContentRect.left, mContentRect.top); canvas.drawLine( mSelctedRect.left, mSelctedRect.top, mSelctedRect.right, mSelctedRect.top, mDrawPaint ); canvas.drawLine( mSelctedRect.left, mSelctedRect.bottom, mSelctedRect.right, mSelctedRect.bottom, mDrawPaint ); canvas.restoreToCount(saveCount); } -
layout
因为这个控件是继承于 View,所以不需要处理
onLayout。 -
touch
如果对 touch event 分发流程熟悉的话,那么很多处理可以说是模版代码,可以参考
NestedScrollView、ScrollView。在
onInterceptTouchEvent中,判断是否开始进行拖动手势,保存到变量(mIsBeingDragged)中:// 多指处理 final int pointerIndex = ev.findPointerIndex(activePointerId); if (pointerIndex == -1) { Log.e(TAG, "Invalid pointerId=" + activePointerId + " in onInterceptTouchEvent"); break; } final int y = (int) ev.getY(pointerIndex); final int yDiff = Math.abs(y - mLastMotionY); if (yDiff > mTouchSlop && (getNestedScrollAxes() & SCROLL_AXIS_VERTICAL) == 0) { // 开始拖动 mIsBeingDragged = true; mLastMotionY = y; initVelocityTrackerIfNotExists(); mVelocityTracker.addMovement(ev); mNestedYOffset = 0; if (mScrollStrictSpan == null) { mScrollStrictSpan = StrictMode.enterCriticalSpan("ScrollView-scroll"); } final ViewParent parent = getParent(); if (parent != null) { // 禁止父控件拦截事件分发 parent.requestDisallowInterceptTouchEvent(true); } }在
onTouchEvent中对ACTION_MOVR进行拖动的处理,如果支持嵌套滚动,那么会预先进行嵌套滚动的分发。如果支持阴影效果,那么使用EdgeEffect。// 和 onInterceptTouchEvent 一样进行拖动手势开始的判断 if (!mIsBeingDragged && Math.abs(deltaY) > mTouchSlop) { final ViewParent parent = getParent(); if (parent != null) { parent.requestDisallowInterceptTouchEvent(true); } mIsBeingDragged = true; if (deltaY > 0) { deltaY -= mTouchSlop; } else { deltaY += mTouchSlop; } } if (mIsBeingDragged) { // 拖动处理 // Scroll to follow the motion event mLastMotionY = y - mScrollOffset[1]; final int oldY = mScrollY; final int range = getScrollRange(); final int overscrollMode = getOverScrollMode(); boolean canOverscroll = overscrollMode == OVER_SCROLL_ALWAYS || (overscrollMode == OVER_SCROLL_IF_CONTENT_SCROLLS && range > 0); // Calling overScrollBy will call onOverScrolled, which // calls onScrollChanged if applicable. // 滚动处理,overScrollBy 中会处理嵌套滚动预先分发 if (overScrollBy(0, deltaY, 0, mScrollY, 0, range, 0, mOverscrollDistance, true) && !hasNestedScrollingParent()) { // Break our velocity if we hit a scroll barrier. mVelocityTracker.clear(); } final int scrolledDeltaY = mScrollY - oldY; final int unconsumedY = deltaY - scrolledDeltaY; // 嵌套滚动 if (dispatchNestedScroll(0, scrolledDeltaY, 0, unconsumedY, mScrollOffset)) { mLastMotionY -= mScrollOffset[1]; vtev.offsetLocation(0, mScrollOffset[1]); mNestedYOffset += mScrollOffset[1]; } else if (canOverscroll) { final int pulledToY = oldY + deltaY; // 拖动阴影效果 if (pulledToY < 0) { mEdgeGlowTop.onPull((float) deltaY / getHeight(), ev.getX(activePointerIndex) / getWidth()); if (!mEdgeGlowBottom.isFinished()) { mEdgeGlowBottom.onRelease(); } } else if (pulledToY > range) { mEdgeGlowBottom.onPull((float) deltaY / getHeight(), 1.f - ev.getX(activePointerIndex) / getWidth()); if (!mEdgeGlowTop.isFinished()) { mEdgeGlowTop.onRelease(); } } if (mEdgeGlowTop != null && (!mEdgeGlowTop.isFinished() || !mEdgeGlowBottom.isFinished())) { postInvalidateOnAnimation(); } } }支持滚动手势的控件,一般都会支持 fling 手势,可以理解为惯性滚动。这也是模版代码,在
onTouchEvent中对ACTION_UP中对拖动速度进行分析。case MotionEvent.ACTION_UP: if (mIsBeingDragged) { final VelocityTracker velocityTracker = mVelocityTracker; velocityTracker.computeCurrentVelocity(1000, mMaximumVelocity); // 获取拖动速度 int initialVelocity = (int) velocityTracker.getYVelocity(mActivePointerId); if ((Math.abs(initialVelocity) > mMinimumVelocity)) { // 可以进行 fling 操作 flingWithNestedDispatch(-initialVelocity); } else if (mScroller.springBack(mScrollX, mScrollY, 0, 0, 0, getScrollRange())) { postInvalidateOnAnimation(); } mActivePointerId = INVALID_POINTER; endDrag(); } break;具体的代码可以在
ScrollView中阅读。回到我实现的自定义控件来,对 touch event 的处理代码可以说是和系统控件的处理没有什么两样,在获取到拖动的距离后,根据这个值绘制不同位置的可见区域。这里多了两个处理是:
第一拖动结束后,进行复位处理。拖动结束后,选择框如果停留在两个 item 之间,那么根据和两个 item 的距离进行比较,选择更近的 item。
private void correctionDistanceY() {
      if (mDistanceY % mTextRect.height() != 0) {
          int position = mDistanceY / mTextRect.height();
          int remainder = mDistanceY % mTextRect.height();
          if (remainder >= mTextRect.height() / 2f) {
              position++;
          }
          int newDistanceY = position * mTextRect.height();
          animChangeDistanceY(newDistanceY);
      }
  }
第二个是在使用上发现的问题,如果剩余可滚动的距离过短,拖动的手势速度又很快,就会导致 fling 处理没结束,视觉上又没有改变,同时是在滚动结束后才进行选择的回调,所以体检上不好,但是
Scroller并没有提供setDuration,所以拷贝Scroller中计算 duration 的方法,根据剩余的滚动计算合适的 duration,手动中断Scroller的 fling 处理。if ((SystemClock.elapsedRealtime() - mStartFlingTime) >= mFlingDuration || currY == mScroller.getFinalY()) { //duration or current == final if (DEBUG) { Logger.d("abortAnimation"); } mScroller.abortAnimation(); }
具体的代码可以阅读源码。
