

本系列文章是对 metalkit.org 上面MetalKit内容的全面翻译和学习.
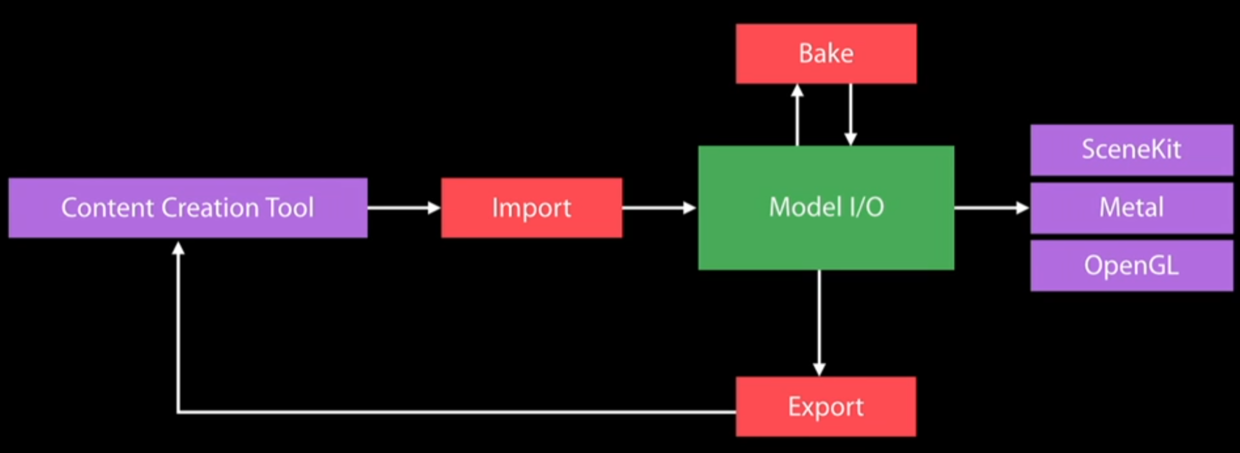
Model I/O是2015年被引入到iOS 9和OS X 10.11中的,这个框架帮助我们创建更真实更有交互性的图形.我们可以用它来导入/导出3D素材,来描述灯光,材料和环境,来烘焙灯光,来细分及体素化网格,来提供基于物理效果的渲染.Model I/O用一些3D API轻易地将我们的资源融入到代码里:
要导入一个资源,我们只需要做:
var url = URL(string: "/Users/YourUsername/Desktop/imported.obj")
let asset = MDLAsset(url: url!)
要导出一个素材我们只要做:
url = URL(string: "/Users/YourUsername/Desktop/exported.obj")
try! asset.export(to: url!)
Model I/O会保存 .obj文件和一个额外的 .mtl文件,其中包含了物体材质的信息,比如这个例子:
# Apple ModelI/O MTL File: exported.mtl

newmtl material_1
	Kd 0.8 0.8 0.8
	Ka 0 0 0
	Ks 0 0 0
	ao 0 0 0
	subsurface 0 0 0
	metallic 0 0 0
	specularTint 0 0 0
	roughness 0.9 0 0
	anisotropicRotation 0 0 0
	sheen 0.05 0 0
	sheenTint 0 0 0
	clearCoat 0 0 0
	clearCoatGloss 0 0 0
将Model I/O和Metal融合只需要四步:
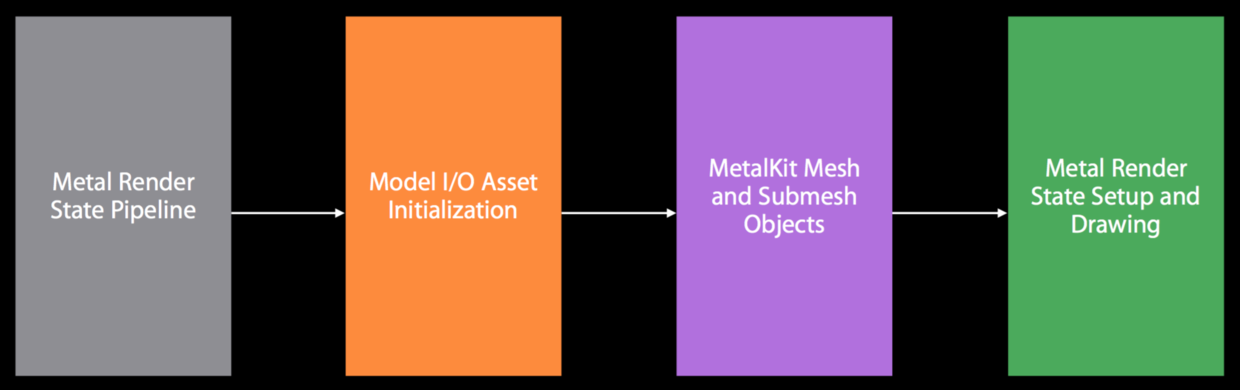
Step 1: set up the render pipeline state创建渲染管线状态
首先我们创建一个顶点描述符来传递输入项到顶点函数.顶点描述符是用来描述输入到渲染状态管线的顶点属性.我们需要3 x 4字节给顶点位置,4 x 1字节给颜色,2 x 2字节给纹理坐标,4 x 1字节给AO环境光遮蔽.最后我们告诉描述符,总的stride步幅是多长(24):
let vertexDescriptor = MTLVertexDescriptor()
vertexDescriptor.attributes[0].offset = 0
vertexDescriptor.attributes[0].format = MTLVertexFormat.float3 // position

vertexDescriptor.attributes[1].offset = 12
vertexDescriptor.attributes[1].format = MTLVertexFormat.uChar4 // color

vertexDescriptor.attributes[2].offset = 16
vertexDescriptor.attributes[2].format = MTLVertexFormat.half2 // texture

vertexDescriptor.attributes[3].offset = 20
vertexDescriptor.attributes[3].format = MTLVertexFormat.float // occlusion

vertexDescriptor.layouts[0].stride = 24
let renderPipelineDescriptor = MTLRenderPipelineDescriptor()
renderPipelineDescriptor.vertexDescriptor = vertexDescriptor
let rps = device.newRenderPipelineStateWithDescriptor(renderPipelineDescriptor)
Step 2: set up the asset initialization建立素材初始化
我们还需要创建一个Model I/O的顶点描述符来描述顶点属性在网格中的布局.我们使用一个名为Farmhouse.obj的模型,它有一个Farmhouse.png纹理(都已经添加到项目中了):
let desc = MTKModelIOVertexDescriptorFromMetal(vertexDescriptor)
var attribute = desc.attributes[0] as! MDLVertexAttribute
attribute.name = MDLVertexAttributePosition
attribute = desc.attributes[1] as! MDLVertexAttribute
attribute.name = MDLVertexAttributeColor
attribute = desc.attributes[2] as! MDLVertexAttribute
attribute.name = MDLVertexAttributeTextureCoordinate
attribute = desc.attributes[3] as! MDLVertexAttribute
attribute.name = MDLVertexAttributeOcclusionValue
let mtkBufferAllocator = MTKMeshBufferAllocator(device: device!)
let url = Bundle.main.url(forResource: "Farmhouse", withExtension: "obj")
let asset = MDLAsset(url: url!, vertexDescriptor: desc, bufferAllocator: mtkBufferAllocator)
下一步,为素材加载纹理:
let loader = MTKTextureLoader(device: device)
let file = Bundle.main.path(forResource: "Farmhouse", ofType: "png")
let data = try Data(contentsOf: URL(fileURLWithPath: file))
let texture = try loader.newTexture(with: data, options: nil)
Step 3: set up MetalKit mesh and submesh objects建立MetalKit网格和子网格对象
我们现在正在创建在最后一步,第四步中用到的网格和子网格.我们还要计算Ambient Occlusion环境光遮蔽,它是对几何体遮断的度量,它告诉我们环境光有多少到达了我们物体的各个像素或点,以及光线被周围的网格阻碍了多少.Model I/O提供了一个UV制图器来创建2D纹理并将其包裹在物体的3D网格上.我们为纹理中的每个像素计算其环境光遮蔽数值,这个值是添加一每个顶点上的额外的浮点数:
let mesh = asset.object(at: 0) as? MDLMesh
mesh.generateAmbientOcclusionVertexColors(withQuality: 1, attenuationFactor: 0.98, objectsToConsider: [mesh], vertexAttributeNamed: MDLVertexAttributeOcclusionValue)
let meshes = try MTKMesh.newMeshes(from: asset, device: device!, sourceMeshes: nil)
Step 4: set up Metal rendering and drawing of meshes建立Metal渲染和绘图网格
最后,我们用网格数据来配置绘图所需的命令编码器:
let mesh = (meshes?.first)!
let vertexBuffer = mesh.vertexBuffers[0]
commandEncoder.setVertexBuffer(vertexBuffer.buffer, offset: vertexBuffer.offset, at: 0)
let submesh = mesh.submeshes.first!
commandEncoder.drawIndexedPrimitives(submesh.primitiveType, indexCount: submesh.indexCount, indexType: submesh.indexType, indexBuffer: submesh.indexBuffer.buffer, indexBufferOffset: submesh.indexBuffer.offset)
下一步,我们将致力于我们的着色器函数.首先我们为顶点和uniforms建立自己的结构体:
struct VertexIn {
    float4 position [[attribute(0)]];
    float4 color [[attribute(1)]];
    float2 texCoords [[attribute(2)]];
    float occlusion [[attribute(3)]];
};

struct VertexOut {
    float4 position [[position]];
    float4 color;
    float2 texCoords;
    float occlusion;
};

struct Uniforms {
    float4x4 modelViewProjectionMatrix;
};
注意,我让顶点描述符中的信息和VertexIn结构体相匹配.对于顶点函数,我们使用了一个** [[stage_in]]**属性,因为我们将把每个顶点的输入值作为一个参数传递到该函数:
vertex VertexOut vertex_func(const VertexIn vertices [[stage_in]],
                             constant Uniforms &uniforms [[buffer(1)]],
                             uint vertexId [[vertex_id]])
{
    float4x4 mvpMatrix = uniforms.modelViewProjectionMatrix;
    float4 position = vertices.position;
    VertexOut out;
    out.position = mvpMatrix * position;
    out.color = float4(1);
    out.texCoords = vertices.texCoords;
    out.occlusion = vertices.occlusion;
    return out;
}
片段函数读取从顶点函数中传递过来的每个片段作为输入值,并通过命令编码器处理我们传递过去的纹理:
fragment half4 fragment_func(VertexOut fragments [[stage_in]],
                             texture2d<float> textures [[texture(0)]])
{
    float4 baseColor = fragments.color;
    return half4(baseColor);
}
如果你运行playground,你会看到这样的输出图片:
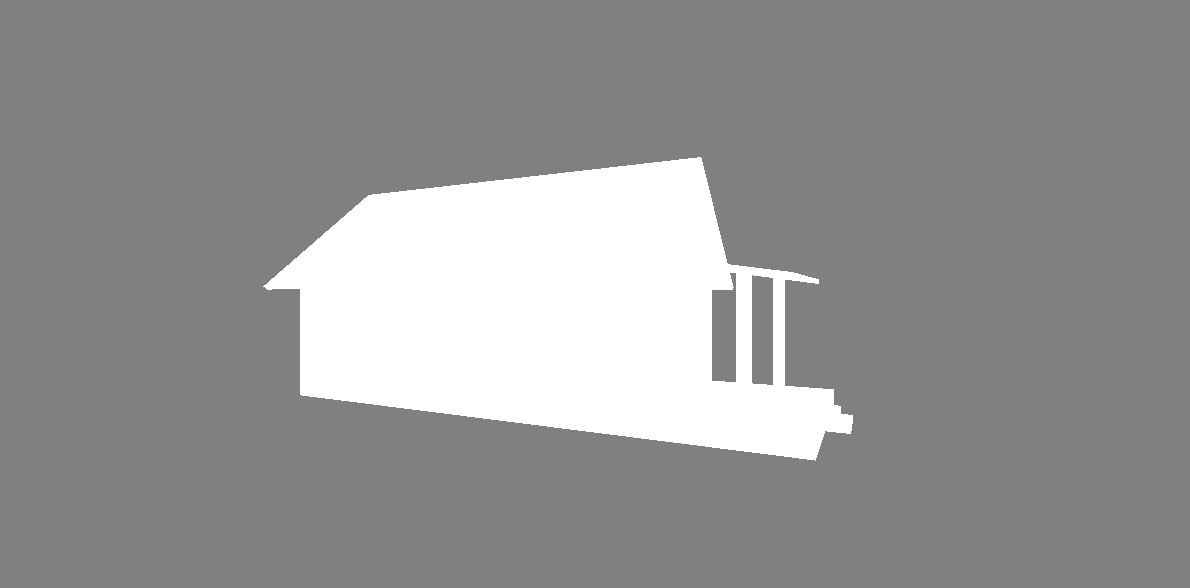
这是个相当无趣的纯白模型.让我们给它应用上环境光遮蔽,只要在片段函数中用下面几行替换最后一行就行了:
float4 occlusion = fragments.occlusion;
return half4(baseColor * occlusion);
如果你运行playground,你会看到这样的输出图片:
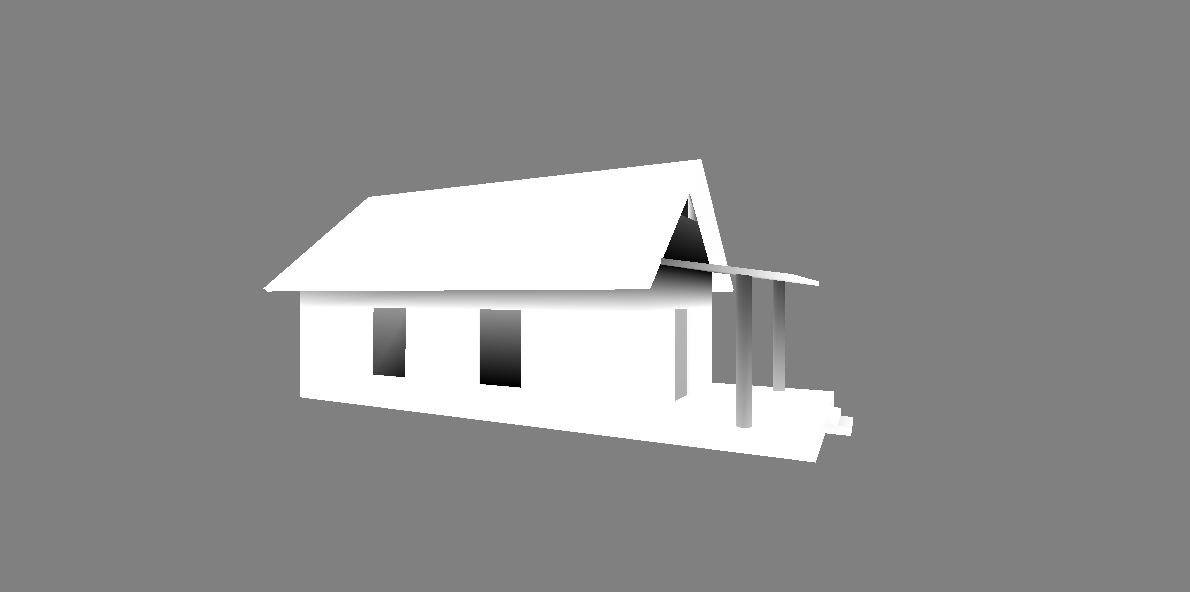
环境光遮蔽看上去有点不成熟,这是因为我们的模型是扁平的,没有任何的曲线或表面不规则,所以环境光遮蔽不能让它更真实.下一步,我们用上纹理.用下面几行替换片段函数中的最后一行:
constexpr sampler samplers;
float4 texture = textures.sample(samplers, fragments.texCoords);
return half4(baseColor * texture);
如果你再运行playground,你会看到这样的输出图片:
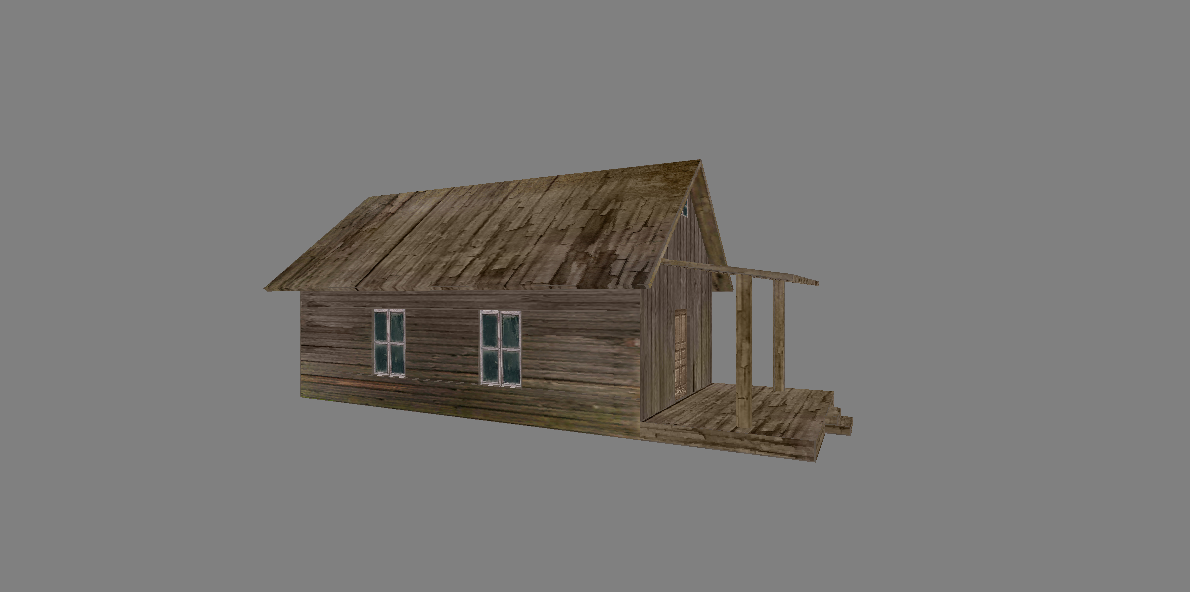
模型上的纹理看起来好多了,但如果我们将环境光遮蔽也用上它会显得更真实.用下面这行替换片段函数中的最后一行:
return half4(baseColor * occlusion * texture);
如果你再运行playground,你会看到这样的输出图片:
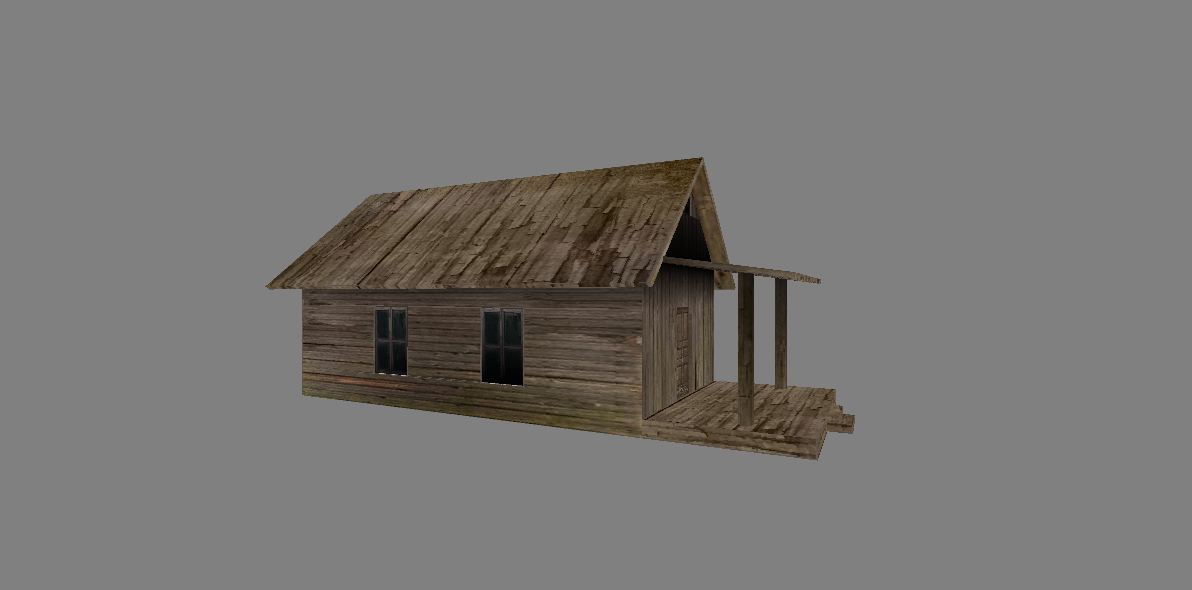
几行代码效果不错,对吧?Model I/O对于3D图形和游戏开发者来说是个很棒的框架.网上也有很多关于Model I/O与SceneKit协同使用的文章,但是,我认为将其和Metal协同使用会更有意思!
源代码 source code 已发布在Github上.
下次见!
