0X000 前言
在 使用tensorflow自动识别验证码(一) 这篇文章中,对使用tensorflow自动识别验证码的过程做了简单的了解和编写。那么今天这篇文章将对上篇文章中代码进行修改用于实现对主流的CMS进行验证码的破解。
0x001 破解步骤
先回顾一下 tensorflow 的自动识别验证码的步骤
-
采样
-
创建识别模型
-
训练识别模型
-
保存识别模型
-
验证
由于后面三步基本都是tensorflow自动完成我们主要的工作是前两步。所以步骤以以下几步为主:
-
寻找开源系统中的验证码模块
-
修改和测试验证码模块
-
验证码模块适配采样代码
-
修改识别 模型参数
0x002 寻找开源系统中的验证码模块
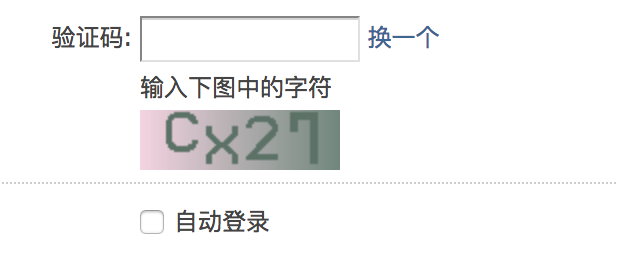
先寻找你想要破解的cms(开不开源没关系,最主要是你有源码)。这里用的是XXXCMS(=。= 屏蔽掉了关键字 自行想象)我们先登陆一下管理员,OK,果然是有验证码的。
打开编辑器 寻找到生成验证码的类 checkcode.class.php
<?php
/**
 * 生成验证码
 * @author chenzhouyu
 * 类用法
 * $checkcode = new checkcode();
 * $checkcode->doimage();
 * //取得验证
 * $_SESSION['code']=$checkcode->get_code();
 */
class checkcode {
    //验证码的宽度
    public $width=130;

    //验证码的高
    public $height=50;

    //设置字体的地址
    private $font;

    //设置字体色
    public $font_color;

    //设置随机生成因子
    public $charset = 'abcdefghkmnprstuvwyzABCDEFGHKLMNPRSTUVWYZ23456789';

    //设置背景色
    public $background = '#EDF7FF';

    //生成验证码字符数
    public $code_len = 4;

    //字体大小
    public $font_size = 20;

    //验证码
    private $code;

    //图片内存
    private $img;

    //文字X轴开始的地方
    private $x_start;

    function __construct() {
        $rand = rand(0,1);
        if($rand==0) {
            $this->font = PC_PATH.'libs'.DIRECTORY_SEPARATOR.'data'.DIRECTORY_SEPARATOR.'font'.DIRECTORY_SEPARATOR.'elephant.ttf';
        } else {
            $this->font = PC_PATH.'libs'.DIRECTORY_SEPARATOR.'data'.DIRECTORY_SEPARATOR.'font'.DIRECTORY_SEPARATOR.'Vineta.ttf';
        }
    }

    /**
     * 生成随机验证码。
     */
    protected function creat_code() {
        $code = '';
        $charset_len = strlen($this->charset)-1;
        for ($i=0; $i<$this->code_len; $i++) {
            $code .= $this->charset[rand(1, $charset_len)];
        }
        $this->code = $code;
    }

    /**
     * 获取验证码
     */
    public function get_code() {
        return strtolower($this->code);
    }

    /**
     * 生成图片
     */
    public function doimage() {
        $code = $this->creat_code();
        $this->img = imagecreatetruecolor($this->width, $this->height);
        if (!$this->font_color) {
            $this->font_color = imagecolorallocate($this->img, rand(0,156), rand(0,156), rand(0,156));
        } else {
            $this->font_color = imagecolorallocate($this->img, hexdec(substr($this->font_color, 1,2)), hexdec(substr($this->font_color, 3,2)), hexdec(substr($this->font_color, 5,2)));
        }
        //设置背景色
        $background = imagecolorallocate($this->img,hexdec(substr($this->background, 1,2)),hexdec(substr($this->background, 3,2)),hexdec(substr($this->background, 5,2)));
        //画一个柜形,设置背景颜色。
        imagefilledrectangle($this->img,0, $this->height, $this->width, 0, $background);
        $this->creat_font();
        $this->creat_line();
        $this->output();
    }

    /**
     * 生成文字
     */
    private function creat_font() {
        $x = $this->width/$this->code_len;
        for ($i=0; $i<$this->code_len; $i++) {
            imagettftext($this->img, $this->font_size, rand(-30,30), $x*$i+rand(0,5), $this->height/1.4, $this->font_color, $this->font, $this->code[$i]);
            if($i==0)$this->x_start=$x*$i+5;
        }
    }

    /**
     * 画线
     */
    private function creat_line() {
        imagesetthickness($this->img, 3);
        $xpos   = ($this->font_size * 2) + rand(-5, 5);
        $width  = $this->width / 2.66 + rand(3, 10);
        $height = $this->font_size * 2.14;

        if ( rand(0,100) % 2 == 0 ) {
          $start = rand(0,66);
          $ypos  = $this->height / 2 - rand(10, 30);
          $xpos += rand(5, 15);
        } else {
          $start = rand(180, 246);
          $ypos  = $this->height / 2 + rand(10, 30);
        }

        $end = $start + rand(75, 110);

        imagearc($this->img, $xpos, $ypos, $width, $height, $start, $end, $this->font_color);

        if ( rand(1,75) % 2 == 0 ) {
          $start = rand(45, 111);
          $ypos  = $this->height / 2 - rand(10, 30);
          $xpos += rand(5, 15);
        } else {
          $start = rand(200, 250);
          $ypos  = $this->height / 2 + rand(10, 30);
        }

        $end = $start + rand(75, 100);

        imagearc($this->img, $this->width * .75, $ypos, $width, $height, $start, $end, $this->font_color);
    }

    /**
     * 输出图片
     */
    private function output() {
        header("content-type:image/png\r\n");
        imagepng($this->img);
        imagedestroy($this->img);
    }
}
前期准备工作基本完成。接下来是修改和测试验证码模块
0x003 修改和测试验证码模块
由于系统的验证码都是随机生成且不可控我们需要把上面的代码改造成 形如create_img.php?code=XXXX 的形式这样子我们就可以通过上次的py的代码随机生成参数来控制验证码的生成从而达到生成样本的目的。值得注意的是 这个系统用了两种字体去生成它的验证码我们这为了减轻识别的负担,把其中一个去掉 。
改造后 保存为 create_img.php
<?php
class checkcode
{
    //验证码的宽度
    public $width = 130;

    //验证码的高
    public $height = 50;

    //设置字体的地址
    private $font;

    //设置字体色
    public $font_color;

    //设置随机生成因子
    public $charset = 'abcdefghkmnprstuvwyzABCDEFGHKLMNPRSTUVWYZ23456789';

    //设置背景色
    public $background = '#EDF7FF';

    //生成验证码字符数
    public $code_len = 4;

    //字体大小
    public $font_size = 20;

    //验证码
    private $code;

    //图片内存
    private $img;

    //文字X轴开始的地方
    private $x_start;

    function __construct()
    {

        $this->font = './font/elephant.ttf';

    }

    /**
     * 生成随机验证码。
     */
    protected function creat_code()
    {

        $this->code = $_GET['code'];
    }

    /**
     * 获取验证码
     */
    public function get_code()
    {
        return strtolower($this->code);
    }

    /**
     * 生成图片
     */
    public function doimage()
    {
        $code = $this->creat_code();
        $this->img = imagecreatetruecolor($this->width, $this->height);
        if (!$this->font_color) {
            $this->font_color = imagecolorallocate($this->img, rand(0, 156), rand(0, 156), rand(0, 156));
        } else {
            $this->font_color = imagecolorallocate($this->img, hexdec(substr($this->font_color, 1, 2)), hexdec(substr($this->font_color, 3, 2)), hexdec(substr($this->font_color, 5, 2)));
        }
        //设置背景色
        $background = imagecolorallocate($this->img, hexdec(substr($this->background, 1, 2)), hexdec(substr($this->background, 3, 2)), hexdec(substr($this->background, 5, 2)));
        //画一个柜形,设置背景颜色。
        imagefilledrectangle($this->img, 0, $this->height, $this->width, 0, $background);
        $this->creat_font();
        $this->creat_line();
        $this->output();
    }

    /**
     * 生成文字
     */
    private function creat_font()
    {
        $x = $this->width / $this->code_len;
        for ($i = 0; $i < $this->code_len; $i++) {
            imagettftext($this->img, $this->font_size, rand(-30, 30), $x * $i + rand(0, 5), $this->height / 1.4, $this->font_color, $this->font, $this->code[$i]);
            if ($i == 0) $this->x_start = $x * $i + 5;
        }
    }

    /**
     * 画线
     */
    private function creat_line()
    {
        imagesetthickness($this->img, 3);
        $xpos = ($this->font_size * 2) + rand(-5, 5);
        $width = $this->width / 2.66 + rand(3, 10);
        $height = $this->font_size * 2.14;

        if (rand(0, 100) % 2 == 0) {
            $start = rand(0, 66);
            $ypos = $this->height / 2 - rand(10, 30);
            $xpos += rand(5, 15);
        } else {
            $start = rand(180, 246);
            $ypos = $this->height / 2 + rand(10, 30);
        }

        $end = $start + rand(75, 110);

        imagearc($this->img, $xpos, $ypos, $width, $height, $start, $end, $this->font_color);

        if (rand(1, 75) % 2 == 0) {
            $start = rand(45, 111);
            $ypos = $this->height / 2 - rand(10, 30);
            $xpos += rand(5, 15);
        } else {
            $start = rand(200, 250);
            $ypos = $this->height / 2 + rand(10, 30);
        }

        $end = $start + rand(75, 100);

        imagearc($this->img, $this->width * .75, $ypos, $width, $height, $start, $end, $this->font_color);
    }

    /**
     * 输出图片
     */
    private function output()
    {
        header("content-type:image/png\r\n");
        imagepng($this->img);
        imagedestroy($this->img);
    }
}

$checkcode = new checkcode();
$checkcode->doimage();
接下来要测试一下 编写 test.py
import requests as req
from PIL import Image
from io import BytesIO
import numpy as np

response = req.get('http://127.0.0.1:8080/xxxcms/create_img.php?code=1234')
image = Image.open(BytesIO(response.content))
gray = image.convert('L')  #灰值
gray = gray.point(lambda x: 0 if x<128 else 255, '1') #去杂质
gray.show()
img = np.array(gray.getdata()) #转换成数组

print  img
运行 python test.py
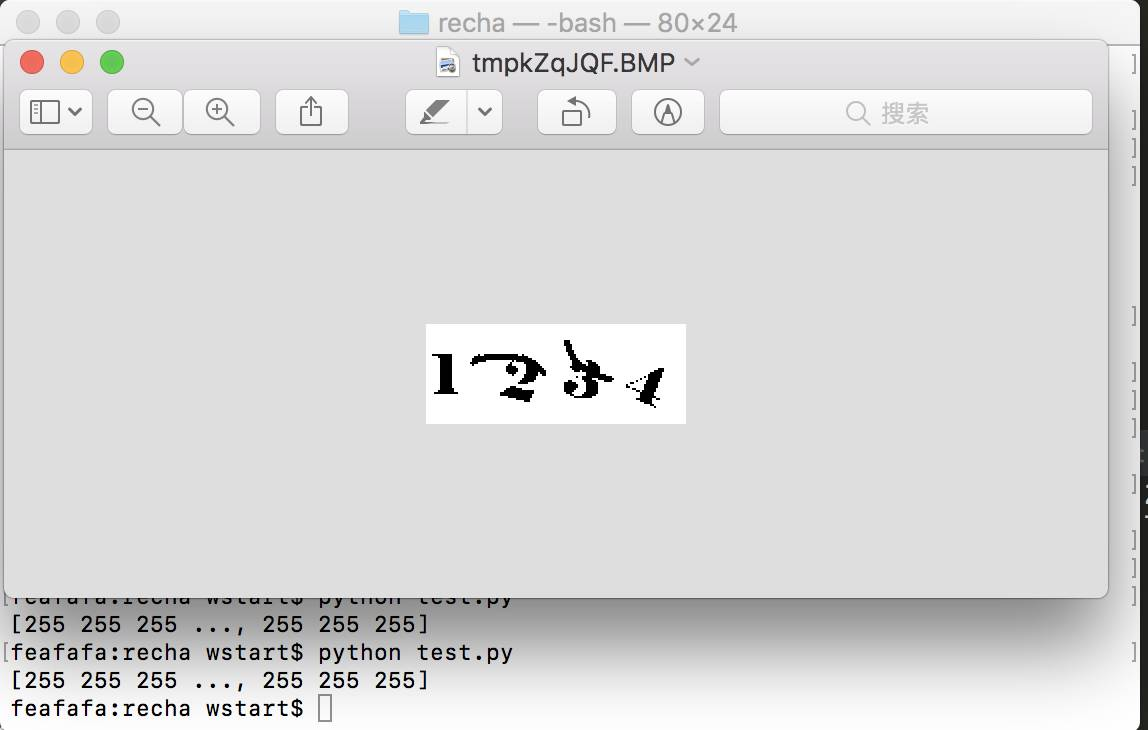 如果打开看到控制台以及黑白图片后那么
代表验证码部分准备完成
如果打开看到控制台以及黑白图片后那么
代表验证码部分准备完成
0x004 验证码模块适配采样代码
重点看几个参数
-
验证码的 生成因子
-
验证码的 长 ,宽
-
验证码的 位数
上面的类中我们可以看到 这几个参数的值 依次为
-
生成因子: abcdefghkmnprstuvwyzABCDEFGHKLMNPRSTUVWYZ23456789 -
长宽:130x50 -
位数: 4;
复制一份 generate_captcha.py 为 xxxcms_generate_captcha.py
添加from io import BytesIO 和 import requests as req 的 import
主要修改两个地方
第一个是 开头处的生成参数
width=130,  # 验证码图片的宽
 height=50,  # 验证码图片的高
 char_num=4,  # 验证码字符个数
 characters='abcdefghkmnprstuvwyzABCDEFGHKLMNPRSTUVWYZ23456789'):
第二个是 gen_captcha 的方法中获取图片的方法修改成test.py中的方法
X = np.zeros([batch_size, self.height, self.width, 1])
img = np.zeros((self.height, self.width), dtype=np.uint8)
Y = np.zeros([batch_size, self.char_num, self.classes])
image = ImageCaptcha(width=self.width, height=self.height)
while True:
    for i in range(batch_size):
        captcha_str = ''.join(random.sample(self.characters, self.char_num))
        imgurl = 'http://127.0.0.1:8080/xxxcms/create_img.php?code='+captcha_str
        response = req.get(imgurl)
        img = Image.open(BytesIO(response.content)).convert('L')
        img = np.array(img.getdata())
        X[i] = np.reshape(img, [self.height, self.width, 1]) / 255.0
        for j, ch in enumerate(captcha_str):
            Y[i, j, self.characters.find(ch)] = 1
    Y = np.reshape(Y, (batch_size, self.char_num * self.classes))
    yield X, Y
打开 train_captcha.py把import generate_captcha 改为import xxxcms_generate_captcha as generate_captcha
重新运行 python train_captcha.py
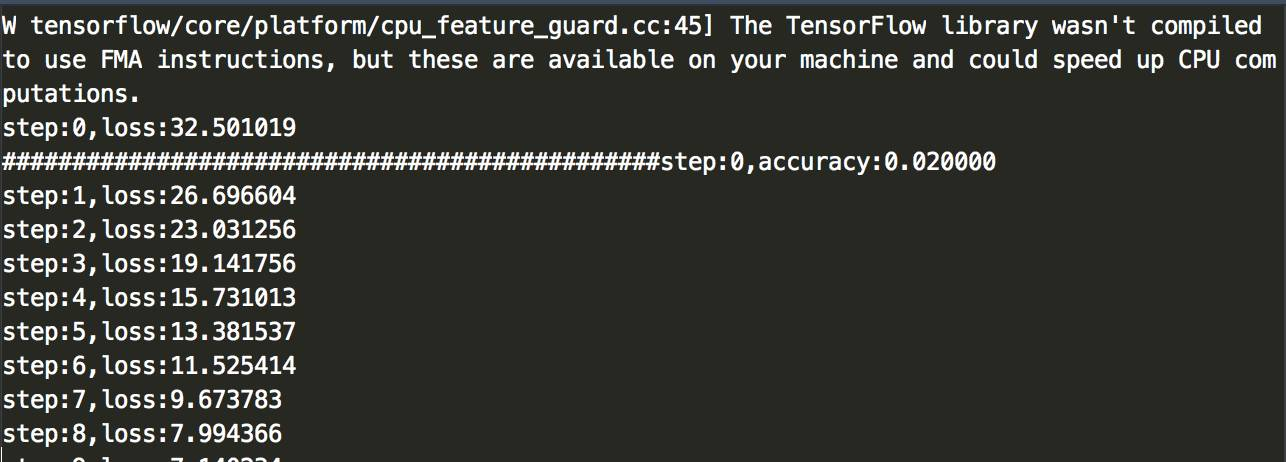
剩下的流程 就和 第一篇一样了 。
0x005 一些小心得
-
如何看我的算法是否已经生效
-
看lost的值是否是逐渐降低
-
是不是什么验证码都可以破解
-
理论上大小字母+数字以及一些图片上只有一些线或者点的 基本都可以。概率大小问题
-
能接受破解速度的基本是4位。5,6或者以上都需要大型机器来辅助加快模型生成
-
如何加快我的模型生成速度
-
增加硬件设备
-
调整模型生成参数
-
上阿里云购买 阿里云GPU服务器