

NerdyUI
最好用的快速布局 UI 库,适用于 iOS 8 及以上版本。
github: github.com/nerdycat/Ne…
序言
众所周知,UI在一个App中所占的比重是很大的,如果能快速的布局UI,则会大大的提高App整体的开发效率,NerdyUI正是基于这个理由创建的。
NerdyUI使用非常紧凑的链式语法,提供一些常用但系统控件又缺失的功能,更为简便的约束创建方式和更好理解的布局系统,势必能大大减少您的代码量和开发时间。
快速创建 NSString, UIFont, UIColor, UIImage 和常用的 structs
你可以用 Str() 来转换大部分类型到NSString。同理,你可以用 Log() 来打印大部分的变量。
Str(100);                     //@"100"
Str(3.14);                    //@"3.14"
Str(@0.618);                  //@"0.618"
Str(view.frame);              //@"{{0, 0}, {100, 100}}"
Str(view.center);             //@"50, 50}"
Str(_cmd);                    //@"viewDidLoad"
Str(NSString.class);          //@"NSString"
Str("c string");              //@"c string"
Str(@"1 + 1 = %d", 1 + 1);    //@"1 + 1 = 2

Log(100);
Log(3.14);
Log(@0.618);
Log(view.frame);
...
Log(@"1 + 1 = %d", 1 + 1);

//拼接字符串
@"1".a(@"2").a(3).a(nil).a(4.0f).a(@5).a(@"%d", 6);    //@"123456"
你可以用 AttStr() 来创建NSAttributedString。
AttStr(@"hello, 101").match(@"[0-9]+").underline;
AttStr(@"A smile ", Img(@"smile"), @" !!");        //attributedString with image attachment
你可以用 Fnt() 来创建UIFont。
Fnt(15);                     //[UIFont systemFontOfSize:15]
Fnt(@15);                    //[UIFont boldSystemFontOfSize:15]
Fnt(@"body");                //UIFontTextStyleBody
Fnt(@"Helvetica,15");        //helvetica font with size 15
你可以用 Color() 来创建UIColor。
Color(@"red");                //[UIColor redColor]
Color(@"green,0.5");          //green color with 0.5 alpha
Color(@"0,0,255");            //blue color
Color(@"#0000FF");            //blue color
Color(@"#00F,0.5");           //blue color with 0.5 alpha
Color(@"random");             //random color
你可以用 Img() 来创建UIImage。
Img(@"imageName");            //[UIImage imageNamed:@"imageName"]
Img(@"#imageName");           //加上#号会返回一个可拉伸的图片
Img(@"red");                  //返回一个 1x1 大小的红色图片
你可以用 XY(), WH(), XYWH(), Range(), Insets() 来创建CGPoint, CGSize, CGRect, NSRange, UIEdgeInsets。
CGPoint        p = XY(20, 20);
CGSize         s = WH(50, 50);

CGRect        f1 = XYWH(20, 20, 50, 50);
CGRect        f2 = XYWH(f1.origin, f1.size);
CGRect        f3 = XYWH(f2.origin, 50, 50);
CGRect        f4 = XYWH(20, 20, f3.size);

NSRange        r = Range(10, 20);

UIEdgeInsets i1 = Insets(10);                //{10, 10, 10, 10}
UIEdgeInsets i2 = Insets(10, 20);            //{10, 20, 10, 20}
UIEdgeInsets i3 = Insets(10, 20, 30);        //{10, 20, 30, 20}
UIEdgeInsets i4 = Insets(10, 20, 30, 40);    //{10, 20, 30, 40}
使用这些宏可以简化一些常见类型的创建过程,更重要的是你可以用同样的方式来设置视图的属性值,稍后你就会明白是什么意思。
快速访问frame属性和屏幕大小
someView.x = 10;
someView.y = someView.x;
someView.xy = XY(10, 10);
someView.w = 50;                //width
someView.h = someView.w;        //height
someView.wh = WH(50, 50);
someView.frame = XYWH(10, 10, 50, 50);

someView.cx = 25;
someView.cy = someView.cx;
someView.center = XY(25, 25);

someView.maxX = 60;
someView.maxY = someView.maxX;
someView.maxXY = XY(60, 60);

//Screen只是 [UIScreen mainScreen] 的宏定义
someView.wh = WH(Screen.width, Screen.height);
我猜大部分人都有类似的扩展吧
快速的创建UI控件
NerdyUI 使用链式语法来快速的创建和设置 UI 控件。
UIView *view1 = View.xywh(20, 30, 50, 50).bgColor(@"red").opacity(0.7).border(3, @"3d3d3d");
UIView *view2 = View.xy(80, 30).wh(view1.wh).bgColor(@"blue,0.7").cornerRadius(25).shadow(0.8).onClick(^{
    Log(@"view2");
});
UIImageView *moose = ImageView.img(@"moose").x(20).y(100).shadow(0.6, 2, -3, -1);
UILabel *quiz = Label.str(@"%d+%d=?", 1, 1).fnt(@17).color(@"66,66,66").fitSize.x(moose.maxX + 10).cy(moose.cy);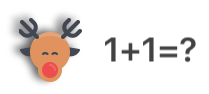
//如果后续不需要再访问 title 的属性,定义为 id 可以减少一些代码量
id title = AttStr(@"TAP ME").fnt(15).underline.range(0, 3).fnt(@18).color(@"random");
UIButton *button1 = Button.str(title).insets(5, 10).fitSize.border(1).xy(20, 150).onClick(^(UIButton *btn) {
    //Exp() 可在任何位置执行任意代码
    quiz.text = Str(@"%d+%d=%d", 1, 1, Exp(btn.tag += 1));
    [quiz sizeToFit];
});

UIButton *button2 = Button.str(@"HAT").highColor(@"brown").img(@"hat").gap(8);
button2.xywh(button1.frame).x(button1.maxX + 10).cornerRadius(5).bgImg(@"blue,0.5").highBgImg(@"orange");
//.highBgImg() 可以用来设置 UIButton 的 highlightedBackgroundColor,这是一个非常有用的功能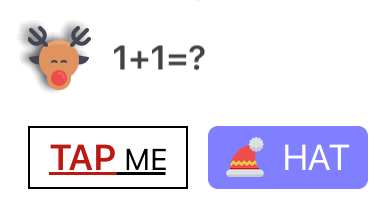
id pinField = TextField.x(button1.x).y(button1.maxY + 15).wh(170, 30).onChange(^(NSString *text) {
    //这里的 self 已经自动做了 weakify 处理, 不用担心会有引用循环
    [(id)[self.view viewWithTag:101] setText:text];
}).numberKeyboard.maxLength(4).hint(@"pin code").fnt(15).roundStyle;

id textView = TextView.xywh(20, 240, 170, 100).border(1).insets(8).hint(@"placeholder").fnt([pinField font]).tg(101);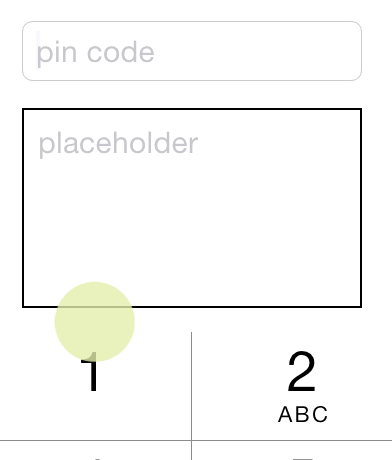
正如你所看到的,大部分链式属性还是比较简单明了的。有一些属性非常的灵活,可以接受不同类型的参数。顺便说一下,View 只是 [UIView new] 的宏定义,其他的也一样(就是类名去掉 UI )。
你可以用 .opacity() 和 .tg() 来设置视图的 alpha 和 tag 值.
你可以用 .x(), .y(), .xy(), .w(), .h(), .wh(), .xywh(), .cx(), .cy(), .cxy(), .maxX(), .maxY(),
.maxXY() 等来设置视图的大小和位置。
你可以用 .touchEnabled, .touchDisabled, .invisible 来设置视图是否可点和是否可见。
你可以用 .flexibleLeft, .flexibleRight, .flexibleTop, .flexibleBottom, .flexibleLR, .flexibleTB, .flexibleLRTB, .flexibleWidth, .flexibleHeight,
.flexibleWH 等来设置autoresizingMask。
你可以用 .fnt() 来设置字体,它能接受的参数跟 Fnt() 一样。
你可以用 .str() 来设置 text 或者 attribtedText, 它能接受的参数跟 Str() 一样。
你可以用 .img(), .highImg(), .bgImg() 和 .highBgImg() 来设置 image, highlightedImage, backgroundImage 和 highlightedBackgroundImage。 他们能接受的参数跟 Img() 一样。
你可以用 .tint(), .color(), .bgColor(), .highColor() 来设置 tintColor, textColor, backgroundColor 和 highlightedTextColor, 它们能接受的参数跟 Color() 一样。
你可以用 .border(), .cornerRadius() 和 .shadow() 来设置边框和阴影。
你可以用 .fitWidth, .fitHeight 和 .fitSize 来改变视图的大小,使它的大小刚好能包含视图的内容。
你可以用 .onClick() 来给任何视图添加一个单击事件。
至于 UITextField 和 UITextView, 你可以用 .hint() 来设置 placeholder, .maxLength() 来限制输入文本的长度, .onChange() 来添加一个文本改变事件。
如果是 UIButton, UITextField 和 UITextView, 你还可以使用 .insets() 来添加一些padding。
这里列出的只是一部分属性,你可以到对应的扩展头文件里看完整的属性列表。
UILabel扩展
以前如果想给UILabel添加行间距,必须使用NSAttributedString。现在你只需要使用 .lineGap() 设置一下就行了。
另一个很有的扩展功能是链接,你只需要使用 AttStr() 来创建一个NSAttributedString, 并标记其中一部分为 .linkForLabel,那么标记的那部分自动就会变成链接。然后你只需要用 .onLink() 来给UILabel 添加一个链接点击事件就行了。
id str = @"Lorem ipsum 20 dolor sit er elit lamet, consectetaur cillium #adipisicing pecu, sed do #eiusmod tempor incididunt ut labore et 3.14 dolore magna aliqua.";
id attStr = AttStr(str).range(0, 5).match(@"lamet").match(@"[0-9.]+").matchHashTag.linkForLabel;

Label.str(attStr).multiline.lineGap(10).xywh(self.view.bounds).onLink(^(NSString *text) {
    Log(text);
}).addTo(self.view);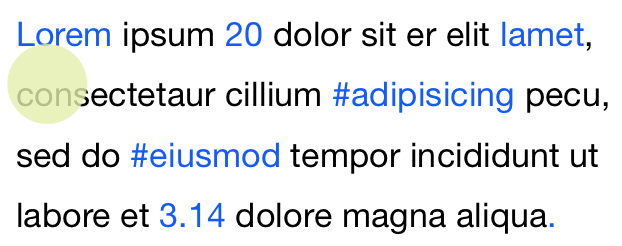
快速的创建约束
有的时候手动修改 frame 会显得很麻烦。NerdyUI 提供一些链式属性和一个跟 Masonry 类似的方式来创建约束。
你可以用 .fixWidth(), .fixHeight(), .fixWH() 来添加宽高约束。
你可以用 .embedIn() 来把一个视图嵌入到它的父视图里, 这会添加上下左右的约束。
你可以用 .horHugging(), .horResistance(), .verHugging(), .verResistance(), .lowHugging, .lowResistance, .highHugging 和 .highResistance 来设置 contentHuggingPriority 和 contentCompressionResistancePriority。当有多个视图在 StackView 里时,可以用这些属性来设置允许哪些视图可以拉伸,哪些视图不可以拉伸。
对于更复杂的约束, 你可以用 .makeCons(), .remakeCons() 和 .updateCons() 来设置约束, 就像Masonry一样。
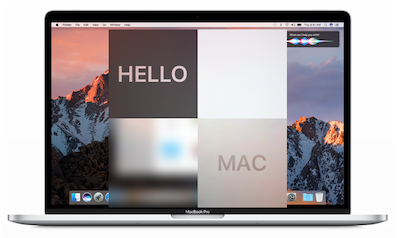
ImageView.img(@"macbook").embedIn(self.view).centerMode;

id hello = Label.str(@"HELLO").fnt(@20).wh(80, 80).centerAlignment;
id mac = Label.str(@"MAC").fnt(@20).wh(80, 80).centerAlignment;

//使用 .makeCons() 之前必须把当前视图加到父视图里,这里使用 .addTo() 来执行此操作
EffectView.darkBlur.fixWH(80, 80).addTo(self.view).makeCons(^{
    //在 .makeCons() 里你可以直接使用 make 变量,不需要显示的定义它
    make.right.equal.superview.centerX.constants(0);
    make.bottom.equal.superview.centerY.constants(0);
}).addVibrancyChild(hello).tg(101);

EffectView.extraLightBlur.fixWidth(80).fixHeight(80).addTo(self.view).makeCons(^{
    make.left.bottom.equal.view(self.view).center.constants(0, 0);
});

EffectView.lightBlur.addTo(self.view).makeCons(^{
    make.size.equal.constants(80, 80).And.center.equal.constants(40, 40);
}).addVibrancyChild(mac);

id subImg = Img(@"macbook").subImg(95, 110, 80, 80).blur(10);
ImageView.img(subImg).addTo(self.view).makeCons(^{
    make.centerX.top.equal.view([self.view viewWithTag:101]).centerX.bottom.constants(0);
});
快速布局
手动给每个视图添加约束稍微想一下就知道会很麻烦。幸好大部分的 UI 可以用 HorStack() 和 VerStack() 来实现。使用这两个简易版 StackView,加上上面介绍的那些属性,很多时候你根本不需要手动显示的创建任何约束。
_indexLabel = Label.fnt(17).color(@"darkGray").fixWidth(44).centerAlignment;
_iconView = ImageView.fixWH(64, 64).cornerRadius(10).border(Screen.onePixel, @"#CCCCCC");

//用 .preferWidth() 来设置 preferredMaxLayoutWidth,有助于提高性能
_titleLabel = Label.fnt(15).lines(2).preferWidth(Screen.width - 205);
_categoryLabel = Label.fnt(13).color(@"darkGray");

_ratingLabel = Label.fnt(11).color(@"orange");
_countLabel = Label.fnt(11).color(@"darkGray");

_actionButton = Button.fnt(@15).color(@"#0065F7").border(1, @"#0065F7").cornerRadius(3);
_actionButton.highColor(@"white").highBgImg(@"#0065F7").insets(5, 10);
_iapLabel = Label.fnt(9).color(@"darkGray").lines(2).str(@"In-App\nPurchases").centerAlignment;

//.gap() 会在每一个StackView Item 之间添加间隙
id ratingStack = HorStack(_ratingLabel, _countLabel).gap(5);
id midStack = VerStack(_titleLabel, _categoryLabel, ratingStack).gap(4);
id actionStack = VerStack(_actionButton, _iapLabel).gap(4).centerAlignment;

HorStack(
         _indexLabel,
         _iconView,
         @10,           //使用NSNumber可在两个 Item 之间添加间隙
         midStack,
         NERSpring,     //NERSpring是一个特殊的变量,它相当于一个弹簧,保证actionStack始终停留在最右边
         actionStack
).embedIn(self.contentView, 10, 0, 10, 15);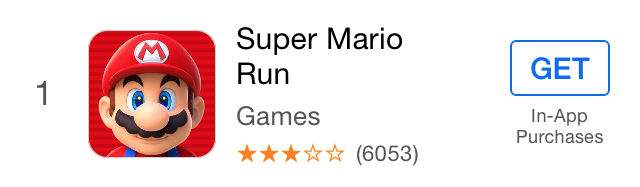
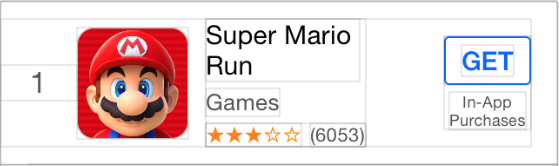
这里我们模仿 AppStore 排行榜来创建一个类似的 Cell 。可以看出 HorStack 和 VerStack 的用法非常的简单。你只需要找出最小的 Stack ,然后把它嵌到上一层的 Stack 里,重复这个过程直到最外层的 Stack 用 embedIn 来添加到它的父视图里。最后你还可以给这些视图加上一些间隙(gap)。
使用 "Debug View Hierarchy" 可以看到这些视图是怎么嵌套再一起的。
一旦布局完,剩下的就是设置要显示的内容,其他的都不需要再动了。
轻量级 Style
大部分链式属性都可以设置为 style。
//全局Style
Style(@"h1").color(@"#333333").fnt(17);
Style(@"button").fixHeight(30).insets(0, 10).cornerRadius(5);
//局部Style
id actionButtonStyle = Style().styles(@"button h1").bgImg(@"red").highBgImg(@"blue").highColor(@"white");
这里我们创建了两个全局 Style 和一个局部 Style。局部 Style 使用 .styles() 来继承那两个全局 Style。创建完之后,全局 Style 可以使用 Style 名来全局引用,局部 Style 只能使用变量名来引用。所有的 UIView(及其子类) 和 NSAttributedString 都可以引用这些 Style。
id foo = Label.styles(@"h1").str(@"hello world");
id bar = Button.styles(actionButtonStyle).str(@"Send Email");
其他
你可以用 PlainTV 和 GroupTV 来创建静态的 UITableView,比如说设置页面。
PlainTV(Row.str(@"Row1"), Row.str(@"Row2"), Row.str(@"Row3")).embedIn(self.view);你可以用 Alert 和 ActionSheet 来创建并显示 UIAlert 和 UIActionSheet。
Alert.title(@"Title").message(@"Message").action(@"OK",^{}), cancel(@"Cancel").show();
ActionSheet.title(@"Title").message(@"Message").action(@"OK",^{}), cancel(@"Cancel").show();
对于NSArray, 我们提供了 .forEach(), .map(), .filter() 和 .reduce() 等这几个链式属性。
id result = @[@1, @2, @3, @4].map(^(NSInteger n) {
    return n * 2;
}).filter(^(NSInteger n) {
    return n < 5;
}).reduce(^(NSInteger ac, NSInteger n) {
    return ac + n;
});
注意
在链式属性里直接使用中文字符串常量会导致后续的自动补全提示失效,一个解决方案是把中文字符串单独拿出来定义为一个变量,或者把 .str(), .hint() 等 放在最后面。
当你使用 .onClick(), .onLink(), .onChange() 和 .onFinish() 时, 里面的 self 已经做了 weakify 处理了,所以你不需要担心会有引用循环问题。有时候你可能需要对它做个强引用来保证它不会被提前释放。这几个属性除了可以传一个 block 之外,还可以传一个方法名来作为回调方法。
NerdyUI 使用了非常多的宏定义和类别方法,而且为了方便使用没添加任何前缀。虽然所有的名字都是经过精心挑选的,不排除有跟您自己代码或其他第三方库冲突的可能,请注意。
用CocoaPods安装
pod "NerdyUI"