

在程序开发的过程中,总会有一些场景需要去写重复冗余的代码。而程序员一般都是懒惰了(懒惰促使人进步 ^ο^ ),所以就出现了很多可以减少重复工作的框架或者工具。比如今天要分析的主角—— ButterKnife ,如果你做 Android 开发却没有听说过 ButterKnife 那就 Out 啦。ButterKnife 使用依赖注入的方式来减少程序员去编写一堆 findViewById 的代码,使用起来很方便。那么接下来就一步步地带你深入理解 ButterKnife 框架。PS:最近写的博客篇幅都有点长,请耐心阅读!Logo 图镇楼!

0x02 ButterKnife 的使用方法
我们先讲下 ButterKnife 的使用方法:
在
app/build.gradle中添加依赖:dependencies { compile 'com.jakewharton:butterknife:8.4.0' annotationProcessor 'com.jakewharton:butterknife-compiler:8.4.0' }在
Activity中添加注解:public class ExampleActivity extends Activity { @BindView(R.id.user) EditText username; @BindView(R.id.pass) EditText password; @OnClick(R.id.submit) public void onClick(View v) { // TODO onClick View... } @Override public void onCreate(Bundle savedInstanceState) { super.onCreate(savedInstanceState); setContentView(R.layout.simple_activity); ButterKnife.bind(this); // TODO Use fields... } }
使用方法非常简单,不得不赞叹 ButterKnife 实在是太方便了。彻底跟 findViewById say goodbye 啦。但是我们也认识到,如果一个框架使用起来越简单,那么这个框架内部做的事情就越多。所以在 ButterKnife 内部一定做了很多事情。
今天我们主要分析下 ButterKnife 的三个部分:Annotation 、ButterKnifeProcessor 和 ButterKnife 。这三个部分就把整个 View 依赖注入的原理串联起来了。
准备好了吗?下面我们就一探究竟。(PS:本文分析的 ButterKnife 源码为 8.4.0 版本)
0x03 Annotation
我们先来看一下其中的注解部分。ButterKnife 的注解都在 butterknife-annotations 模块下:
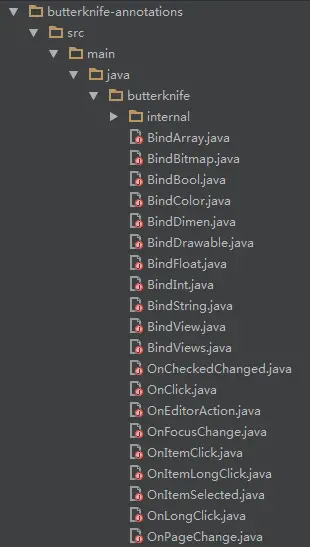
发现我们平时常用的 @BindView 、@OnClick 和 @OnItemClick 都在里面。我们就挑 @BindView (路径:butterknife-annotations/butterknife/BindView.java) 来看一下:
@Retention(CLASS)
@Target(FIELD)
public @interface BindView {
  /** View ID to which the field will be bound. */
  @IdRes int value();
}
注解都是用 @interface 来表示。在 BindView 注解的上面还有 @Retention 和 @Target 。
@Retention:表示注解的保留时间,可选值 SOURCE(源码时),CLASS(编译时),RUNTIME(运行时),默认为 CLASS ;@Target:表示可以用来修饰哪些程序元素,如 TYPE, METHOD, CONSTRUCTOR, FIELD, PARAMETER 等,未标注则表示可修饰所有。
所以我们可知,@BindView 是用来修饰 field 的,并且保留至编译时刻。内部有一个默认属性 value ,用来表示 View 的 id ,即平时程序中的 R.id.xxx 。
0x04 ButterKnifeProcessor
如果只有 @BindView 是不行的,我们还需要去解析注解。如何去解析编译时的注解呢?我们可以创建一个继承自 AbstractProcessor 的注解处理器,然后实现相关方法。在 ButterKnife 中 ButterKnifeProcessor (路径:butterknife-compiler/butterknife/compiler/ButterKnifeProcessor.java) 就是用来解析这些注解的注解处理器。
init(ProcessingEnvironment env)
我们先来看看 ButterKnifeProcessor 中的 init(ProcessingEnvironment env) 方法:
@Override public synchronized void init(ProcessingEnvironment env) {
  super.init(env);

  String sdk = env.getOptions().get(OPTION_SDK_INT);
  if (sdk != null) {
    try {
      this.sdk = Integer.parseInt(sdk);
    } catch (NumberFormatException e) {
      env.getMessager()
          .printMessage(Kind.WARNING, "Unable to parse supplied minSdk option '"
              + sdk
              + "'. Falling back to API 1 support.");
    }
  }
  // 得到一些有用的工具类
  elementUtils = env.getElementUtils();
  typeUtils = env.getTypeUtils();
  filer = env.getFiler();
  try {
    trees = Trees.instance(processingEnv);
  } catch (IllegalArgumentException ignored) {
  }
}
在 init 中主要根据 env 得到一些工具类。其中的 filter 主要是用来生成 Java 代码,而 elementUtils 和 typeUtils 会在下面源码中用到。
getSupportedAnnotationTypes()
private static final List> LISTENERS = Arrays.asList(//
  OnCheckedChanged.class, //
  OnClick.class, //
  OnEditorAction.class, //
  OnFocusChange.class, //
  OnItemClick.class, //
  OnItemLongClick.class, //
  OnItemSelected.class, //
  OnLongClick.class, //
  OnPageChange.class, //
  OnTextChanged.class, //
  OnTouch.class //
);


@Override public Set getSupportedAnnotationTypes() {
  // 返回注解处理器支持处理的注解
  Set types = new LinkedHashSet<>();
  for (Class annotation : getSupportedAnnotations()) {
    types.add(annotation.getCanonicalName());
  }
  return types;
}

// 得到所有的注解
private Set> getSupportedAnnotations() {
  Set> annotations = new LinkedHashSet<>();

  annotations.add(BindArray.class);
  annotations.add(BindBitmap.class);
  annotations.add(BindBool.class);
  annotations.add(BindColor.class);
  annotations.add(BindDimen.class);
  annotations.add(BindDrawable.class);
  annotations.add(BindFloat.class);
  annotations.add(BindInt.class);
  annotations.add(BindString.class);
  annotations.add(BindView.class);
  annotations.add(BindViews.class);
  annotations.addAll(LISTENERS);

  return annotations;
}
getSupportedAnnotationTypes() 方法的作用就是返回该注解处理器所支持处理的注解集合。在 getSupportedAnnotations() 中我们可以看到一些熟悉的注解,比如 @BindView 、@OnClick 和 @OnItemClick 等。
process(Set elements, RoundEnvironment env)
接下来就是重头戏了,注解处理器中最重要的方法 process(Set elements, RoundEnvironment env) 。process(Set elements, RoundEnvironment env) 的代码看上去没几行,其实大部分都写在其他私有方法中了:
@Override public boolean process(Set elements, RoundEnvironment env) {
  // 扫描所有注解,最后生成 map
  Map bindingMap = findAndParseTargets(env);
  // 遍历 bindingMap 并且通过 Filer 生成 Java 代码
  for (Map.Entry entry : bindingMap.entrySet()) {
    TypeElement typeElement = entry.getKey();
    BindingSet binding = entry.getValue();

    JavaFile javaFile = binding.brewJava(sdk);
    try {
      javaFile.writeTo(filer);
    } catch (IOException e) {
      error(typeElement, "Unable to write binding for type %s: %s", typeElement, e.getMessage());
    }
  }

  return true;
}
总体来看 process 方法就干了两件事情:
我们慢慢来看,先来分析一下 findAndParseTargets(env) :
// 扫描所有的ButterKnife注解,并且生成以TypeElement为键,BindingSet为值的HashMap
private Map findAndParseTargets(RoundEnvironment env) {
  Map builderMap = new LinkedHashMap<>();
  Set erasedTargetNames = new LinkedHashSet<>();

  scanForRClasses(env);

  // 省略一堆解析各种注解的源码,这些源码做的事情和下面这个 for 循环一样
  // 所以只要看这个解析 @BindView 就够了
  ...

  // Process each @BindView element.
  // 遍历所有被 @BindView 标注的元素
  for (Element element : env.getElementsAnnotatedWith(BindView.class)) {
    // we don't SuperficialValidation.validateElement(element)
    // so that an unresolved View type can be generated by later processing rounds
    try {
      parseBindView(element, builderMap, erasedTargetNames);
    } catch (Exception e) {
      logParsingError(element, BindView.class, e);
    }
  }

  ...

}
先来看关于 BindView 的那个 for 循环,它会遍历所有被 @BindView 注解的属性,然后调用 parseBindView 方法。那么我们就先看到 findAndParseTargets 的前半段,一起跟进 parseBindView 的方法中去。
private void parseBindView(Element element, Map builderMap,
      Set erasedTargetNames) {
    // 得到注解 @BindView 元素所在的类元素
    TypeElement enclosingElement = (TypeElement) element.getEnclosingElement();

    // Start by verifying common generated code restrictions.
    // ---------- 类型校验逻辑 start ---------------
    // 判断是否被注解在属性上,如果该属性是被 private 或者 static 修饰的,则出错
    // 判断是否被注解在错误的包中,若包名以“android”或者“java”开头,则出错
    boolean hasError = isInaccessibleViaGeneratedCode(BindView.class, "fields", element)
        || isBindingInWrongPackage(BindView.class, element);

    // Verify that the target type extends from View.
    TypeMirror elementType = element.asType();
    if (elementType.getKind() == TypeKind.TYPEVAR) {
      TypeVariable typeVariable = (TypeVariable) elementType;
      elementType = typeVariable.getUpperBound();
    }
    // 判断元素是不是View及其子类或者Interface
    if (!isSubtypeOfType(elementType, VIEW_TYPE) && !isInterface(elementType)) {
      if (elementType.getKind() == TypeKind.ERROR) {
        note(element, "@%s field with unresolved type (%s) "
                + "must elsewhere be generated as a View or interface. (%s.%s)",
            BindView.class.getSimpleName(), elementType, enclosingElement.getQualifiedName(),
            element.getSimpleName());
      } else {
        error(element, "@%s fields must extend from View or be an interface. (%s.%s)",
            BindView.class.getSimpleName(), enclosingElement.getQualifiedName(),
            element.getSimpleName());
        hasError = true;
      }
    }
    // 如果有错误 不执行下面代码
    if (hasError) {
      return;
    }
    //---------------- 类型校验逻辑 end -----------------

    // Assemble information on the field.  //得到被注解的注解值,即 R.id.xxx
    int id = element.getAnnotation(BindView.class).value();
    // 根据所在的类元素去查找 builder
    BindingSet.Builder builder = builderMap.get(enclosingElement);
    // 如果相应的 builder 已经存在
    if (builder != null) {
      // 得到相对应的 View 绑定的属性名
      String existingBindingName = builder.findExistingBindingName(getId(id));
      // 若该属性名已经存在,则说明之前已经绑定过,会报错
      if (existingBindingName != null) {
        error(element, "Attempt to use @%s for an already bound ID %d on '%s'. (%s.%s)",
            BindView.class.getSimpleName(), id, existingBindingName,
            enclosingElement.getQualifiedName(), element.getSimpleName());
        return;
      }
    } else {
      // 如果没有对应的 builder ,就通过 getOrCreateBindingBuilder 方法生成,并且放入 builderMap 中
      builder = getOrCreateBindingBuilder(builderMap, enclosingElement);
    }
    // 得到注解名
    String name = element.getSimpleName().toString();
    // 得到注解元素的类型
    TypeName type = TypeName.get(elementType);
    boolean required = isFieldRequired(element);
    // 根据 id ,添加相对应的 Field 的绑定信息
    builder.addField(getId(id), new FieldViewBinding(name, type, required));

    // Add the type-erased version to the valid binding targets set.
    // 添加到待 unbind 的序列中
    erasedTargetNames.add(enclosingElement);
}
在 parseBindView 方法中基本上都加了注释,在方法的开头会对该 element 去做校验。如果校验没通过的话,就没有下面代码的什么事了。若校验通过之后,生成该 element 所在的类元素对应的 builder ,builder 中添加相应的 Field 绑定信息,最后添加到待 unbind 的序列中去。
现在,我们回过头来看看 findAndParseTargets(env) 方法的后半段:
private Map findAndParseTargets(RoundEnvironment env) {

  ... // 省略前半部分源码

  // Associate superclass binders with their subclass binders. This is a queue-based tree walk
  // which starts at the roots (superclasses) and walks to the leafs (subclasses).
  Deque> entries =
      new ArrayDeque<>(builderMap.entrySet());
  Map bindingMap = new LinkedHashMap<>();
  while (!entries.isEmpty()) {
    // 一个个取出遍历
    Map.Entry entry = entries.removeFirst();
    // 得到对应的 key 和 value
    TypeElement type = entry.getKey();
    BindingSet.Builder builder = entry.getValue();
    // 找到该类元素的父元素
    TypeElement parentType = findParentType(type, erasedTargetNames);
    if (parentType == null) {
      // 生成 BindingSet ,放入 Map 中
      bindingMap.put(type, builder.build());
    } else {
      BindingSet parentBinding = bindingMap.get(parentType);
      if (parentBinding != null) {
        // 设置父元素的 BindingSet
        builder.setParent(parentBinding);
        bindingMap.put(type, builder.build());
      } else {
        // Has a superclass binding but we haven't built it yet. Re-enqueue for later.
        // 有父元素,但是父元素的 BindingSet 还没有被 build 出来,
        // 所以再放入 entries 中等待遍历
        entries.addLast(entry);
      }
    }
  }
  // 解析结果都会存放在 bindingMap 中
  return bindingMap;
}
在 findAndParseTargets(env) 方法的后半段中,主要就是把之前的 builderMap 转换为了 bindingMap 并返回。
到了这里,我们把 process(Set elements, RoundEnvironment env) 做的第一件事情搞清楚了,下面就接着来看第二件事情了。
// 遍历 bindingMap 并且通过 Filer 生成 Java 代码
for (Map.Entry entry : bindingMap.entrySet()) {
  TypeElement typeElement = entry.getKey();
  BindingSet binding = entry.getValue();

  JavaFile javaFile = binding.brewJava(sdk);
  try {
    javaFile.writeTo(filer);
  } catch (IOException e) {
    error(typeElement, "Unable to write binding for type %s: %s", typeElement, e.getMessage());
  }
}
brewJava(int sdk)
从上面可以看到,遍历了之前得到的 bindingMap ,然后利用 binding 中的信息生成相应的 Java 源码。所以在 binding.brewJava(sdk) 这个方法是我们重点关注对象。那么就进入 BindingSet (路径:butterknife-compiler/butterknife/compiler/BindingSet.java) 这个类中去看看吧:
JavaFile brewJava(int sdk) {
    // 生成 JavaFile,添加相应的注释
    return JavaFile.builder(bindingClassName.packageName(), createType(sdk))
            .addFileComment("Generated code from Butter Knife. Do not modify!")
            .build();
}
brewJava(int sdk) 方法的代码竟然这么短 O_o ,就是利用了 JavaFile.builder 生成了一个 JavaFile 对象而已。但是我们发现其中有一个 createType(int sdk) 方法,隐隐约约感觉一定是这个方法在搞大事情。继续跟进去看:
private TypeSpec createType(int sdk) {
    // 生成类名为 bindingClassName 的公共类,比如 MainActivity_ViewBinding
    TypeSpec.Builder result = TypeSpec.classBuilder(bindingClassName.simpleName())
            .addModifiers(PUBLIC);
    // 是否修饰为 final ,默认是 false
    if (isFinal) {
        result.addModifiers(FINAL);
    }

    if (parentBinding != null) {
        // 如果有父类的话,那么要继承父类
        result.superclass(parentBinding.bindingClassName);
    } else {
        // 如果没有父类,那么实现 Unbinder 接口
        result.addSuperinterface(UNBINDER);
    }

    // 增加一个变量名为target,类型为targetTypeName的成员变量
    if (hasTargetField()) {
        result.addField(targetTypeName, "target", PRIVATE);
    }
    // 如果没有 View 绑定
    if (!constructorNeedsView()) {
        // Add a delegating constructor with a target type + view signature for reflective use.
        // 该生成的构造方法被 @deprecated ,一般作为反射使用
        result.addMethod(createBindingViewDelegateConstructor(targetTypeName));
    }
    // 生成构造方法,另外 findViewById 类似的代码都在这里生成
    // Xxxx_ViewBinding 一般都是执行这个方法生成构造器
    result.addMethod(createBindingConstructor(targetTypeName, sdk));

    if (hasViewBindings() || parentBinding == null) {
        //生成unBind方法
        result.addMethod(createBindingUnbindMethod(result, targetTypeName));
    }

    return result.build();
}
在 createType(int sdk) 方法中,基本构建好了一个类的大概,其中对于构造器以及类似 findViewById 的操作都是在 createBindingConstructor(targetTypeName, sdk) 中实现:
private MethodSpec createBindingConstructor(TypeName targetType, int sdk) {
    // 创建构造方法,方法修饰符为 public ,并且添加注解为UiThread
    MethodSpec.Builder constructor = MethodSpec.constructorBuilder()
            .addAnnotation(UI_THREAD)
            .addModifiers(PUBLIC);
    // 如果有方法绑定,比如 @OnClick
    if (hasMethodBindings()) {
        // 如果有,那么添加 targetType 类型,final 修饰,参数名为 target 的构造方法参数
        constructor.addParameter(targetType, "target", FINAL);
    } else {
        // 如果没有,和上面比起来就少了一个 final 修饰符
        constructor.addParameter(targetType, "target");
    }
    // 如果有注解的 View
    if (constructorNeedsView()) {
        // 那么添加 View source 参数
        constructor.addParameter(VIEW, "source");
    } else {
        // 否则添加 Context context 参数
        constructor.addParameter(CONTEXT, "context");
    }

    if (hasUnqualifiedResourceBindings()) {
        // Aapt can change IDs out from underneath us, just suppress since all will work at runtime.
        constructor.addAnnotation(AnnotationSpec.builder(SuppressWarnings.class)
                .addMember("value", "$S", "ResourceType")
                .build());
    }

    // 如果有父类,那么会根据不同情况调用不同的 super 语句
    if (parentBinding != null) {
        if (parentBinding.constructorNeedsView()) {
            constructor.addStatement("super(target, source)");
        } else if (constructorNeedsView()) {
            constructor.addStatement("super(target, source.getContext())");
        } else {
            constructor.addStatement("super(target, context)");
        }
        constructor.addCode("\n");
    }
    // 如果有绑定 Field 或者方法,那么添加 this.target = target 语句
    if (hasTargetField()) {
        constructor.addStatement("this.target = target");
        constructor.addCode("\n");
    }
    // 如果有 View 绑定
    if (hasViewBindings()) {
        if (hasViewLocal()) {
            // Local variable in which all views will be temporarily stored.
            constructor.addStatement("$T view", VIEW);
        }
        for (ViewBinding binding : viewBindings) {
            // 为 View 绑定生成类似于 findViewById 之类的代码
            addViewBinding(constructor, binding);
        }
        // 为 View 的集合或者数组绑定
        for (FieldCollectionViewBinding binding : collectionBindings) {
            constructor.addStatement("$L", binding.render());
        }

        if (!resourceBindings.isEmpty()) {
            constructor.addCode("\n");
        }
    }
    // 绑定 resource 资源的代码
    if (!resourceBindings.isEmpty()) {
        if (constructorNeedsView()) {
            constructor.addStatement("$T context = source.getContext()", CONTEXT);
        }
        if (hasResourceBindingsNeedingResource(sdk)) {
            constructor.addStatement("$T res = context.getResources()", RESOURCES);
        }
        for (ResourceBinding binding : resourceBindings) {
            constructor.addStatement("$L", binding.render(sdk));
        }
    }

    return constructor.build();
}
通过上面的代码就生成了构造器,但是我们还是没有看到具体 findViewById 操作的代码。别急,这些代码都在 addViewBinding(constructor, binding) 里会看到:
private void addViewBinding(MethodSpec.Builder result, ViewBinding binding) {
    if (binding.isSingleFieldBinding()) {
        // Optimize the common case where there's a single binding directly to a field.
        FieldViewBinding fieldBinding = binding.getFieldBinding();
        // 注意这里直接使用了 target. 的形式,所以属性肯定是不能 private 的
        CodeBlock.Builder builder = CodeBlock.builder()
                .add("target.$L = ", fieldBinding.getName());
        // 下面都是 View 绑定的代码
        boolean requiresCast = requiresCast(fieldBinding.getType());
        if (!requiresCast && !fieldBinding.isRequired()) {
            builder.add("source.findViewById($L)", binding.getId().code);
        } else {
            builder.add("$T.find", UTILS);
            builder.add(fieldBinding.isRequired() ? "RequiredView" : "OptionalView");
            if (requiresCast) {
                builder.add("AsType");
            }
            builder.add("(source, $L", binding.getId().code);
            if (fieldBinding.isRequired() || requiresCast) {
                builder.add(", $S", asHumanDescription(singletonList(fieldBinding)));
            }
            if (requiresCast) {
                builder.add(", $T.class", fieldBinding.getRawType());
            }
            builder.add(")");
        }
        result.addStatement("$L", builder.build());
        return;
    }

    List requiredBindings = binding.getRequiredBindings();
    if (requiredBindings.isEmpty()) {
        result.addStatement("view = source.findViewById($L)", binding.getId().code);
    } else if (!binding.isBoundToRoot()) {
        result.addStatement("view = $T.findRequiredView(source, $L, $S)", UTILS,
                binding.getId().code, asHumanDescription(requiredBindings));
    }

    addFieldBinding(result, binding);
    // OnClick 等监听事件绑定
    addMethodBindings(result, binding);
}
至此,整个 ButterKnifeProcessor 解析注解、生成 Java 代码的流程就走完了。我们来看看生成的代码到底长成什么样子:
public class MainActivity_ViewBinding implements Unbinder {
  protected T target;

  private View view2131427413;

  @UiThread
  public MainActivity_ViewBinding(final T target, View source) {
    this.target = target;

    View view;
    view = Utils.findRequiredView(source, R.id.button, "field 'button' and method 'onClick'");
    target.button = Utils.castView(view, R.id.button, "field 'button'", Button.class);
    view2131427413 = view;
    view.setOnClickListener(new DebouncingOnClickListener() {
      @Override
      public void doClick(View p0) {
        target.onClick(p0);
      }
    });
    target.tv = Utils.findRequiredViewAsType(source, R.id.tv, "field 'textView'", TextView.class);
  }

  @Override
  @CallSuper
  public void unbind() {
    T target = this.target;
    if (target == null) throw new IllegalStateException("Bindings already cleared.");

    target.button = null;
    target.tv = null;

    view2131427413.setOnClickListener(null);
    view2131427413 = null;

    this.target = null;
  }
}不得不赞叹一句,JavaPoet 生成的代码跟我们手写的基本上没什么区别。JavaPoet 实在是太强大了 *^ο^* 。
0x05 ButterKnife
通过之前介绍 ButterKnife 的使用方法,我们知道 View 绑定是通过调用 ButterKnife.bind() 方法来实现的。下面我们来看看其内部原理 (路径:butterknife/butterknife/ButterKnife.java) :
@NonNull @UiThread
public static Unbinder bind(@NonNull Activity target) {
  View sourceView = target.getWindow().getDecorView();
  return createBinding(target, sourceView);
}

@NonNull @UiThread
public static Unbinder bind(@NonNull View target) {
  return createBinding(target, target);
}

...
createBinding(@NonNull Object target, @NonNull View source)
发现 bind() 方法内都会去调用 createBinding(@NonNull Object target, @NonNull View source) :
private static Unbinder createBinding(@NonNull Object target, @NonNull View source) {
    // 得到 target 的类名,比如 MainActivity
    Class targetClass = target.getClass();
    if (debug) Log.d(TAG, "Looking up binding for " + targetClass.getName());
    // 找到 target 对应的构造器
    Constructor constructor = findBindingConstructorForClass(targetClass);

    if (constructor == null) {
      return Unbinder.EMPTY;
    }

    //noinspection TryWithIdenticalCatches Resolves to API 19+ only type.
    try {
      // 创建对应的对象
      return constructor.newInstance(target, source);
    } catch (IllegalAccessException e) {
      throw new RuntimeException("Unable to invoke " + constructor, e);
    } catch (InstantiationException e) {
      throw new RuntimeException("Unable to invoke " + constructor, e);
    } catch (InvocationTargetException e) {
      Throwable cause = e.getCause();
      if (cause instanceof RuntimeException) {
        throw (RuntimeException) cause;
      }
      if (cause instanceof Error) {
        throw (Error) cause;
      }
      throw new RuntimeException("Unable to create binding instance.", cause);
    }
}

@VisibleForTesting
static final Map, Constructor> BINDINGS = new LinkedHashMap<>();

@Nullable @CheckResult @UiThread
private static Constructor findBindingConstructorForClass(Class cls) {
    // 对构造器的查找进行了缓存,可以直接从 Map 中获取
    Constructor bindingCtor = BINDINGS.get(cls);
    if (bindingCtor != null) {
      if (debug) Log.d(TAG, "HIT: Cached in binding map.");
      return bindingCtor;
    }
    String clsName = cls.getName();
    if (clsName.startsWith("android.") || clsName.startsWith("java.")) {
      if (debug) Log.d(TAG, "MISS: Reached framework class. Abandoning search.");
      return null;
    }
    try {
      // 得到对应的 class 对象,比如 MainActivity_ViewBinding
      Class bindingClass = Class.forName(clsName + "_ViewBinding");
      //noinspection unchecked
      // 得到对应的构造器
      bindingCtor = (Constructor) bindingClass.getConstructor(cls, View.class);
      if (debug) Log.d(TAG, "HIT: Loaded binding class and constructor.");
    } catch (ClassNotFoundException e) {
      if (debug) Log.d(TAG, "Not found. Trying superclass " + cls.getSuperclass().getName());
      bindingCtor = findBindingConstructorForClass(cls.getSuperclass());
    } catch (NoSuchMethodException e) {
      throw new RuntimeException("Unable to find binding constructor for " + clsName, e);
    }
    // 进行缓存
    BINDINGS.put(cls, bindingCtor);
    return bindingCtor;
}
其实 createBinding(@NonNull Object target, @NonNull View source) 方法做的事情就是根据 target 创建对应的 targetClassName_ViewBinding 。在 targetClassName_ViewBinding 的构造器中会把对应的 View 进行绑定(具体可以查看上面的 MainActivity_ViewBinding )。而在 findBindingConstructorForClass(Class cls) 方法中也使用了 Class.forName() 反射来查找 Class ,这也是无法避免的。但是仅限于一个类的第一次查找,之后都会从 BINDINGS 缓存中获取。
0x06 总结
总体来说,ButterKnife 是一款十分优秀的依赖注入框架,方便,高效,减少代码量。最重要的是解放程序员的双手,再也不用去写无聊乏味的 findViewById 了 \(╯-╰)/ 。与 ButterKnife 原理相似的,还有 androidannotations 框架。感兴趣的同学可以自己研究一下。那么,今天的 ButterKnife 解析到这里就结束了。如果对此有问题或疑惑的同学可以留言,欢迎探讨。
Goodbye !~~
0x07 References
坚持原创技术分享,您的支持将鼓励我继续创作!

微信打赏

支付宝打赏
