

搭建环境
React Native 包管理器同时用到了 node 和 watchman, 并采用了同为 Facebook 出品的 flow 作为类型检查库,因此我们将在 macOS 下使用 Homebrew 进行相关依赖的安装。
安装 Homebrew
$ /usr/bin/ruby -e "$(curl -fsSL https://raw.githubusercontent.com/Homebrew/install/master/install)"
安装 React Native 依赖
$ brew install node
$ brew install watchman
$ brew install flow
== 如果在安装过程中遇到问题,可尝试更新 brew 和相关依赖包 ==
$ brew update
$ brew upgrade
安装 React Native
$ npm install -g react-native-cli
针对不同平台安装 Xcode 或 Android Studio 开发环境
创建一个新的应用
使用 React Native 命令行工具创建一个模板工程
$ react-native init HelloReactNative
按项目创建的成功提示运行应用
To run your app on iOS:
   cd /Users/Binboy/Desktop/HelloReactNative
   react-native run-ios
   - or -
   Open /Users/Binboy/Desktop/HelloReactNative/ios/HelloReactNative.xcodeproj in Xcode
   Hit the Run button
To run your app on Android:
   Have an Android emulator running (quickest way to get started), or a device connected
   cd /Users/Binboy/Desktop/HelloReactNative
   react-native run-android
== 若运行出错,可尝试在工程目录下重新运行 npm install 和 npm start ==
配置部署到 iOS 设备
登录开发者账号 -> 注册 iOS 设备 UUID -> 在 AppDelegate.m 中配置 React Native 文件地址 jsCodeLocation
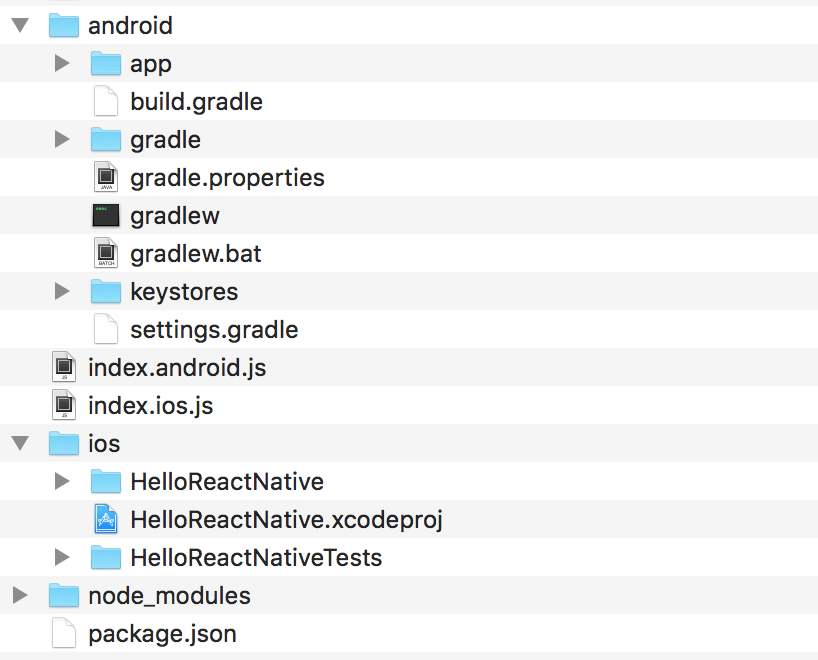
探索示例代码
摸索一下命令行工具生成的默认工程项目代码吧~
添加组件
- 在
AppDelegate.m中声明根视图RCTRootView
RCTRootView *rootView = [[RCTRootView alloc] initWithBundleURL:jsCodeLocation
        moduleName:@"HelloReactNative"
        initialProperties:nil
        launchOptions:launchOptions];
- 对应地,在
index.ios.js中,代码最后一行可以看到其中注册了一个相同名字的组件
AppRegistry.registerComponent('HelloReactNative', () => HelloReactNative);
模块导入
- 进一步观察
index.ios.js文件的开头
import React, { Component } from 'react';
import {
  AppRegistry,
  StyleSheet,
  Text,
  View
} from 'react-native';
开发过程中,我们需要导入所需的每一个组件或模块,包括像 AppRegistry 和 StyleSheet 这样基本的库函数模块。
视图样式组件
- 组件结构
export default class HelloReactNative extends Component {
render() {
return (
<View style={styles.container}>
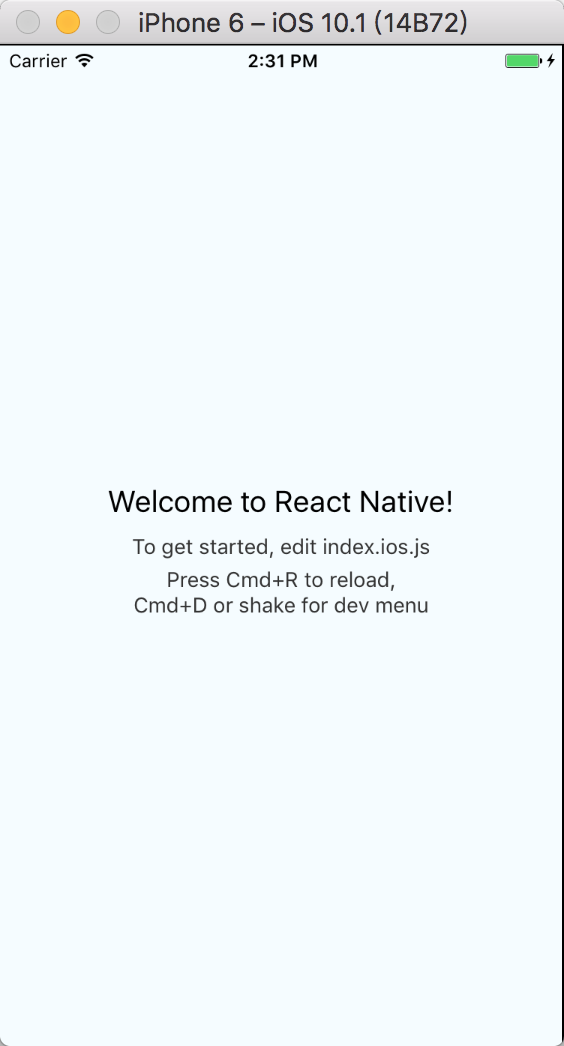
<Text style={styles.welcome}>
Welcome to React Native!
</Text>
<Text style={styles.instructions}>
To get started, edit index.ios.js
</Text>
<Text style={styles.instructions}>
Press Cmd+R to reload,{'\n'}
Cmd+D or shake for dev menu
</Text>
</View>
);
}
}
熟悉HTML这样的结构化标记语言的话,这段代码不难理解,表达了视图中的组件结构
- 组件样式
const styles = StyleSheet.create({
  container: {
    flex: 1,
    justifyContent: 'center',
    alignItems: 'center',
    backgroundColor: '#F5FCFF',
  },
  welcome: {
    fontSize: 20,
    textAlign: 'center',
    margin: 10,
  },
  instructions: {
    textAlign: 'center',
    color: '#333333',
    marginBottom: 5,
  },
});
React Native 中所有样式都采用样式对象来代替传统样式表,通常使用 StyleSheet 库来创建组件样式。
总结
大致熟悉了默认示例工程的文件结构与代码组织,那么接下来我们就将做点儿有趣的尝试来实现一些简单的小功能,看看 React Native 是如何工作的。
