

微信应用号(实际叫微信小程序)今天内测了, 好像也不关我啥事。继续入坑, CoreText入坑一实现了CoreText的基本步骤, 以及删除线的绘制。这篇主要实现绘制背景色, 自动识别链接, 点击链接跳转, 图文混排。
一. 背景色填充
先来个简单点的, 上篇文章TULabel绘制了删除线, 那么填充背景色也是照那个步骤开始。
首先需要像识别删除线样式一样识别出背景色样式, 所以在drawRun函数添加判断代码
// 画样式
func drawRun(run: CTRun, attributes: NSDictionary, context: CGContext) {
   if nil != attributes[NSStrikethroughStyleAttributeName] { // 删除线
       CTRunDraw(run, context, CFRangeMake(0, 0))
       drawStrikethroughStyle(run, attributes: attributes, context: context)
   } else if nil != attributes[NSBackgroundColorAttributeName] { // 背景色
       fillBackgroundColor(run, attributes: attributes, context: context)
       CTRunDraw(run, context, CFRangeMake(0, 0))
   } else {
       CTRunDraw(run, context, CFRangeMake(0, 0))
   }
}
注意跟之前不太一样的地方是CTRunDraw的调用需要在填充颜色之后。
然后再来看下怎样填充背景色
// 填充背景色
func fillBackgroundColor(run: CTRun, attributes: NSDictionary, context: CGContext) {
     // 获取设置的背景色
   let backgroundColor = attributes[NSBackgroundColorAttributeName]
   guard let color = backgroundColor else {
       return
   }
   // 获取画线的起点, getRunOrigin就是删除线里面获取Run原点的代码提取的函数
   let origin = getRunOrigin(run)
   // 获取Run的宽度, ascent, descent
   var ascent = CGFloat(), descent = CGFloat(), leading = CGFloat()
   let typographicWidth = CGFloat(CTRunGetTypographicBounds(run, CFRangeMake(0, 0), &ascent, &descent, &leading))
   let pt = CGContextGetTextPosition(context)
   // 需要填充颜色的区域
   let rect = CGRectMake(origin.x + pt.x, pt.y + origin.y - descent, typographicWidth, ascent + descent)
   // 开始填充颜色
   let components = CGColorGetComponents(color.CGColor)
   CGContextSetRGBFillColor(context, components[0], components[1], components[2], components[3])
   CGContextFillRect(context, rect)
}
使用的时候就跟系统Label使用方式一致
// 检测到的链接
private var detectLinkList: [NSTextCheckingResult]?
// 检测链接
func detectLinks() {
guard let text = self.attributedText else {
return
}
// 定义识别器类型
let linkDetector = try! NSDataDetector(types: NSTextCheckingType.Link.rawValue)
// 将匹配的类型存储到一个数组中
let content = text.string
self.detectLinkList = linkDetector.matchesInString(content, options: NSMatchingOptions.ReportProgress, range: NSMakeRange(0, content.characters.count))
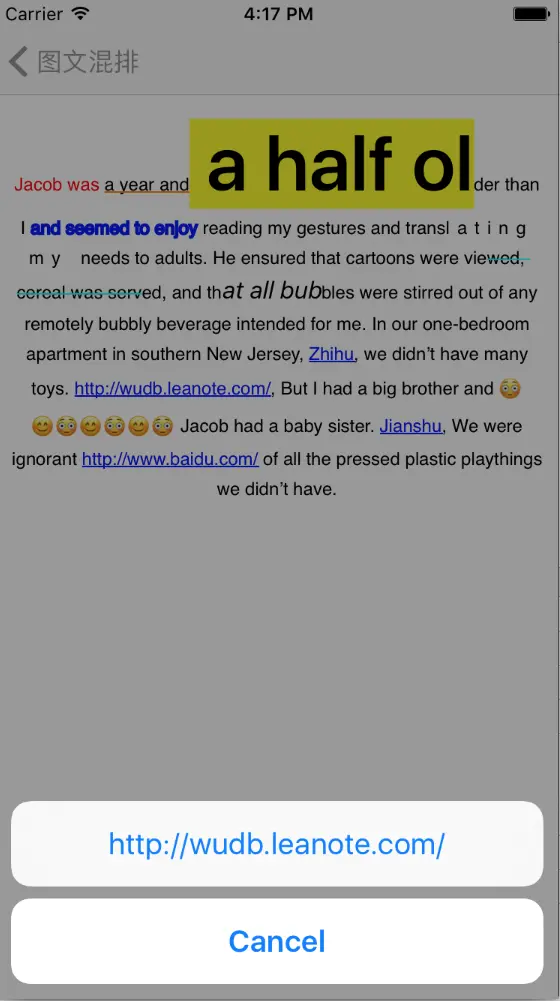
}这样就完成了背景色的填充, 效果如下
二. 自动识别链接
富文本中插入链接, CoreText是不能自动识别的, 所以就需要我们自己识别了。先看下怎么识别链接
// 检测到的链接
private var detectLinkList: [NSTextCheckingResult]?
// 检测链接
func detectLinks() {
   guard let text = self.attributedText else {
       return
   }
   // 定义识别器类型
   let linkDetector = try! NSDataDetector(types: NSTextCheckingType.Link.rawValue)
   // 将匹配的类型存储到一个数组中
   let content = text.string
   self.detectLinkList = linkDetector.matchesInString(content, options: NSMatchingOptions.ReportProgress, range: NSMakeRange(0, content.characters.count))
}
链接识别出来了, 按我们平常看到的链接样式需要跟普通文本不一样, 所以还要给链接添加样式以区别
// 链接显示颜色, 可外部自定义, 默认为蓝色
var linkColor = UIColor.blueColor()
// 给链接增加样式
func addLinkStyle(attributedText: NSAttributedString?, links: [NSTextCheckingResult]?) -> NSAttributedString? {
   guard let linkList = links else {
       return attributedText
   }
   guard let text = attributedText else {
       return attributedText
   }
   // 遍历链接列表, 增加指定样式
   let attrText = NSMutableAttributedString(attributedString: text)
   linkList.forEach { [unowned self] result in
       attrText.addAttributes([NSForegroundColorAttributeName: self.linkColor,
           NSUnderlineStyleAttributeName: NSUnderlineStyle.StyleSingle.rawValue,
           NSUnderlineColorAttributeName: self.linkColor], range: result.range)
   }
   return attrText
}
剩下的就是只有调用这两个函数了
// 是否自动检测链接, default is false, 可开启自动识别
var autoDetectLinks = false
override func drawRect(rect: CGRect) {
   if self.autoDetectLinks {
      // 检测链接
       detectLinks()
       // 给链接添加样式
       self.attributedText = addLinkStyle(self.attributedText, links: self.detectLinkList)
   }
    ...
}
外部调用的时候就只需要开启自动识别即可, 效果如下
三. 链接跳转
要让链接可以跳转, 就需要先识别点击的是否为链接, 然后才可以进行跳转。
先来看看怎么实现获取点击的坐标
override func touchesBegan(touches: Set, withEvent event: UIEvent?) {
   if self.autoDetectLinks {
      let touch: UITouch = touches.first!
      let point = touch.locationInView(self)
      // 获取点击位置对应富文本的位置
      let index = attributedIndexAtPoint(point)
      // 根据index找链接
      let foundLink = linkAtIndex(index)
      if nil != foundLink.foundLink  {
          guard let link = foundLink.link else {
              return
          }
          // 抛出回调
          if let touchLink = self.touchLinkCallback {
              touchLink(link: link)
          }
         }
}
重写touchesBegan函数来实现获取点击坐标, 根据坐标获取对应的富文本索引
private var ctframe: CTFrame?
// 获取点击位置对应的富文本的位置index
func attributedIndexAtPoint(point: CGPoint) -> CFIndex {
    // 记住CTFrame, 需要通过frame找点击位置
   guard let frame = self.ctframe else {
       return -1
   }
   let lines = CTFrameGetLines(frame)
   // 获得行数
   let numberOfLines = CFArrayGetCount(lines)
   // 获得每一行的origin, CoreText的origin是在字形的baseLine处的
   var lineOrigins = [CGPoint](count: numberOfLines, repeatedValue: CGPointZero)
   CTFrameGetLineOrigins(frame, CFRangeMake(0, 0), &lineOrigins)
   //坐标变换
   let transform = CGAffineTransformScale(CGAffineTransformMakeTranslation(0, self.bounds. size.height), 1, -1);
   for index in 0..
这个函数CTLineGetStringIndexForPosition是核心, 获取到索引后就可以根据索引来查找当前点击位置是不是链接了
// 判断点击的位置是不是链接
func linkAtIndex(index: CFIndex) -> (foundLink: NSTextCheckingResult?, link: String?) {
if self.autoDetectLinks {
guard let links = self.detectLinkList else {
return (nil, nil)
}
var foundLink: NSTextCheckingResult?
var link: String?
// 遍历所有之前检测出的链接来匹配index, 查找到对应链接
links.forEach({ result in
if NSLocationInRange(index, result.range) {
foundLink = result
link = self.attributedText!.attributedSubstringFromRange(result.range).string
return
}
})
return (foundLink, link)
}
return (nil, nil)
}
这样就实现了链接点击跳转了, 但是如果不希望链接直接出现在文本中, 而是用特定的文字替代链接, 但是照样要能特别显示, 也需要可以点击, 那又如何实现了?
获取点击索引还是上面的函数attributedIndexAtPoint, 主要是换成查找特定的文字来添加样式, 实际源码请看文末附加链接, 这里就直接上效果了。
这是点击后的效果, 图中蓝色带下划线的即为链接
四. 图文混排
CoreText为在文本中插入图片做了一些事情, 其实我们就是通过CTRunDelegateCallbacks这个类的回调来计算图片所在布局, 相当于把图片也当做一个Run来处理。
我们先定义一个类来表示一个图片的一些相关信息
// 判断点击的位置是不是链接
func linkAtIndex(index: CFIndex) -> (foundLink: NSTextCheckingResult?, link: String?) {
if self.autoDetectLinks {
guard let links = self.detectLinkList else {
return (nil, nil)
}
var foundLink: NSTextCheckingResult?
var link: String?
// 遍历所有之前检测出的链接来匹配index, 查找到对应链接
links.forEach({ result in
if NSLocationInRange(index, result.range) {
foundLink = result
link = self.attributedText!.attributedSubstringFromRange(result.range).string
return
}
})
return (foundLink, link)
}
return (nil, nil)
}
然后我们在使用的时候就需要用到这个类
// 判断点击的位置是不是链接
func linkAtIndex(index: CFIndex) -> (foundLink: NSTextCheckingResult?, link: String?) {
if self.autoDetectLinks {
guard let links = self.detectLinkList else {
return (nil, nil)
}
var foundLink: NSTextCheckingResult?
var link: String?
// 遍历所有之前检测出的链接来匹配index, 查找到对应链接
links.forEach({ result in
if NSLocationInRange(index, result.range) {
foundLink = result
link = self.attributedText!.attributedSubstringFromRange(result.range).string
return
}
})
return (foundLink, link)
}
return (nil, nil)
}
到此时, 还没有开始实现TULabel的绘制图片, 现在来看看。先检查是否插入了图片附件, 如果有就给每个图片附件添加一个RunDelegate来占个位
// 判断点击的位置是不是链接
func linkAtIndex(index: CFIndex) -> (foundLink: NSTextCheckingResult?, link: String?) {
if self.autoDetectLinks {
guard let links = self.detectLinkList else {
return (nil, nil)
}
var foundLink: NSTextCheckingResult?
var link: String?
// 遍历所有之前检测出的链接来匹配index, 查找到对应链接
links.forEach({ result in
if NSLocationInRange(index, result.range) {
foundLink = result
link = self.attributedText!.attributedSubstringFromRange(result.range).string
return
}
})
return (foundLink, link)
}
return (nil, nil)
}
插入RunDelegate的方法
// 插入图片样式
func imageAttribute(attachment: TUImageAttachment) -> NSAttributedString {
// 定义RunDelegateCallback并实现
var imageCallback = CTRunDelegateCallbacks(version: kCTRunDelegateVersion1, dealloc: { pointer in
pointer.dealloc(1)
}, getAscent: { pointer -> CGFloat in
return UnsafePointer(pointer).memory.size.height / 2
}, getDescent: { pointer -> CGFloat in
return UnsafePointer(pointer).memory.size.height / 2
}, getWidth: { pointer -> CGFloat in
return UnsafePointer(pointer).memory.size.width
})
// 创建RunDelegate, 传入callback中图片数据
let pointer = UnsafeMutablePointer.alloc(1)
pointer.initialize(attachment.image!)
let runDelegate = CTRunDelegateCreate(&imageCallback, pointer)
// 为每个图片创建一个空的string占位
let imageAttributedString = NSMutableAttributedString(string: " ")
imageAttributedString.addAttribute(kCTRunDelegateAttributeName as String, value: runDelegate!, range: NSMakeRange(0, 1))
// 将附件作为指定属性的值
imageAttributedString.addAttribute(TUImageAttachmentAttributeName, value: attachment, range: NSMakeRange(0, 1))
return imageAttributedString
}
到此, 还只是为图片占了个坑, 所以这个调用要放到drawRect方法绘制之前
override func drawRect(rect: CGRect) {
...
if let attributedString = checkImage(self.attributedText) {
self.attributedText = attributedString
}
...
}
占坑完毕了, 那么就是绘制图片了
// 画图片
func drawImage(run: CTRun, attributes: NSDictionary, context: CGContext) {
// 获取对应图片属性的附件
let imageAttachment = attributes[TUImageAttachmentAttributeName]
guard let attachment = imageAttachment else {
return
}
// 计算绘制图片的区域
let origin = getRunOrigin(run)
var ascent = CGFloat(), descent = CGFloat(), leading = CGFloat()
let typographicWidth = CGFloat(CTRunGetTypographicBounds(run, CFRangeMake(0, 0), &ascent, &descent, &leading))
let pt = CGContextGetTextPosition(context)
var rect = CGRect(x: origin.x + pt.x, y: pt.y + origin.y - descent, width: typographicWidth, height: ascent + descent)
let image = (attachment as! TUImageAttachment).image
rect.size = image!.size
// 绘制图片
CGContextDrawImage(context, rect, image!.CGImage!)
}
绘制完了, 在drawRun函数中加入绘制图片的方法
// 画样式
func drawRun(run: CTRun, attributes: NSDictionary, context: CGContext) {
if nil != attributes[NSStrikethroughStyleAttributeName] { // 删除线
CTRunDraw(run, context, CFRangeMake(0, 0))
drawStrikethroughStyle(run, attributes: attributes, context: context)
} else if nil != attributes[NSBackgroundColorAttributeName] { // 背景色
fillBackgroundColor(run, attributes: attributes, context: context)
CTRunDraw(run, context, CFRangeMake(0, 0))
} else if nil != attributes[TUImageAttachmentAttributeName] { // 绘制图片
drawImage(run, attributes: attributes, context: context)
} else {
CTRunDraw(run, context, CFRangeMake(0, 0))
}
}
图片绘制就完成了, 来看看效果
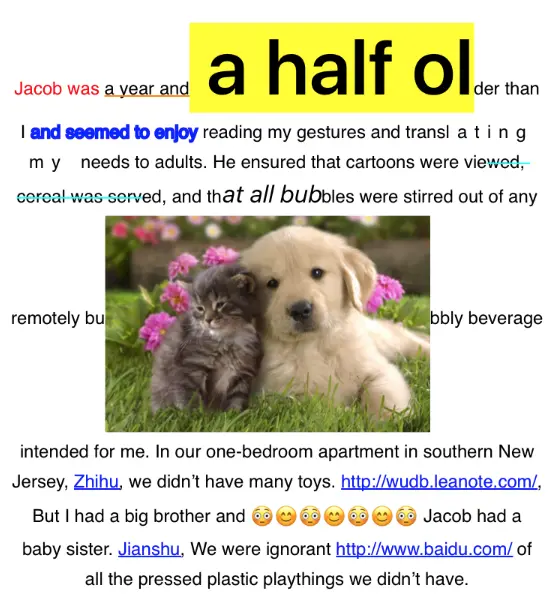
至此, 我们已经完成了删除线, 背景色, 链接, 图片混排四种样式。因为中间正逢iPhone7发布, 带来了iOS10, Swift3.0, Xcode8, 所以就理所当然的转移到新阵地了。本篇文章还是使用Swift2.3编写, 但是另外又开了一个工程适配了Swift3.0。Swift2.x源码, Swift3.0源码, 请自取。
话说应该去研究微信小程序了, 不然就out了!
参考:
CoreText基础概念
CoreText入门
Nimbus
本文由啸寒原创, 转载请注明出处!!!
