

基本功能
Arrays & Collections
常用的方法
//Arrays.java
public static  List asList(T... a) {
   return new ArrayList<>(a);
}
注意这里返回的ArrayList不同于我们平时使用的ArrayList,根据该ArrayLsit的源码
private static class ArrayList extends AbstractList
知道其继承至AbstractList,但是没有实现它的add()和delete()方法,因此若调用会抛出UnsupportedOperationException的提示,这是由于该List的底层就是一个数组,而且不会扩容,所以不支持添加等操作,在使用的时候要特别注意。
List list = ...;
List lists1 = new ArrayList(list);
List lists2 = Collections.addAll(list);
上面代码,相比lists1,lists2更为高效。
集合类基本介绍
- List 以特定顺序保存的一组元素
- Set 以特定顺序保存的不重复的一组元素
- Queue 同数据结构队列
- Map 使用KV保存两组值
具体介绍

List
相比Collection,多 了一些方法,如listIterator()等.
ArrayList

概述
根据类图可以知道ArrayList的继承结构,RandomAccess是一个说明性接口,没有任何的方法实现.ArrayList的底层实现任然是数组,当容量达到一定时,会新建一个数组,再把原来的数据拷贝过去,所以性能并不是太好.下面详细的看看.
准备
由于ArrayList的底层是由数组实现的,并且ArrayList是动态大小,因此修改扩容,这里用到Arrays.copyOf(...)方法
public static  T[] copyOf(U[] original, int newLength, Class extends T[]> newType) {
    @SuppressWarnings("unchecked")
    T[] copy = ((Object)newType == (Object)Object[].class)
          ? (T[]) new Object[newLength]
          : (T[]) Array.newInstance(newType.getComponentType(), newLength);
    System.arraycopy(original, 0, copy, 0,
                   Math.min(original.length, newLength));  //native
    return copy;
}
源码阅读
transient Object[] elementData; // 为什么是Object而不是泛型E?
private int size; //实际大小 size()函数就是返回该值
它的三个构造函数的作用都是初始化上面两个参数的值.都是非常的简单,不多说,下面看看最常用的add()函数.
public boolean add(E e) {
   ensureCapacityInternal(size + 1);  // 判断数组容量是否够,不够就扩容
   elementData[size++] = e;
   return true;
}

public void add(int index, E element) {
    rangeCheckForAdd(index); //index > size || index < 0抛异常
    ensureCapacityInternal(size + 1);  // Increments modCount!!
    System.arraycopy(elementData, index, elementData, index + 1,
                     size - index);//index后的往后移一位
    elementData[index] = element;
    size++;
}

public boolean addAll(Collection extends E> c) {
    Object[] a = c.toArray();
    int numNew = a.length;
    ensureCapacityInternal(size + numNew);  // Increments modCount
    System.arraycopy(a, 0, elementData, size, numNew);
    size += numNew;
    return numNew != 0;
}

public boolean addAll(int index, Collection extends E> c) {
    rangeCheckForAdd(index);
    Object[] a = c.toArray();
    int numNew = a.length;
    ensureCapacityInternal(size + numNew);  // Increments modCount
    int numMoved = size - index;
    if (numMoved > 0)
       System.arraycopy(elementData, index, elementData, index + numNew,
                         numMoved);
    System.arraycopy(a, 0, elementData, index, numNew);
    size += numNew;
    return numNew != 0;
}
本身这段代码是非常容易理解的,下面看看它扩容的实现.
private void ensureCapacityInternal(int minCapacity) {
      if (elementData == EMPTY_ELEMENTDATA) { //还没有数据时
          minCapacity = Math.max(DEFAULT_CAPACITY, minCapacity);
      }
      ensureExplicitCapacity(minCapacity);
}

private void ensureExplicitCapacity(int minCapacity) {
     modCount++;
     // overflow-conscious code
     //注意elementData.length只是表示现有的容量,不是size
     if (minCapacity - elementData.length > 0)
         grow(minCapacity);
}

private void grow(int minCapacity) {
    // overflow-conscious code
    int oldCapacity = elementData.length;
    int newCapacity = oldCapacity + (oldCapacity >> 1);//增加1.5倍容量,位操作效率远远高于做除法
    if (newCapacity - minCapacity < 0) //容量还没有达到申请的量
        newCapacity = minCapacity;
    if (newCapacity - MAX_ARRAY_SIZE > 0) //Integer.MAX_VALUE - 8
        newCapacity = hugeCapacity(minCapacity);
    // minCapacity is usually close to size, so this is a win:
    elementData = Arrays.copyOf(elementData, newCapacity);//把原来的数据移动到新数组中


private static int hugeCapacity(int minCapacity) {
    if (minCapacity < 0) // int 溢出变为负数了
        throw new OutOfMemoryError();
    return (minCapacity > MAX_ARRAY_SIZE) ?
         Integer.MAX_VALUE :
         MAX_ARRAY_SIZE;
}
通过上面的代码,可以看到ArrayList的最大容量为Integer.MAX_VALUE,即65535.接下来就看看同等常用的get()函数.
public E get(int index) {
     rangeCheck(index);  //检查index是否在[0,size)范围内,具体实现就这一个条件判断
     return elementData(index); //取得元素elementData[index]
}
根据他的名称我们很容易的了解他的功能,并且对于数组的随机存取,这个实现太简单了,就不必多说.下面看看set()方法.
public E set(int index, E element) {
    rangeCheck(index);
    E oldValue = elementData(index);
    elementData[index] = element;
    return oldValue;
}
卧槽,我都不想多说什么了,就是简单的判断index的范围,然后就是对数组操作.函数indexOf()/contains()和lastIndexOf()都是简单的对数组的遍历过程,也跳过.下面看看remove()相关的方法.
public E remove(int index) {
    rangeCheck(index);
    modCount++;
    E oldValue = elementData(index);
    int numMoved = size - index - 1;
    if (numMoved > 0)
        System.arraycopy(elementData, index+1, elementData, index,
                         numMoved);
    elementData[--size] = null; // clear to let GC do its work
    return oldValue;
}

/**
 * 先遍历查找到index,在移除
 */
public boolean remove(Object o) {
    if (o == null) {
        for (int index = 0; index < size; index++)
            if (elementData[index] == null) {
                fastRemove(index);
                return true;
            }
    } else {
        for (int index = 0; index < size; index++)
            if (o.equals(elementData[index])) {
                fastRemove(index);
                return true;
            }
    }
    return false;
}

private void fastRemove(int index) {
    modCount++;
    int numMoved = size - index - 1;
    if (numMoved > 0)
        System.arraycopy(elementData, index+1, elementData, index,
                         numMoved);
    elementData[--size] = null; // clear to let GC do its work
}
下面看看retainAll()和removeAll()的实现函数batchRemove().
private boolean batchRemove(Collection c, boolean complement) {
    final Object[] elementData = this.elementData;
    int r = 0, w = 0;
    boolean modified = false;
    try {
        for (; r < size; r++)
           if (c.contains(elementData[r]) == complement)
                elementData[w++] = elementData[r]; //保留相等/或者不等的部分
    } finally {
       // Preserve behavioral compatibility with AbstractCollection,
       // even if c.contains() throws.
       if (r != size) {
           System.arraycopy(elementData, r,
                            elementData, w,
                             size - r);
            w += size - r;
        }
        if (w != size) {
            // clear to let GC do its work
            for (int i = w; i < size; i++)
                elementData[i] = null;
            modCount += size - w;
            size = w;
            modified = true;
        }
    }
     return modified;
}
下面看看排序函数sort()
public void sort(Comparator super E> c) {
    final int expectedModCount = modCount;
    Arrays.sort((E[]) elementData, 0, size, c);
    if (modCount != expectedModCount) {
        throw new ConcurrentModificationException();
    }
    modCount++;
}
由上面的代码可以看出sort()在排序过程重中是不允许执行修改/添加等等操作的.subList()返回一个List,但是这个List是依附在原本的ArrayList的,也就是说subList()得到的List其实是ArrayList的镜像,当ArrayList修改后,取得的subList也会显示出修改后的状态.这里可以看看它的一部分实现
//构造函数
SubList(AbstractList parent,
        int offset, int fromIndex, int toIndex) {
   this.parent = parent;
   this.parentOffset = fromIndex;
   this.offset = offset + fromIndex;
   this.size = toIndex - fromIndex;
   this.modCount = ArrayList.this.modCount;
}

public E get(int index) {
   rangeCheck(index);
   checkForComodification();
   //从这里可以看出,它的数据是外部类ArrayList的.
   return ArrayList.this.elementData(offset + index);
}
最后看看函数listIterator()和函数iterator(),他们分别返回一个双向迭代器和单向迭代器.本质他们的遍历过程还是数组的遍历,想要了解详情可以去看看具体的源码,这里就不介绍了.
LinkedList

概述
inkedList实现了List、Deque、Cloneable以及Serializable接口。其中Deque是双端队列接口,所以LinkedList可以当作是栈、队列或者双端队队列。在使用它的时候,通常可以把它向上转型为List,Queue已达到缩小她的接口的功能(限制了不需要的方法).
源码阅读
由于是由链表实现,首先需要查看的就是结点了.
private static class Node {
        E item;
        Node next;
        Node prev;

        Node(Node prev, E element, Node next) {
            this.item = element;
            this.next = next;
            this.prev = prev;
        }
}
在LinkedList的内部,保存着first和last结点的引用,这样就方便了两端的插入删除等操作.
    transient int size = 0;
    transient Node first;
    transient Node last;
下面看看它的关键实现函数,添加结点相关函数.
//尾部添加
void linkLast(E e) {
        final Node l = last;
        final Node newNode = new Node<>(l, e, null); //注意构造函数已经绑定的前结点
        last = newNode;
        if (l == null)
            first = newNode;
        else
            l.next = newNode;
        size++;
        modCount++;
}

//头部添加
private void linkFirst(E e) {
        final Node f = first;
        final Node newNode = new Node<>(null, e, f);
        first = newNode;
        if (f == null)
            last = newNode;
        else
            f.prev = newNode;
        size++;
        modCount++;
}

//在某个结点前添加
void linkBefore(E e, Node succ) {
        // assert succ != null;
        final Node pred = succ.prev;
        final Node newNode = new Node<>(pred, e, succ);
        succ.prev = newNode;
        if (pred == null)
            first = newNode;
        else
            pred.next = newNode;
        size++;
        modCount++;
}
删除结点相关函数.
E unlink(Node x) {
        // assert x != null;
        final E element = x.item;
        final Node next = x.next;
        final Node prev = x.prev;

        if (prev == null) {
            first = next;
        } else {
            prev.next = next;
            x.prev = null;
        }

        if (next == null) {
            last = prev;
        } else {
            next.prev = prev;
            x.next = null;
        }

        x.item = null;
        size--;
        modCount++;
        return element;
 }

private E unlinkFirst(Node f) {
        // assert f == first && f != null;
        final E element = f.item;
        final Node next = f.next;
        f.item = null;
        f.next = null; // help GC
        first = next;
        if (next == null)
            last = null;
        else
            next.prev = null;
        size--;
        modCount++;
        return element;
}

private E unlinkLast(Node l) {
        // assert l == last && l != null;
        final E element = l.item;
        final Node prev = l.prev;
        l.item = null;
        l.prev = null; // help GC
        last = prev;
        if (prev == null)
            first = null;
        else
            prev.next = null;
        size--;
        modCount++;
        return element;
}
以上两组函数实现都是非常的简单,和数据结构书中讲的都几乎一样,想必大家也可以看懂,就不多废话了,而该类的其他方法多依赖于以上方法的实现.还有一个其他函数的依赖函数是node()
//获取第index个结点
Node node(int index) {
        // assert isElementIndex(index);
        if (index < (size >> 1)) {
            Node x = first;
            for (int i = 0; i < index; i++)
                x = x.next;
            return x;
        } else {
            Node x = last;
            for (int i = size - 1; i > index; i--)
                x = x.prev;
            return x;
        }
}
可以看出他是遍历链表的操作,只是因为有first和last的存在,可以稍微优化一下.
Stack
根据上面LinkedList的实现,其实使用LinkedList实现一个Stack是非常的容易的,可以看看实现方式.
public class Stack {
    private LinkedList storage = new LinkedList();

     /** 入栈 */
    public void push(T v) {
       storage.addFirst(v);
    }

     /** 出栈,但不删除 */
    public T peek() {
       return storage.getFirst();
    }

     /** 出栈 */
    public T pop() {
       return storage.removeFirst();
    }

     /** 栈是否为空 */
    public boolean empty() {
       return storage.isEmpty();
    }

     /** 打印栈元素 */
    public String toString() {
       return storage.toString();
    }
}
但是Java中任然提供了Stack类,而且实现方式与上面的完全不同,它的内部存储结构是数组,基本的实现其实还是和ArrayList差不多,而且在<>中并不建议使用它,因此这里不讲了.
Map
HashMap
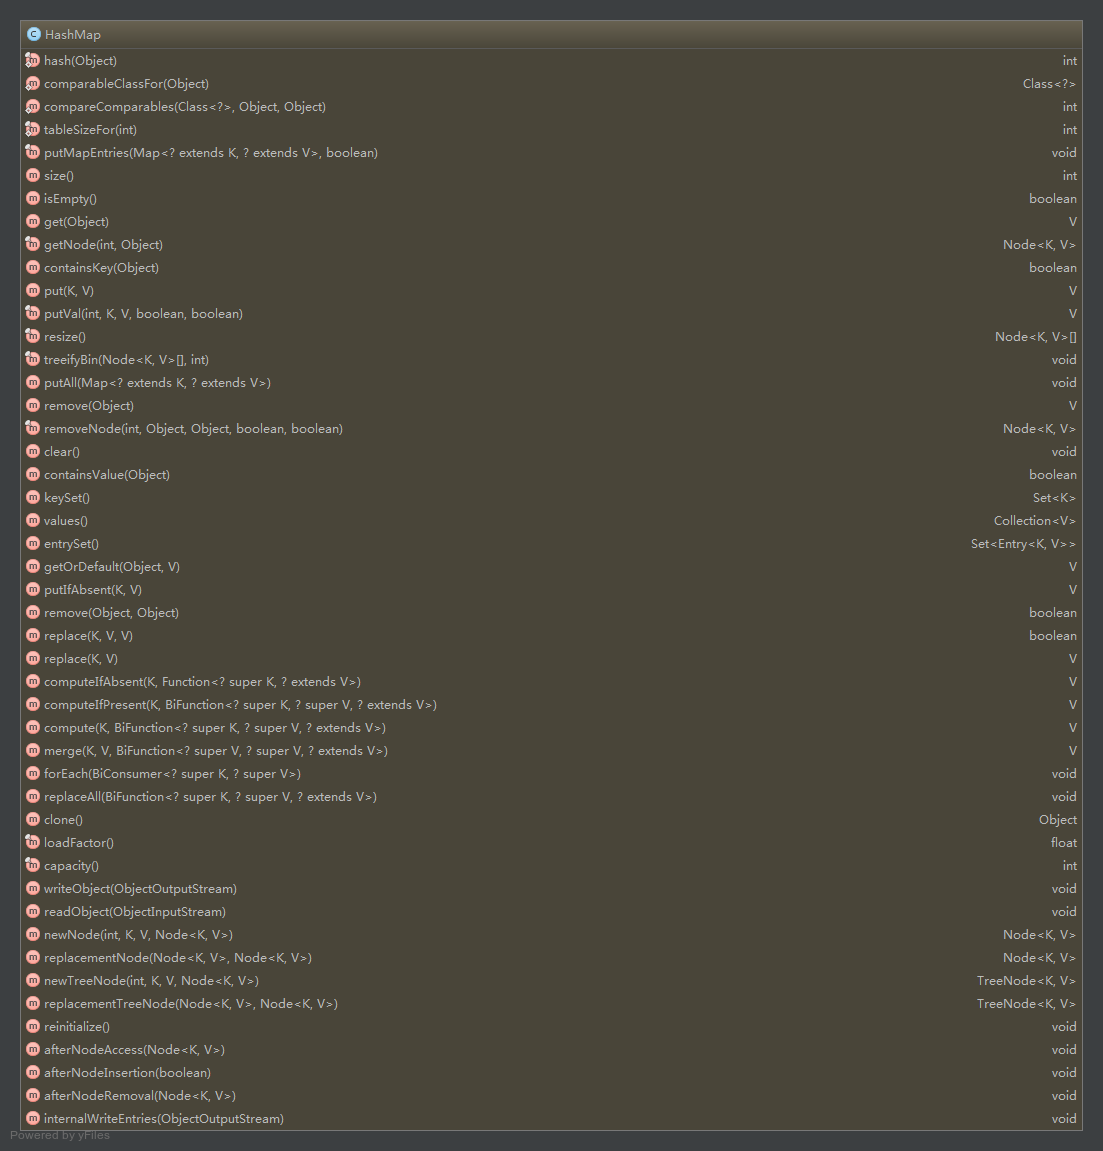
本文的代码均来至于JDK1.8,HashMap与前面版本的变化比较大,Android SDK V23中的是旧版本的
源码阅读
    transient Node[] table;
    transient Set> entrySet;
    // HashMap的阈值,用于判断是否需要调整HashMap的容量(threshold = 容量*加载因子)
    int threshold;
    final float loadFactor; //加载因子,注意Android SDK写死的0.75
在这里可以看看构造函数的参数
public HashMap(int initialCapacity, float loadFactor) {
        if (initialCapacity < 0)
            throw new IllegalArgumentException("Illegal initial capacity: " +
                                               initialCapacity);
        if (initialCapacity > MAXIMUM_CAPACITY)
            initialCapacity = MAXIMUM_CAPACITY;
        if (loadFactor  0 || Float.isNaN(loadFactor))
            throw new IllegalArgumentException("Illegal load factor: " +
                                               loadFactor);
        this.loadFactor = loadFactor;
        //tableSizeFor(n) Returns the smallest power of two >= its argument
        this.threshold = tableSizeFor(initialCapacity);
}
可以看出threshold在没到达最大值之前是$2^n$.下面再看看常用的方法.
public V put(K key, V value) {
        return putVal(hash(key), key, value, false, true);
}

final V putVal(int hash, K key, V value, boolean onlyIfAbsent,`
                   boolean evict) {
        Node[] tab; Node p; int n, i;
        //还没有初始化数组
        if ((tab = table) == null || (n = tab.length) == 0)
            n = (tab = resize()).length;
        //找到要添加的位置
        if ((p = tab[i = (n - 1) & hash]) == null)
            //如果还没有元素,就放入
            tab[i] = newNode(hash, key, value, null);
        else {
            Node e; K k;
            if (p.hash == hash &&
                ((k = p.key) == key || (key != null && key.equals(k))))
                //已经存在了一个相同KEY的元素
                e = p;
                //红黑树,JDK1.8的优化点,当链表的长度大于8时,不再使用链表,转为红黑树
            else if (p instanceof TreeNode)
                e = ((TreeNode)p).putTreeVal(this, tab, hash, key, value);
            else {
                //链表结构
                for (int binCount = 0; ; ++binCount) {
                    //添加到链表尾部
                    if ((e = p.next) == null) {
                        p.next = newNode(hash, key, value, null);
                        if (binCount >= TREEIFY_THRESHOLD - 1) // -1 for 1st
                            treeifyBin(tab, hash); //链表长度为8了,转红黑树
                        break;
                    }
                    //在链表中找到了同KEY值得元素
                    if (e.hash == hash &&
                        ((k = e.key) == key || (key != null && key.equals(k))))
                        break;
                    p = e;
                }
            }
            if (e != null) { // existing mapping for key ,已经存在的KEY,修改原本的值
                V oldValue = e.value;
                if (!onlyIfAbsent || oldValue == null)
                    e.value = value;
                afterNodeAccess(e);
                return oldValue;
            }
        }
        ++modCount;
        if (++size > threshold)
            resize();
        afterNodeInsertion(evict); //空操作
        return null;
}

 final void treeifyBin(Node[] tab, int hash) {
        int n, index; Node e;
        if (tab == null || (n = tab.length) < MIN_TREEIFY_CAPACITY)
            resize();
        else if ((e = tab[index = (n - 1) & hash]) != null) {
            TreeNode hd = null, tl = null;
            do {
                TreeNode p = replacementTreeNode(e, null);
                if (tl == null)
                    hd = p;
                else {
                    p.prev = tl;
                    tl.next = p;
                }
                tl = p;
            } while ((e = e.next) != null);
            //到此得到一个双向链表的格式.
            if ((tab[index] = hd) != null)
                hd.treeify(tab); //形成从该节点连接的节点的树。实现有点复杂
        }
}
关于红黑树的操作本身是非常复杂的,可以参考Wiki,接下来看看get()操作.
public V get(Object key) {
        Node e;
        return (e = getNode(hash(key), key)) == null ? null : e.value;
}

final Node getNode(int hash, Object key) {
        Node[] tab; Node first, e; int n; K k;
        if ((tab = table) != null && (n = tab.length) > 0 &&
            (first = tab[(n - 1) & hash]) != null) {
            //Fiest为链表的首节点或红黑树的根节点
            if (first.hash == hash && // always check first node
                ((k = first.key) == key || (key != null && key.equals(k))))
                return first;
            if ((e = first.next) != null) {
                if (first instanceof TreeNode)
                    //在红黑树中查找
                    return ((TreeNode)first).getTreeNode(hash, key);
                do {
                   //链表中遍历查找
                    if (e.hash == hash &&
                        ((k = e.key) == key || (key != null && key.equals(k))))
                        return e;
                } while ((e = e.next) != null);
            }
        }
        return null;
}
之理也只是大体说明一下HashMap的结构,核心的东西就是红黑树,它的其他方法也是大体一致,都是对链表和红黑树的操作.entrySet()和keySet()也是和List中的iterator一样,内部的操作都是由HashMap本身来完成.
public boolean containsValue(Object value) {
        Node[] tab; V v;
        if ((tab = table) != null && size > 0) {
            for (int i = 0; i < tab.length; ++i) {
                for (Node e = tab[i]; e != null; e = e.next) {
                    if ((v = e.value) == value ||
                        (value != null && value.equals(v)))
                        return true;
                }
            }
        }
        return false;
}
这个函数大家可能也会有一点困惑,为什么这里就只讨论了链表的情况,并根据next()遍历整个链表?其实TreeNode是继承至Node,并且在生成红黑树的时候并没有修改next的指向,所以通过next()遍历就没问题了.
TreeMap

TreeMap的底层实现也是基于红黑树的.
源码阅读
还是老规矩,先看最常用的方法put().
public V put(K key, V value) {
        Entry t = root;
        //红黑树为空,直接添加一个结点接OK
        if (t == null) {
            compare(key, key); // type (and possibly null) check
            root = new Entry<>(key, value, null);
            size = 1;
            modCount++;
            return null;
        }
        int cmp;
        Entry parent;
        // split comparator and comparable paths
        Comparator super K> cpr = comparator;
        //优先使用主动提供的比较器,
        //在使用该类(KEY)自带的比较器(继承Comparable)
        if (cpr != null) {
            do {
                parent = t;
                cmp = cpr.compare(key, t.key);
                if (cmp < 0)
                    t = t.left;
                else if (cmp > 0)
                    t = t.right;
                else
                    //找到key值相同的结点,覆盖该值即可
                    return t.setValue(value);
            } while (t != null);
        }
        else {
            //key不允许为NULL
            if (key == null)
                throw new NullPointerException();
            @SuppressWarnings("unchecked")
                Comparable super K> k = (Comparable super K>) key;
            do {
                parent = t;
                cmp = k.compareTo(t.key);
                if (cmp < 0)
                    t = t.left;
                else if (cmp > 0)
                    t = t.right;
                else
                    return t.setValue(value);
            } while (t != null);
        }
        //到此找到了要插入到结点parent的子结点
        Entry e = new Entry<>(key, value, parent);
        if (cmp < 0)
            parent.left = e;
        else
            parent.right = e;
        //插入完成,此时的红黑树结构可能已经被破坏,需要重新构建
        //过程和HasmMap的其实是一样的.了解更多可以看文章后面的参考
        fixAfterInsertion(e);
        size++;
        modCount++;
        return null;
}
接下来看看get()函数.
public V get(Object key) {
        Entry p = getEntry(key);
        return (p==null ? null : p.value);
}

final Entry getEntry(Object key) {
        // Offload comparator-based version for sake of performance
        if (comparator != null)
            //自定义比较器的时候
            return getEntryUsingComparator(key);
        if (key == null)
            throw new NullPointerException();
        @SuppressWarnings("unchecked")
            Comparable super K> k = (Comparable super K>) key;
        Entry p = root;
        //实现就是查找二叉树查找问题
        while (p != null) {
            int cmp = k.compareTo(p.key);
            if (cmp < 0)
                p = p.left;
            else if (cmp > 0)
                p = p.right;
            else
                return p;
        }
}
//这个函数的实现
final Entry getEntryUsingComparator(Object key) {
        @SuppressWarnings("unchecked")
            K k = (K) key;
        Comparator super K> cpr = comparator;
        if (cpr != null) {
            Entry p = root;
            while (p != null) {
                int cmp = cpr.compare(k, p.key);
                if (cmp < 0)
                    p = p.left;
                else if (cmp > 0)
                    p = p.right;
                else
                    return p;
            }
        }
        return null;
}
遍历的时候调用了一个函数
final Entry nextEntry() {
            Entry e = next;
            if (e == null)
                throw new NoSuchElementException();
            if (modCount != expectedModCount)
                throw new ConcurrentModificationException();
            next = successor(e);  //中序遍历的E的后一节点
            lastReturned = e;
            return e;
}
这样输入的数据就是按照红黑树中序遍历的数据,也就是有序数据.
LinkedHashMap

根据最上面的继承关系图我们知道LinkedHashMap继承至HashMap,所以重复型的东西我就不说了,LinkedHashMap的核心功能就是维持了原有的输入顺序或者指定为访问顺序(LRU).下面也是主要看看这个功能的实现.
源码阅读
LinkedHashMap中的字段
    // 头部放旧结点(最久没使用或最久放入)
    transient LinkedHashMap.Entry head;
    // 尾部放新节点
    transient LinkedHashMap.Entry tail;
通过上面的分析,我们知道HashMap的put()时调用了函数newNode(),而LinkedHashMap就重写了这个方法.
//结点,相比HashMap多了before和after
static class Entry extends HashMap.Node {
        Entry before, after;
        Entry(int hash, K key, V value, Node next) {
            super(hash, key, value, next);
        }
}

Node newNode(int hash, K key, V value, Node e) {
        //创建一个结点
        LinkedHashMap.Entry p =
            new LinkedHashMap.Entry(hash, key, value, e);
        linkNodeLast(p);
        return p;
}
//内部保存了一个链表
private void linkNodeLast(LinkedHashMap.Entry p) {
        LinkedHashMap.Entry last = tail;
        tail = p;
        if (last == null)
            head = p;
        else {
            p.before = last;
            last.after = p;
        }
}
这样就要求在以后的插入删除的工作中需要额外的维护这个链表.另外,如果开启了按访问顺序排序的话,在每次get()或者put()了重复数据是都会要求把访问的结点放到链表尾部.
//把E移动到双向链表的尾部
void afterNodeAccess(Node e) { // move node to last
        LinkedHashMap.Entry last;
        if (accessOrder && (last = tail) != e) {
            LinkedHashMap.Entry p =
                (LinkedHashMap.Entry)e, b = p.before, a = p.after;
            p.after = null;
            if (b == null) //P本身为首节点
                head = a;
            else
                b.after = a;
            if (a != null)
                a.before = b;
            else         //P本身为尾接点
                last = b;
            //到此P被移除了
            if (last == null) //原本链表只有一个元素,移除光了
                head = p;
            else {
               //P放在最后
                p.before = last;
                last.after = p;
            }
            //修改指向末尾结点的指针
            tail = p;
            ++modCount;
        }
}
接下来就看看LinkedHashMap的遍历.entrySet()返回的是一个LinkedEntrySet的实例,而LinkedEntrySet的迭代器是LinkedEntryIterator,LinkedEntryIterator的next()方法调用nextNode()函数.
//构造函数
LinkedHashIterator() {
            next = head;
            expectedModCount = modCount;
            current = null;
}

final LinkedHashMap.Entry nextNode() {
            LinkedHashMap.Entry e = next;
            if (modCount != expectedModCount)
                throw new ConcurrentModificationException();
            if (e == null)
                throw new NoSuchElementException();
            current = e;
            next = e.after;
            return e;
 }
可以很明显的看到,它的实现完全依赖于构建的链表,不像HashMap对组数和链表(红黑树)的遍历.相比HashMap其实就是多了一个双向链表而已.
Set
Set是一个不包含重复元素的Collection。更确切地讲,Set 不包含满足 e1.equals(e2) 的元素对 e1 和 e2,并且最多包含一个 null 元素.
HashSet

HashSet的底部是使用一个HashMap,把值存在HashMap的KEY,HashMap的VALUE字段为固定的值,根据HashMap的KEY的唯一性,可以保证HashSet的值得唯一性.额外,有一个构造器使用的是LinkedHashMap,只有包权限,是后面要讲的LinkedHashSet的实现.
//dummy 参数只是使用来区别构造函数
HashSet(int initialCapacity, float loadFactor, boolean dummy) {
        map = new LinkedHashMap<>(initialCapacity, loadFactor);
}
源码阅读
其实HashSet的源码并没有什么东西,都是调用HashMap的基本操作.下面随便看两个函数.
private transient HashMap map;

public boolean add(E e) {
        return map.put(e, PRESENT)==null;
}

public Iterator iterator() {
        return map.keySet().iterator();
}

public boolean contains(Object o) {
        return map.containsKey(o);
}
由于这些方法前面都已经说过了,这里就不说了.
TreeSet

有了上面HashSet的介绍,可能你已经猜到TreeSet的实现方式是基于TreeMap了.将值存放在TreeMap的KEY中,保证了不会重复并且有序,最后只需要遍历TreeSet的KEY就行了.具体的操作可以看看TreeMap.
LinkedHashSet
它的实现是最简单的,继承至HashSet,调用前面说的特殊构造器,相当于把HashSet的HashMap换成了LinkedHashMap,并且按照插入顺序排序.
Queue
LinkedList
这个上面已经分析过了,这里跳过。
PriorityQueue
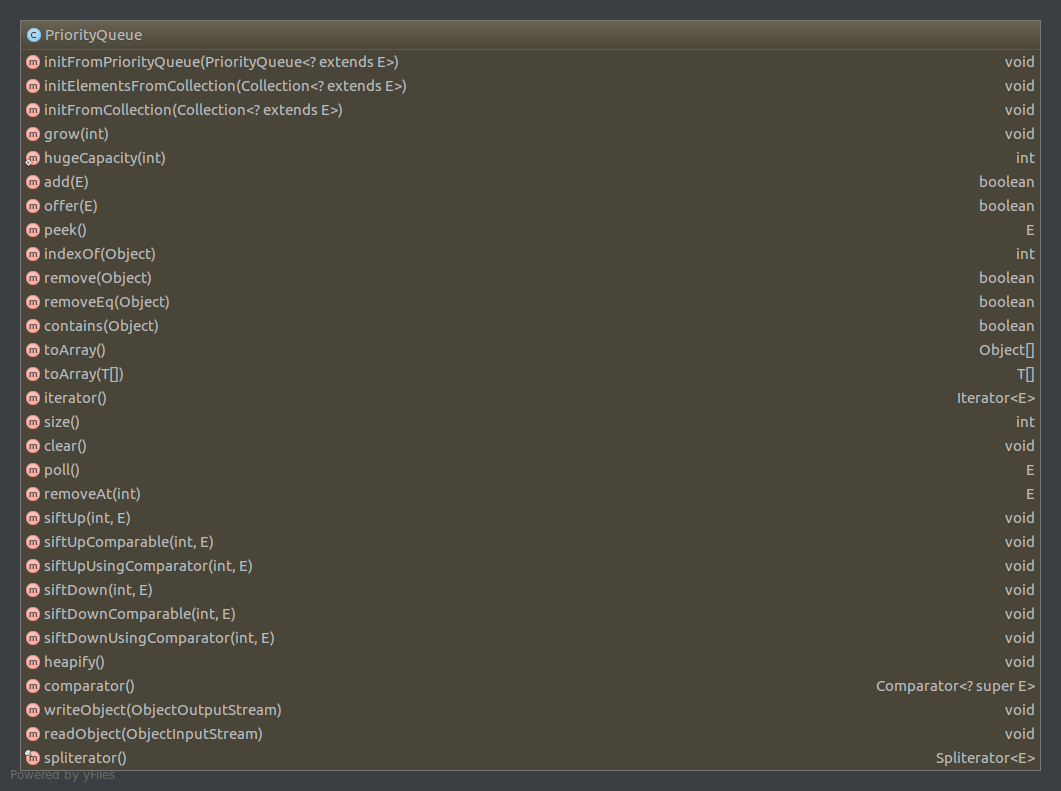
准备
在数据结构的课程中,我们都学过用数组表示完全二叉树,这里有一些固定的公式
Index(parent) = (Index(Child)-1) >> 1 //索引0开始
而优先级队列Priority就是使用了数组表示最小堆,每次插入删除都会重新排列内部数据。
最小堆,是一种经过排序的完全二叉树
源码阅读
有用的字段
priavte transient Object[] queue; //内部表示最小堆的数组
private int size = 0; //实际大小
常用方法add()的实现
public boolean add(E e) {
return offer(e); // add方法内部调用offer方法
}
public boolean offer(E e) {
if (e == null) // 元素为空的话,抛出NullPointerException异常
throw new NullPointerException();
modCount++;
int i = size;
if (i >= queue.length) // 如果当前用堆表示的数组已经满了,调用grow方法扩容
grow(i + 1); // 扩容
size = i + 1; // 元素个数+1
if (i == 0) // 堆还没有元素的情况
queue[0] = e; // 直接给堆顶赋值元素
else // 堆中已有元素的情况
siftUp(i, e); // 重新调整堆,从下往上调整,因为新增元素是加到最后一个叶子节点
return true;
}
private void siftUp(int k, E x) {
if (comparator != null) // 比较器存在的情况下
siftUpUsingComparator(k, x); // 使用比较器调整
else // 比较器不存在的情况下
siftUpComparable(k, x); // 使用元素自身的比较器调整
}
private void siftUpUsingComparator(int k, E x) {
while (k > 0) { // 一直循环直到父节点还存在
int parent = (k - 1) >>> 1; // 找到父节点索引,依赖完全二叉树性质
Object e = queue[parent]; // 赋值父节点元素
if (comparator.compare(x, (E) e) >= 0) // 新元素与父元素进行比较,如果满足比较器结果,直接跳出,否则进行调整
break;
queue[k] = e; // 进行调整,新位置的元素变成了父元素
k = parent; // 新位置索引变成父元素索引,进行递归操作
}
queue[k] = x; // 新添加的元素添加到堆中
}
private void siftUpComparable(int k, E x) {
...//同上面类似
}
下面看看函数remove()的实现
public boolean remove(Object o) {
int i = indexOf(o); //按数组索引遍历
if (i == -1)
return false;
else {
removeAt(i);
return true;
}
}
private E removeAt(int i) {
// assert i >= 0 && i < size;
modCount++;
int s = --size;
if (s == i) // removed last element,移除最后的元素,该数组依旧是最小堆
queue[i] = null;
else {
E moved = (E) queue[s];
queue[s] = null; //数组最后一个位置置空
siftDown(i, moved);
if (queue[i] == moved) {
siftUp(i, moved);
if (queue[i] != moved)
return moved;
}
}
return null;
}
private void siftDown(int k, E x) {
if (comparator != null)
siftDownUsingComparator(k, x);
else
siftDownComparable(k, x);
}
@SuppressWarnings("unchecked")
private void siftDownComparable(int k, E x) {
Comparable super E> key = (Comparable super E>)x;
int half = size >>> 1; // loop while a non-leaf
//为什么是一半??
//因为大于half的元素必然是没有叶子节点的,这是只需要用末节点X替换要删除的节点index(K),然后重新排序。
//而对于小于half的节点,由于存在(左)/(右)节点,用较小的节点替换要删除的节点,这样带删除节点的Index = (左)/(右)的索引,然后继续递归执行,直到大于half,在用末节点替换她。
while (k < half) {
int child = (k << 1) + 1; // assume left child is least
Object c = queue[child];
int right = child + 1;
if (right < size &&
((Comparable super E>) c).compareTo((E) queue[right]) > 0)
c = queue[child = right];
if (key.compareTo((E) c) 0)
break;
queue[k] = c;
k = child;
}
queue[k] = key;
}
函数poll()和remove()的实现基本一致。
public E poll() {
if (size == 0)
return null;
int s = --size;
modCount++;
E result = (E) queue[0];
E x = (E) queue[s];
queue[s] = null;
if (s != 0)
siftDown(0, x);
return result;
}
其他的比如扩容函数和ArrayList的原理都是一样的,这里就不说了。到此,基本的集合类的源码大体上都说完了。
其他技术点
Java 8 default关键字
interface A {
void doSomeThing();
}
static class B implements A {
@Override
public void doSomeThing() {
System.out.println("B");
}
}
static class C implements A {
@Override
public void doSomeThing() {
System.out.println("C");
}
}
以上代码如果想在A中添加一个函数,必然需要修改B和C的实现,但是在Java 8支持为接口添加一个默认的实现,这样和抽象类就很相似了。
interface A {
void doSomeThing();
default void doAction() {
System.out.println("Default");
}
}
static class B implements A {
@Override
public void doSomeThing() {
System.out.println("B");
}
}
static class C implements A {
@Override
public void doSomeThing() {
System.out.println("C");
}
}
就向上面就OK了。
Integer比较问题
System.out.println(Integer.valueOf(127)==Integer.valueOf(127));
System.out.println(Integer.valueOf(128)==Integer.valueOf(128));
System.out.println(Integer.parseInt("128")==Integer.valueOf("128"));
true
false
true
为什么会有这问题?通过源代码
public static Integer valueOf(int i) {
if (i >= IntegerCache.low && i IntegerCache.high)
return IntegerCache.cache[i + (-IntegerCache.low)];
return new Integer(i);
}
代码中的IntegerCache.low为固定值-128,IntegerCache.high根据VM系统参数不同会有区别,默认127,因此在[-128,127]范围内,实例化的时候是返回的同一个对象,必然相等。当Integer修改的时候,由于他是不可变对象(参考String,每次修改都是重新生成对象),也不会出现问题。对于第三个例子,parseInt()的返回是int,这时和Integer比较,Integer会拆包为int,当然也就相等。
另外补充一点,当我们调用
其实也是执行
Integer i = Integer.valueOf(1);
可以从反编译中看出
//源码
public static void main(String[] args){
Integer i = 1;
int r = i + 1;
}
//反编译结果
public static void main(java.lang.String[]);
Code:
0: iconst_1
1: invokestatic #2 // Method java/lang/Integer.valueOf:(I)Ljava/lang/Integer;
4: astore_1
5: aload_1
6: invokevirtual #3 // Method java/lang/Integer.intValue:()I
9: iconst_1
10: iadd
11: istore_2
12: return
自动拆箱调用intValue(),自动装箱调用valueOf()。
List&Set&Map在遍历过程中删除添加元素错误
for(int i:list){
if(i == 2){
list.remove(Integer.valueOf(2));
}
}
以上这段代码会抛出java.util.ConcurrentModificationException异常。这是因为foreach本质还是调list.iterator(),这里用ArrayList说明。
public Iterator iterator() {
return new Itr();
};
这里返回一个迭代器,其内部参数包括
private class Itr implements Iterator {
int cursor; // index of next element to return
int lastRet = -1; // index of last element returned; -1 if no such
int expectedModCount = modCount; //修改次数,注意int为值传递
}
也就是说保存了修改的次数,在迭代器的next()中有检测这个值是否被篡改(可以修改的地方包括ArrayList的add(...)和remove())。
final void checkForComodification() {
if (modCount != expectedModCount)
throw new ConcurrentModificationException();
}
解决方案是使用迭代器的remove(...)
Iterator iterator = list.iterator();
while (iterator.hasNext()){
Integer i = (Integer) iterator.next();
if(i == 2){
iterator.remove();
}
}
instanceof 关键字
Object obj = null;
if(obj instanceof Object){
System.out.println("会输出吗?还是崩溃");
}
上面的例子不会输出,也不会崩溃,instanceof会检测左边对象是否为null,若是,返回false.
HashMap的容量为什么为$2^n$
在put()函数中,选取数组索引的方式为
重点关注(n - 1) & hash,这里的n是容量,若n=$2^n$,n-1的二进制形式为11...11,做&运算后只有hash的后几位相关,保证足够散列,而若其他情况,下n-1为01..01,运算后只有hash的后几位中的某几位相关,缩小了散列范围,如n-1最末尾为0,这样&之后始终是一个偶数,导致分布过于集中.
参考
