

这里介绍下iOS中加载本地gif的几种方式,我们在最后再总结这几种方式的优缺点
1.通过webview来进行展示
-(void)loadGIFWithWebView
{
    UIWebView *webView = [[UIWebView alloc] initWithFrame:CGRectMake(0, 0, 350*2, 393)];
    [webView setCenter:self.view.center];
    NSData *gif = [NSData dataWithContentsOfFile: [[NSBundle mainBundle] pathForResource:@"2" ofType:@"gif"]];
    webView.userInteractionEnabled = NO;
    [webView loadData:gif MIMEType:@"image/gif" textEncodingName:@"UTF-8" baseURL:nil];
    //设置webview背景透明,能看到gif的透明层
    webView.backgroundColor = [UIColor blackColor];
    webView.opaque = NO;
    [self.view addSubview:webView];

}
这种方式是先创建一个webview,然后通过加载data的方式展示出来

//画一个分隔线表示一下区分
下面要说的几种方式都有一个共同点,就是都用到了ImageI/O.framework
基本原理都是通过框架来获取到图片的信息,然后在配合动画或定时器来进行展示。下面开始接着说
2.这种方式是先对图片进行解析,然后拿到图片的相应信息,最后再配合NSTimer进行展示轮播。方法也是简单粗暴
自定义一个UIView来做gif的呈现布景
#import

@interface CGImageGIFView : UIView

@property (nonatomic,assign,readonly) BOOL isAnimating;

-(instancetype)initWithGIFPath:(NSString *)path;

-(void)startGIF;
-(void)stopGIF;

@end
这里是实现文件的内容,主要就是定义了几个会用到的变量,别忘了引入ImageI/O.framework
#import
@interface CGImageGIFView ()
{
    //gif的字典属性,定义了gif的一些特殊内容,这里虽然设置了,但是没啥特殊设置,一般情况下可以设置为NULL
    NSDictionary *gifProperties;
    size_t index;
    size_t count;
    CGImageSourceRef gifRef;
    NSTimer *timer;
}
@property (nonatomic,assign,readwrite) BOOL isAnimating;
@end
这里是初始化完成的内容
-(instancetype)initWithGIFPath:(NSString *)path
{
    if (self = [super init]) {

        //设置gif的属性来获取gif的图片信息
        gifProperties = [NSDictionary dictionaryWithObject:[NSDictionary dictionaryWithObject:@0 forKey:(NSString *)kCGImagePropertyGIFLoopCount]
                                                    forKey:(NSString *)kCGImagePropertyGIFDictionary];
        //这个是拿到图片的信息
        gifRef = CGImageSourceCreateWithURL((CFURLRef)[NSURL fileURLWithPath:path], (CFDictionaryRef)gifProperties);
        //这个拿到的是图片的张数,一张gif其实内部是有好几张图片组合在一起的,如果是普通图片的话,拿到的数就等于1
        count = CGImageSourceGetCount(gifRef);

        UIImage *image = [UIImage imageWithContentsOfFile:path];
        self.frame = CGRectMake(0, 0, image.size.width, image.size.height);
        self.isAnimating = NO;
    }
    return self;
}
开始和结束
-(void)startGIF
{
    //开始动画,启动一个定时器,每隔一段时间调用一次方法,切换图片
    if (timer == nil) {
        timer = [NSTimer scheduledTimerWithTimeInterval:0.12 target:self selector:@selector(play) userInfo:nil repeats:YES];
    }
    [timer fire];
    self.isAnimating = YES;
}
-(void)play
{
    index = index + 1;
    index=  index % count;
    //方法的内容是根据上面拿到的imageSource来获取gif内部的第几张图片,拿到后在进行layer重新填充
    CGImageRef currentRef = CGImageSourceCreateImageAtIndex(gifRef, index, (CFDictionaryRef)gifProperties);
    self.layer.contents = (id)CFBridgingRelease(currentRef);
}
-(void)stopGIF
{
    //停止定时器
    self.isAnimating = NO;
    [timer invalidate];
    timer = nil;
}
第二种方式的介绍也到此结束,主要就是先拿到图片详细详细信息,然后根据一个定时器,在进行切换,每张图片展示时间相同.
3.上面的方法说到,每张图片的展示时间相同,原因也像上面那样是通过定时器来实现的,可现实中有的gif的图片每张的展示时间不一定是相同的,还有可能不同,下面的方法就可以实现这种需求.
通过CAKeyframeAnimation来实现此操作
在创建一个自定义UIView后,第一步还是通过CGImageSourceRef来获取图片详细信息,在上面的基础上,这里又增加了一个内容,定义如下变量
@interface CAKeyframeAnimationGIFView ()
{
    //解析gif后每一张图片的显示时间
    NSMutableArray *timeArray;
    //解析gif后的每一张图片数组
    NSMutableArray *imageArray;
    //gif动画总时间
    CGFloat totalTime;
    //gif宽度
    CGFloat width;
    //gif高度
    CGFloat height;
}
取相应值
void configImage(CFURLRef url,NSMutableArray *timeArray,NSMutableArray *imageArray,CGFloat *width,CGFloat *height,CGFloat *totalTime)
{

    NSDictionary *gifProperty = [NSDictionary dictionaryWithObject:@{@0:(NSString *)kCGImagePropertyGIFLoopCount} forKey:(NSString *)kCGImagePropertyGIFDictionary];
    //拿到ImageSourceRef后获取gif内部图片个数
    CGImageSourceRef ref = CGImageSourceCreateWithURL(url, (CFDictionaryRef)gifProperty);
    size_t count = CGImageSourceGetCount(ref);

    for (int i = 0; i < count; i++) {

        //添加图片
        CGImageRef imageRef = CGImageSourceCreateImageAtIndex(ref, i, (CFDictionaryRef)gifProperty);
        [imageArray addObject:CFBridgingRelease(imageRef)];

        //取每张图片的图片属性,是一个字典
        NSDictionary *dict = CFBridgingRelease(CGImageSourceCopyPropertiesAtIndex(ref, i, (CFDictionaryRef)gifProperty));

        //取宽高
        if (width != NULL && height != NULL) {
            *width = [[dict valueForKey:(NSString *)kCGImagePropertyPixelWidth] floatValue];
            *height = [[dict valueForKey:(NSString *)kCGImagePropertyPixelHeight] floatValue];
        }

        //添加每一帧时间
        NSDictionary *tmp = [dict valueForKey:(NSString *)kCGImagePropertyGIFDictionary];
        [timeArray addObject:[tmp valueForKey:(NSString *)kCGImagePropertyGIFDelayTime]];

        //总时间
        *totalTime = *totalTime + [[tmp valueForKey:(NSString *)kCGImagePropertyGIFDelayTime] floatValue];
    }
}
开始gif动画,是通过关键帧动画来实现动画的展示
-(void)startGIF
{
    self.isAnimating = YES;
    CAKeyframeAnimation *animation = [CAKeyframeAnimation animationWithKeyPath:@"contents"];

    //获取每帧动画起始时间在总时间的百分比
    NSMutableArray *percentageArray = [NSMutableArray array];
    CGFloat currentTime = 0.0;
    for (int i = 0; i < timeArray.count; i++) {
        NSNumber *percentage = [NSNumber numberWithFloat:currentTime/totalTime];
        [percentageArray addObject:percentage];
        currentTime = currentTime + [[timeArray objectAtIndex:i] floatValue];
    }
    [animation setKeyTimes:percentageArray];

    //添加每帧动画
    [animation setValues:imageArray];
    //动画信息基本设置
    [animation setTimingFunction:[CAMediaTimingFunction functionWithName:kCAMediaTimingFunctionDefault]];
    [animation setDuration:totalTime];
    [animation setDelegate:self];
    [animation setRepeatCount:1000];

    //添加动画
    [self.layer addAnimation:animation forKey:@"gif"];

}
-(void)stopGIF
{
    self.isAnimating = NO;
    [self.layer removeAllAnimations];
}
这里设置repeatcount为1000,可以自行设置具体内容值大小
另外,你还可以自行更改每张图片的展示时间,可以自己控制
附带动画结束后的回调方法
- (void)animationDidStop:(CAAnimation *)anim finished:(BOOL)flag
{
    self.layer.contents = nil;
    self.isAnimating = NO;
}

4.在尝试了上面的三种方式后,总觉得在性能上或多或少的有些缺陷,尤其是第三种,虽说可以自定义显示时间,但是总是感觉很卡顿,下面就说下最后一种方式,通过CADisplayLink来进行gif的动画展示,这个方式最推荐
先来介绍下什么是CADisplayLink
文档是这样一句话介绍的
/** Class representing a timer bound to the display vsync. **/
我的理解是,CADisplayLink是一个将定时器绑定到显示屏上负责垂直同步的类
至于什么是垂直同步,那就是游戏领域的词了,百度后简单理解这个词是能在第一帧绘制成功后,在进行第二帧的绘制,这样就不会再低端性能机上感到跳帧
跑远了,这个类通过target-action方式来绑定一个target,然后在屏幕进行刷新的时候调用action这个方法,特别注意,我们知道iPhone的屏幕刷新频率是每秒60次,也就是说fps是60,通过这个可以在每次屏幕刷新的时候都调用一次这个方法,也就是说调用频率会很高
还是第一步,先获取图片的详细信息
这次通过自定义一个UIImage来解析图片
先看初始化方法
//创建gif图片
-(instancetype)initWithCGImageSource:(CGImageSourceRef)imageSource scale:(CGFloat)scale
{
self = [super init];
if (!imageSource || !self) {
return nil;
}
CFRetain(imageSource);
size_t numberOfFrames = CGImageSourceGetCount(imageSource);
NSDictionary *imageProperties = CFBridgingRelease(CGImageSourceCopyProperties(imageSource, NULL));
NSDictionary *gifProerties = [imageProperties objectForKey:(NSString *)kCGImagePropertyGIFDictionary];
//开辟空间
self.frameDurations = malloc(numberOfFrames);
//读取循环次数
self.loopCount = [[gifProerties objectForKey:(NSString *)kCGImagePropertyGIFLoopCount] unsignedIntegerValue];
//创建所有图片的数值
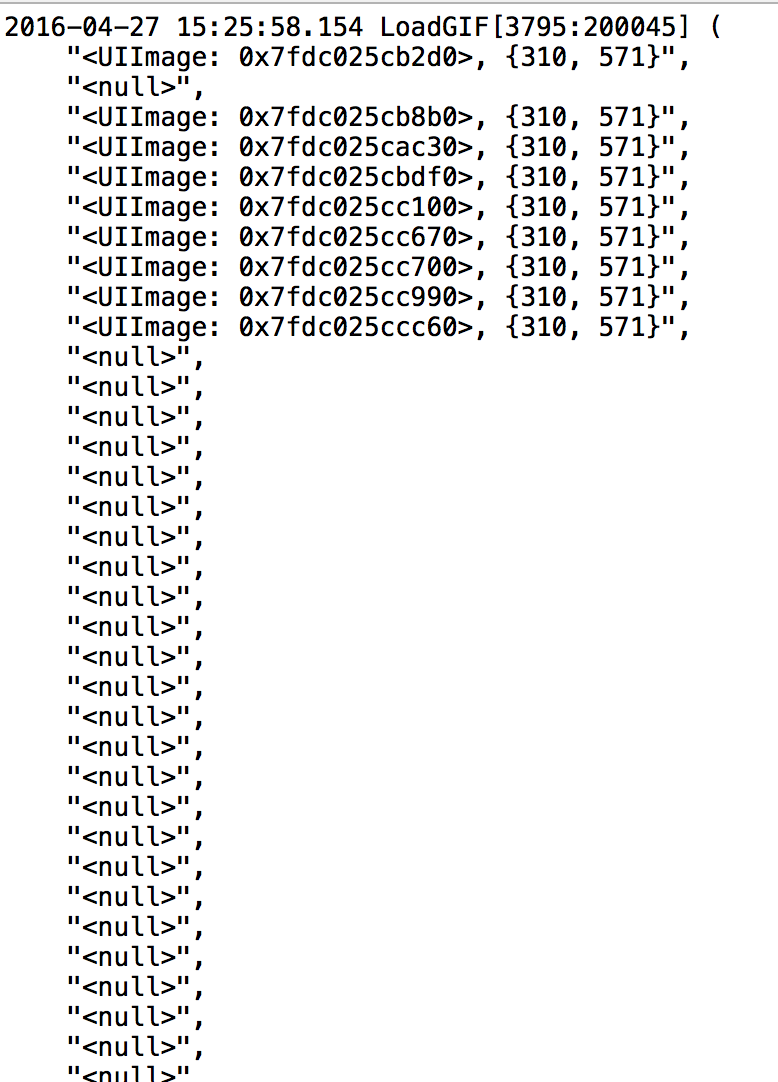
self.images = [NSMutableArray arrayWithCapacity:numberOfFrames];
NSNull *aNull = [NSNull null];
for (NSUInteger i = 0; i < numberOfFrames; i++) {
[self.images addObject:aNull];
//读取每张土拍的显示时间,添加到数组中,并计算总时间
NSTimeInterval frameDuration = CGImageSourceGetGifFrameDelay(imageSource,i);
self.frameDurations[i] = frameDuration;
self.totalDuratoin += frameDuration;
}
NSUInteger num = MIN(_prefetchedNum, numberOfFrames);
for (int i = 0; i < num; i++) {
//替换读取到的每一张图片
CGImageRef image = CGImageSourceCreateImageAtIndex(imageSource, i, NULL);
[self.images replaceObjectAtIndex:i withObject:[UIImage imageWithCGImage:image scale:scale orientation:UIImageOrientationUp]];
CGImageRelease(image);
}
//释放资源,创建子队列
_imageSourceRef = imageSource;
CFRetain(_imageSourceRef);
CFRelease(imageSource);
_scale = scale;
readFrameQueue = dispatch_queue_create("cn.bourbonz.www", DISPATCH_QUEUE_SERIAL);
return self;
}
第二部分的关键是取每个位置对应的图片,这里用到了一个算法
每次只保留10个图片,并随着时间的增加,新添新图片,并移除超出10各部分的就图片,节省内存
#pragma mark custom method
-(UIImage *)getFrameWithIndex:(NSUInteger)idx
{
    //根据当前index 来获取gif图片的第几个图片
    UIImage *frame = nil;
    @synchronized (self.images) {
        frame = self.images[idx];
    }
    //放回对应index的图片
    if (!frame) {
        CGImageRef image = CGImageSourceCreateImageAtIndex(_imageSourceRef, idx, NULL);
        frame = [UIImage imageWithCGImage:image scale:_scale orientation:UIImageOrientationUp];
        CFRelease(image);
    }
    /**
     *  如果图片张数大于10,进行如下操作的目的是
        由于该方法会频繁调用,为加快速度和节省内存,对取值所在的数组进行了替换,只保留10个内容
        并随着的不断增大,对原来被替换的内容进行还原,但是被还原的个数和保留的个数总共为10个,这个是最开始进行的设置的大小
     */
    if (self.images.count > _prefetchedNum) {
        if (idx != 0) {
            [self.images replaceObjectAtIndex:idx withObject:[NSNull null]];
        }
        NSUInteger nextReadIdx = idx + _prefetchedNum;
        for (NSUInteger i = idx + 1; i <= nextReadIdx; i++) {
            //保证每次的index都小于数组个数,从而使最大值的下一个是最小值
            NSUInteger _idx = i%self.images.count;
            if ([self.images[_idx] isKindOfClass:[NSNull class]]) {

                dispatch_async(readFrameQueue, ^{

                    CGImageRef image = CGImageSourceCreateImageAtIndex(_imageSourceRef, _idx, NULL);
                    @synchronized (self.images) {
                        [self.images replaceObjectAtIndex:_idx withObject:[UIImage imageWithCGImage:image scale:_scale orientation:UIImageOrientationUp]];
                    }
                    CFRelease(image);
                });
            }
        }
    }
    return frame;
}
第三步,新建一个UIImageView的子类,来加载刚才新建的UIImage
先看一些属性的设定,由于CADisplayLink是依赖在runloop的,所以需要将imageview的runloop属性进行重写
-(CADisplayLink *)displayLink
{
    //如果有superview就是已经创建了,创建时新建一个CADisplayLink,并制定方法,最后加到一个Runloop中,完成创建
    if (self.superview) {
        if (!_displayLink && self.animatedImage) {

            _displayLink = [CADisplayLink displayLinkWithTarget:self selector:@selector(changeKeyframe:)];
            [_displayLink addToRunLoop:[NSRunLoop mainRunLoop] forMode:self.runLoopMode];
        }
    }else{
        [_displayLink invalidate];
        _displayLink = nil;
    }
    return _displayLink;
}
-(NSString *)runLoopMode
{
    return _runLoopMode ?: NSRunLoopCommonModes;
}
-(void)setRunLoopMode:(NSString *)runLoopMode{
    //这个地方需要重写,因为CADisplayLink是依赖在runloop中的,所以如果设置了imageview的runloop的话
    //就要停止动画,并重新设置CADisplayLink对应的runloop,最后在根据情况是否开始动画
    if (runLoopMode != _runLoopMode) {
        [self stopAnimating];
        NSRunLoop *runloop = [NSRunLoop mainRunLoop];
        [self.displayLink removeFromRunLoop:runloop forMode:_runLoopMode];
        [self.displayLink addToRunLoop:runloop forMode:runLoopMode];

        _runLoopMode = runLoopMode;
        [self startAnimating];
    }
}
setImage:方法是需要重写的,这里完成的操作是设置静止态时UIImageView的显示样式,判断是否是gif。如果是,就取值第一张,如果不是就直接显示,并对一些属性值进行设置和重新绘制,最后根据情况来是否开始动画
-(void)setImage:(UIImage *)image
{
    if (image == self.image) {
        return;
    }

    [self stopAnimating];

    self.currentFrameIndex = 0;
    self.loopCountdown = 0;
    self.accumulator = 0;
    if ([image isKindOfClass:[CADisplayLineImage class]] && image.images) {

        //设置静止态的图片
        if (image.images[0]) {
            [super setImage:image.images[0]];
        }else{
            [super setImage:nil];
        }
        self.currentFrame = nil;
        self.animatedImage = (CADisplayLineImage *)image;
        self.loopCountdown = self.animatedImage.loopCount ? : NSUIntegerMax;
        [self startAnimating];

    }else{
        self.animatedImage = nil;
        [super setImage:image];
    }
    [self.layer setNeedsDisplay];
}
这里是关键的方法,频繁的调用,频繁的绘制图片
//切换动画的关键方法
-(void)changeKeyframe:(CADisplayLink *)displayLink
{
    if (self.currentFrameIndex >= self.animatedImage.images.count) {
        return;
    }
    //这里就是不停的取图,不停的设置,然后不停的调用displayLayer:方法
    self.accumulator += fmin(displayLink.duration, kMaxTimeStep);
    while (self.accumulator >= self.animatedImage.frameDurations[self.currentFrameIndex]) {
        self.accumulator -= self.animatedImage.frameDurations[self.currentFrameIndex];
        if (++self.currentFrameIndex >= self.animatedImage.images.count) {
            if (--self.loopCountdown == 0) {
                [self stopAnimating];
                return;
            }
            self.currentFrameIndex = 0;
        }
        self.currentFrameIndex = MIN(self.currentFrameIndex, self.animatedImage.images.count - 1);
        self.currentFrame = [self.animatedImage getFrameWithIndex:self.currentFrameIndex];
        [self.layer setNeedsDisplay];
    }
}
//绘制图片
-(void)displayLayer:(CALayer *)layer
{
    if (!self.animatedImage || [self.animatedImage.images count] == 0) {
        return;
    }
    if(self.currentFrame && ![self.currentFrame isKindOfClass:[NSNull class]]){
        layer.contents = (__bridge id)([self.currentFrame CGImage]);
    }
}
这样就基本完成了设置,就可以显示了
最后总结下这个方法的优缺点
| 方法 | 优点 | 缺点 |
|---|---|---|
| 1 | 方便快捷 | 新添一个webview,不能控制图片的开始和结束 |
| 2 | 可以控制开始和结束 | 新建timer,控制时间不准确,不能确定每张显示时间 |
| 3 | 可以控制开始和结束,\能控制没张显示时间 | 性能上明显不占优,略占用内存 |
| 4 | 具备以上所有优点 | 相对较复杂 |
欢迎各位在评论下面进行留言或点赞,(づ ̄ 3 ̄)づ
欢迎访问我的博客查看更多
点我下载代码

 微信扫一扫,打赏作者吧~